Tuesday, July 19, 2016

Traditional Scrapbooking Tuesday

Welcome to Traditional Tuesdays with The Cherry On Top.

I'm in the middle of so many huge projects, both digital, traditional and personal.  I'll start mixing things up again, once the kids are back in school.  Not that this album isn't full of inspiration and fun.

Take a look at the newest page from my Trier, Germany mini album.  See the other pages we've done so far as well as a different scrap from a previous blog.


Last week, I was feeling guilty for having such a simple page.  You definitely shouldn't beat yourself up for not spending hours on one page or using dozens of embellishments.  Do what feels right to you.

This week my page is again, super simple, but I truly love it.  This chipboard font is so awesome.  If you have problems keeping your letters straight, stagger them.  It also helps save space.  My photo was light, so I backed it on dark paper.  I added my letters, then a simple flower with a coordinating button.  In my Pizza Box, was an elaborate design with these various beads you see in my layout.  Although, it was all connected, I clipped out the parts that worked for my page.

My final steps were adding a smaller, similar flower, smaller, similar button and another piece of the beaded design.  Can you imagine how fast I got this done? time wasn't even an issue.

If time is the reason you are not scrapping, then perhaps you should reconsider your scrapbooking methodology?  Peruse Pinterest and search out layouts and sketches that are clean and simple and only include a few steps.  Pin those to an inspiration board.  When you do finally make time to scrap, hit up your board for the basic design, grab your coordinated scrapbooking collections of paper and embellishments because those are truly time savers and get to work!


Here are a few other pages from the mini.  These veneer frames are great.  Ink or paint them if you like.

Repeating elements is a super way to keep your pages looking similar and connected.


Scrapbooking doesn't have to cost a fortune.  Clip out images from papers and use them as embellishments, that can often be very costly.

Repeat patterns and elements on pages throughout your album to keep up the cohesion.


Here's a 12x12 page I recently made.  I've had to hang it in the hall for now because the boys loved it so much.  I'll soon blow off the dust and put it in a sleeve and they will forget until we bring the book out, again.  They can go through our books a million times, noticing something different and feeling different emotions each time.


What does scrapbooking mean to you?  The memories you want to continue to cherish?  Those young, smiling faces you want always in your heart?  The feel of that paper under your fingers or the therapeutic aspect of making time for yourself doing what you love to do?

Make the time to scrapbook.  Make the time to do what you love because you deserve it.

Thanks so much for letting  The Cherry be a part of your day.  We invite you to scroll through our blog and join our Facebook Group for fun chats, inspiration, games and exclusive freebies.
  
Happy scrapping!

Saturday, July 16, 2016

Free Paper Bow Template From The Cherry On Top

Welcome to Hybrid Saturday with The Cherry On Top.

I went absolutely nuts making these paper bows with digital scrapbooking paper.  This way I could completely customise my bows.  I've been wanting to make the template for these for months.  There are loads of templates on line, but I couldn't find any digital versions.  If you go to our Cutting Templates boards, you can find more examples similar to this one.  There are hundreds of ideas.  You can get a free printable version of one of these bows on Aimee Harrison Design's blog.

Once I finally committed to the project, I was pleasantly surprised how easy it was and once I started playing with the individual pieces, I could get the template just right.  You can make them as small or large as your printer will allow.

This is a mega easy project the you can whip up in under 30 minutes and we provide you with a free template.  You also need very limited supplies.  The template, computer/software, printer, paper, scissors or cutting machine, adhesive of your choice and if you want traditional elements, grab some of those.  Pearls and bling would look awesome.

Keep reading to get the free template and see the process.


I used the template several times and placed all of the different bows on one sheet to save on paper.


Print out your filled in templates and start cutting.  These shapes cut very, very easily.  Your elements, if you choose, might be difficult.  So, keep that in mind before you add them to your sheet.  The square gem was a breeze, but the butterfly, not so much.  Of course, if your lucky enough to own a cutting machine, this won't be an issue.


The piece that looks like a pair of glasses needs to be folded in ward.  Line up the bottom with the top as closely as possible before gluing.


I found the piece to wrap around the middle redundant.  If you want to use a different color or paper for it, then it's ok.  It also isn't necessary to use if you are going to put something over the top of it.


This is a great example of how your bow will look if you don't line it up just right.  The tape you won't see because I'm placing something over the top.  I used tape because I used very rigid, 300 weight paper for my bows and glue does not do the trick.  A good glue dot might work, but glue dots do not lend for much room for error.  Keep all these things in mind when choosing your adhesive.


This is one way you can use the two ends of the bow and here is what it looks like with the square jewel. An actual jewel or gem would look fantastic, too.


This is just one way you can use the ends of the bow.  Keep scrolling to see an alternative use.


Another print out, cut out and ready to be folded.  Isn't the owl adorable?


This time I put the ends of the bow like this.  I did trim off a bit of the inside edge for a clean fit.


Here's an example of a bow all with the same papers for each piece of the template.  I really like the way it turned out.


I loved this one, too!

Can you tell I pushed in the top of the bow to give it a more round effect?  When you use very rigid paper like I did here, you might put in folds.  You can see on the left loop, what I mean.  If you use lighter weight paper this will not be a problem.


This is what the template looks like, once you fill it in with your papers and if you decide to add some elements from your digital stash.  I used Aimee Harrison's new collection, Give It Your All.  It's also a feature from Freebie Friday.  If you missed that one, you've missed one awesome freebie.  Keep reading to get the link for yesterday's blog.


In this image you can see my layers, to the right.  It is a very simple template.  I also put my elements in place so I get the perfect size, then I moved it over because I didn't want it printed out like this.


This is what my page looked like when I had all the bows I wanted.  Print, cut, fold, glue and that's it.    Not sure how to use digital templates?  Check out our blog on just that.


There you have it.  A very easy project requiring little computer expertise and limited supplies meaning limited cost, too.  That's what we're all about.  Fun, fast, easy and inexpensive.

Go to our group and get the free template.

I used the same collection on Friday's blog.  You can grab a beautiful free frickie there!  Look in our side bar for yesterday's blog or scroll if it is an option.


Missing out on all of our awesome freebies?  Then join our group on Facebook.  I give members exclusive looks at blogs before publishing, exclusive free stuff and we get some lovely chatter there, as well as show off our creative creations.  I'd really love to have you join us there.

Here are some other projects from the blog you may have missed.

A free tag for on a bottle.

 free printable

Mega, free templates.


 free templates

 Our monthly, free planner inserts.
 free planner inserts

Thanks for hanging with The Cherries!


Friday, July 15, 2016

Freebie Friday with Aimee Harrison and Heartstrings Scrap Art

 Welcome to Freebie Friday with The Cherry On Top.

I've got Aimee Harrison and Heartstrings Scrap Art back in the spot light.  Keep reading to see some fabulous inspiration, beautiful collections and great templates from two of your favourite designers, plus a free frickie from The Cherry.


 Give It Your All

Our frickies are pretty popular.  What is a frickie, you ask?  It's a quick page or a frame freebie, a frickie.  Hehehe... 

You can enlarge the frickie and insert your favourite photo, like I did above or you can use it as a frame and use the coordinating elements and goodies from Aimee's collection and make it your very own design, like I did in the next layout.

All of those lovely layers, might be a bit too much in your face for some, making this other layout a bit more soft and gentle on the eyes.

 Give It Your All

This image is saved as a png, so the background will be invisible.  Right click to download and get scrappy.


Fully Anchored in another lovely collection from Aimee Harrison Designs.  I scrapped it up using Heartstrings Scrap Art fabulous, new templates.  I switched it up just slightly for a customised look.

Grouping all of my photos in the centre gives them the spotlight in this layout.  To get a more cohesive look with my squares, I selected a few, scattered layers, merged them, then inserted one paper so that it showed up in a several boxes.  Often, when there are too many, different papers in a layout like this, it can look too busy.  Try the above technique and see what you think.


Here is a look at the collection.  Click on the preview to see more.

 Fully Anchored

These are Heartstrings Scrap Art templates.

 Heartstrings Scrap Art Templates

Here are more of Aimee's Kits and collections.  Click any image to see more.

 Summer Bazaar

 Aimee Harrison Designs

 Aimee also has templates.  Here is one example.


 templates

Thank you so much for buzzing by The Cherry!

I'd love to have you join our Facebook Group, Follow us here and or on Pinterest.  This way you won't miss a beat.

Happy scrapping!

Thursday, July 14, 2016

Throw Back Thursday, Free Paper Dress Template

Welcome to Throw Back Thursday with The Cherry On Top.

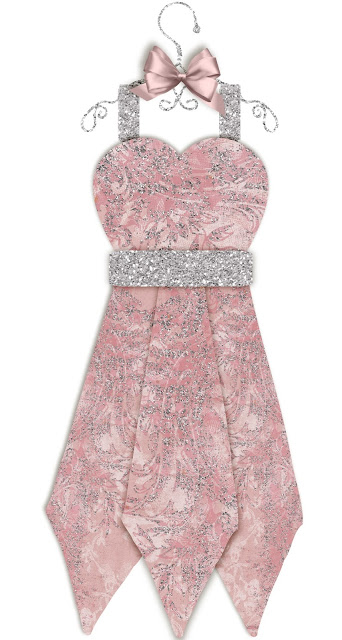
We are bringing back our paper templates for two dresses, some layout love, both traditional and hybrid usage and another, much older paper dress we designed that is still a Pin sensation as well as another throw back picture.

The hair, high wasted jeans and Coca Cola gear says it all.  I'm not in this picture, which probably is a good thing because my 10 feet of hair would have blocked everyone else out.  Hehehe...


Check out this fabulous dress template I designed.  You can use it both traditionally and digitally, like I did in this digital layout.  Consider using it on a card if you like.  There are so many possibilities.  Especially, knowing you can crop in any papers you have and customise it to fit your design.  Click on any of the images to get to the blog for the free templates.

 free dress template

Seriously, I used a heart shape and the bottom of a tie to make this one.  Hehehe...

 free dress template

More ties, this time used upside down.  Easy, right?

 free dress template

Here is our other paper dress.  You can find so many templates on Pinterest.  Just type in "paper dress template" in the search there or check out our cutting templates board.  It is seriously full of mega inspiration.

 pretty paper dress

Thanks so much for stopping by The Cherry!


Tuesday, July 12, 2016

Traditional Tuesday, Mini Scrapbook Continues

Welcome to Traditional Tuesday with The Cherry On Top.

Have you ever scrapped up a page and thought, "I'm cheating" ?  You kept adding and adding and taking away over and over, then ended up with something a bit understated?  That is exactly what happened with this page.

I usually add quite a bit of goodies to all of my pages.  Keeping it clean and simple is a challenge for me.  Hehehe...That is exactly what I've got here, clean and simple.

Keep reading to get some tips and see what other stuff you missed from The Cherry.


Is this an entry or what?!  Just part of the extraordinary architecture in and around Trier, Germany.  If it weren't for my hubby, I'd have very few pictures.  Hehehe...

Because of the lightness of my photo, I backed it up on darker paper.  I want to keep the colours throughout my entire album, so I added some of the mustard colour from the tab and previous pages.  The circles are stickers from the Pizza Box I mentioned earlier, backed up with some more coordinating colours from the previous pages.  I used my circle punches with no regard to the size.  I kept adding things to the stickers and tried adding a couple of leaves, but nothing seemed to actually add to the page overall, so I left it alone as you see it here.

I'm using more of the same pearls from previous pages to keep my look flowing.  Remember my copper coloured element thingies?  Hehehehe...I'm using them again, along the bottom of my photo.  It also reflects the gold colouring in the photo.  My last step was those pearls in-between the circles.  Surly not overstated, but effective and neat.  Let's appreciate this ornate, beautiful door.  We'll save all of those other fabulous embellishments for another layout.

Check out some other paper projects you may have missed?

A simple, fast folding mini you could have ready in minutes. Template included!

 free template for mini

Take a look at another awesome mini we put together.

 Maya Mini Purse Album

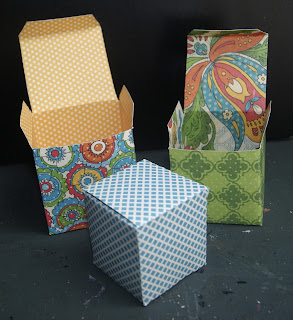
These super stacking boxes.  Template included.

 stacking boxes

Our famous paper showed with a link to the free template.


 paper shoes


Thanks for taking the time to stop by The Cherry On Top.

If you don't want to miss out on all of these lovely freebies and inspiration, join our Facebook Group or Follow us here and on Pinterest.

Happy crafting!

Saturday, July 9, 2016

July's Free Planner Printables and Kim Cameron Designs

Welcome to hybrid Saturday with The Cherry On Top.

I'm back with more coordinating, free planner printables.  I've got some fun banners, useful tabs and two cute journal cards all designed with Kim Cameron Design's Best Summer Ever.  If you missed last months, click here.

Keep reading to see more of Kim's kits as well as Commercial Use goodies and get inspired with our layout love, all using Kim's products.  Look for the link to download the free printables for July.


Click HERE for download.


It would be really cruel to make me choose a favourite a kit from Kim, but I must say, 5 O'Clock Paradise is certainly at the top of my list.  I made over a half dozen layouts with this kit.  Hehehe...I just couldn't stop.

Some of my favourite photos of summer fun in the back yard.

 Kim Cameron 5 O'Clock Paradise


Oh, what a cutie!  If only he would get a haircut like this one, now.  Hehehe...

These are truly everyday types of photos, which goes to show you how versatile this kit is.  Clicking on any of the images will take you to that kit.

 Kim Cameron 5 O'Clock Paradise


This is the kit I used to make this month's and last month's free planner inserts.  I'm just loving these colours and the most thoughtful elements.

 Best Summer Ever

A new kit from Kim is American BBQ.  I showed off my paper loving layout and my grill king in a previous blog along with a free printable invitation.  Keep scrolling to get the link for that blog where the the freebie is still live.

 All American BBQ


Just check out those embellishments!  So perfect for picnics, bbq or even just family types of pictures you may have.  The hybrid ideas are unending.  Invitations, recipes, food tags or labels, drink covers...Have a blast  with your custom designs and be sure to add this to your stash.  The image is linked.

 American BBQ free printable


Our berries are in full bloom and the boys can't get enough.  This is Strawberry Jam.  I wish we had this many berries.  The slugs are beating us to them.

 Strawberry Jam

I want to leave you with a look at some of Kim Cameron's newest Commercial Use.  All of the previews are linked up to her shop at Daisies and Dimples where she is having a super promotion.

 Kim Cameron CU

 Kim Cameron CU

 Kim Cameron CU

Enjoy your free July printables and remember they are for Personal Use Only.

This is what you missed yesterday.

 free download

Don't miss our weekly freebies, ever.  Follow us here, on Pinterest, our Facebook Page or even better, our Facebook Group where you really won't miss the posts. You can join us in friendly chatter, receive exclusive freebies AND you can show off your creative crafts and layouts.

Thank you so much for hanging with The Cherries.

Happy crafting!