Wednesday, December 7, 2016

December's Free Planner Printables From The Cherry On Top

Welcome to The Cherry On Top.

Do not die of shock, but I totally forget my December goodies.  Hehehe...  I thought to make up for it, I will make them beyond awesome and use my free kit from last year, Sleigh Bells Ring.  My plan is to vamp it up and get an entire collection in our Kreative Design Studio shop.  I'm talking quick pages, clusters, borders, templates, word art, cards...the whole nine yards.

Accept my apologies for the tardiness and enjoy!

Get a glimpse at the rest of this collection as well as some other products in our shop and thanks so much for those of you who have already visited and made a purchase.  I love starting off my mornings with notifications of sales.  I'm keeping the prices insanely low because I want everyone to be able to enjoy The Cherry's goodies.  No worries, freebie hunters.  I have no intensions of changing our blog schedule.  However, I won't be leaving up the freebies as long as I have been.  Many of them will be going in the shop.  So get the downloads while they are free!


This is no longer available.

We've got the whole year of planners and some of the links are still available.  Go to the "search" box at the top, right of the blog and type in "planner".  You'll get the entries for all of them.  That is a LOT of free stuff!

I don't know about you, but I get dizzy looking at some previews for kits.  All of those elements piled up on each other.  I can never get a good idea of what is in a kit and believe me, I really want to know about each and every element before I buy.  Personally, I appreciate a list with every element and the number of papers both solid and design.  Scroll further to see my previews that are a bit easier on the eyes.


Scroll to the bottom for the link for the December Goodies.


These are my favourite embellishments in the collection.  I put them on a stage so you can get a better idea of what will be inside.


I also have an alpha sheet.


As I was going through the blog, removing free stuff, I found this adorable layout that was my inspiration for a free template.  I decided to leave that one, in case you missed it.  I plan on keeping freebies peppered throughout the blog.  So don't worry.  Hehehe...


This is the free template.  Click on the image to get to the blog for the link.
 Free Template from The Cherry On Top

I just put these in the shop and they are only .79 cents.  If you noticed, I made a few changes.  I straightened the tiara and added a lovely lady with an awesome tan.  Hehehe...Princesses come in all different colours, shapes and sizes, right?


 Printable Princess goodies from The Cherry On Top

I'm slowly getting new products in the shop.

For the moment our Simply Circles templates are our biggest seller.  Just 1.79 for three templates, it's no wonder they are flying off of the shelf.

 Simply Circle Digital Templates from The Cherry On Top


We'd love to have you follow us here and on Pinterest.  It's the best way to keep up with all of our freebies and products.  If you like sharing your paper or digital creations, join our group.  We share and get into some lovely chatter.  I also offer special peeks and exclusive freebies there.

Thank you so much for visiting our blog.

Happy scrapping!


Tuesday, December 6, 2016

How To Get The Best Printed Results For Your Printables and Photos

Welcome to The Cherry On Top.

As you may know, I recently opened a shop together with Paty Greif Digital Designer called, Kreative Design Studio.  We are selling lovely printables of all kinds as well as kits and templates for both traditional and digital scrapbookers.  Take a browse and see what you can add to your scrap stash.

Since printables are our main thing, for the time being, I wanted to blog about ways to get the best results with your printables.  There are so many variables into printing.  I didn't really think about it all that much until I started designing my own designs and printing them.

Read through our blog for tips and tricks and make sure you are getting the best results from your printer.


Above I did a pocket scrap using our planner printables, Hello, Winter.  That's right!  I scrapbooked, traditionally with printable planner sheets.  You can use these for so many things.  Punch a hole and use those nifty journal cards as tags for your gifts.  Make a beautiful banner with them.  If you're savvy enough, you can use a lot of the goodies, digitally, too!


To get my sizes just right, for the layout above, I used the journal card as a template and traced around my photo with a grease pen.  I have a white and black grease pen.  They work totally awesome for getting those photos cropped up just right.  Simply rub off the pencil with a tissue.

Matting always makes your pages pop.  I matted most of the goodies and photos and used the tapes or borders for extra interest.  Take a close look at my tapes.  Especially, the scalloped, polka dot one.  Notice those white edges?

That is often a problem with printables, but there are solutions.  

*You can ink around the edges to cover the white.  

*You can use a nail file and go around your print out, gently pushing at the edges to give this effect all around your piece. I thought the kind of worn look looked pretty good.  Just make sure you do it in a few places for consistency.

*Printing on sticker paper works really, really well in preventing these white edges.

*Use paper with a gloss or semi gloss for the best results.  Take a look at my red and blue ribbons with the picture of my pa-la.  (Father-in-law hehehe...) Look how crisp the colour is and that there was NO loss of colour even after cutting around all of the edges.  My paper was not thick.  Just a slightly heavy weight and geared for coloured printing paper.  Specifically, this is Xerox, Colotech+ 100g/m2.  


The difference is pretty staggering when it comes to print quality.

Apparently ink jet printers are NOT the way to go for good quality printing, including photos.  I use a Brother, laser printer and I'm fairly satisfied with the results.  With a laser printer, you'll get a lot more pages with your ink.  The ink never dries and therefore, doesn't smear easily either.  Huge pluses when it comes to printing printables and photos.  Though you may want to wait before utilising what you've just printed.

It is recommended that you use the same paper and ink as the brand name of your printer.  Especially, if it is NOT a laser printer.  You certainly should consider that matching your printer ink and paper will most likely give you a top print out, but you only need to do this for really important photos and printables.  If you don't need THE BEST result, go with any kind of photo paper.

For photos, you definitely should use a good quality photo paper.  If you can't find paper to match your printer, go with Kodak.  Your photos will last a lot longer. 

Papers that are acid and lignin free will give you super results in the quality of your image as well as add to the life span of your colour.  Don't forget to let your print outs dry.  Especially, your photos.  It's recommended to let them dry 12-24 hours before handling.  Surly a good tip for ink jets.

Putting your printouts behind glass and in albums will make them last a lot longer.  Keep them stored in a dry, even environment.  The temperature should remain consistent throughout the year for the best results.

If you are using something beside normal or standard printing paper, check your settings.  Printers often give you choices in the kind of paper you are printing on.  You might also have a choice in the quality you want to print in.  Choose best if that's what you want.

You may want to test your print out on regular printer paper before putting it on more expensive paper.

Here's a photo of our printable bottle tie tags.  What a cute way to dress up and give your bottle of wine.  They are just .99 cents in our shop.  You get 5 different ties and of course, you can print them out as much as you like as long as it is for your own personal use.  They'd make cute photo props, too.

 printable bottle tie tags

This is an example of our Hello, Winter ornaments.  Though we use jpg on most of our printables, we do use 300 dpi to ensure a good quality image.  They are also just .99 cents.  We've got a blog dedicated to these with a step by step tutorial.  Click here to see it.

 paper ornaments

Our printable card making kit came out just tops!  Look at that bright clarity and just .99 cents!

 card making kit

I hope you got some handy tips for printing your printables and photos.  If we forgot something, share in the comments.

Make sure you take a visit to our new shop and try out these tricks on your pribtables.

Happy crafting!


Saturday, December 3, 2016

Free Printable Book Marker From Kreative Design Studio

Welcome To The Cherry On Top's Hybrid Saturday.

We're back with more hybrid fun and Paty Greif Digital Designer goodies from Santa's Little Helpers. This Christmas collection is an absolute most have.  Grab Paty's digital kit or get our fantastic printables in our new Etsy shop, Kreative Design Studio which is just a combination of mine and Paty's goodies.  Often she makes the collection and I turn them into the printables and all of the extras.  Like the one you see below.  I also have my templates and other scrapbooking goodies there.

Keep reading to get the link for the download, see what you missed yesterday and take a look at more goodies from our shop, Kreative Design Studio.


Santa's Little Helpers is such a cute, cute collection.  Those adorable, mischievous elves add life and fun to your projects and pages.  You can use the collection to design your very own printable treasures for your personal use or you can save a lot of time and get ours.  Hehehe...


I designed some word art titles and used one in the above layout.  Here they are, below.

This is a look at Paty's kit.

 Santa's Little Helpers


I scrapped up these circles with Paty's pretty papers from Hello, Winter another collection of Paty's, to make some stunning ornaments for the upcoming holidays.  Use them on your tree, to decorate or give them as gifts or on gifts.  There are so many things you can do with our printables.  Keep reading to see them in use.


You can craft a round ball like the one on the left or use a tiny glue dot and create the effect you see below.  The trees were really easy.  You only need a few to make pretty ornaments.  I've got a tutorial with step by step directions.  Click on the image to see it.  Grab our download, head over to the tutorial and get scrappy!


I wanted to tell you a little secret.  In every few of our products, I put a little treat.  Sometimes a freebie of various sorts or a coupon for your next purchase.  You'll find something free with this printable.


Here's another nifty printable you can find in our shop.  These adorable ties to decorate your wine or other bottled gifts.  Beer, soda...whatever you have in mind.  Download our 2 printable sheets, print to your desired size, cut them out...


I didn't have a large enough circle punch, but I did use the one I had and then took my fussy scissors and cut it all of the way out.


Take a look!  Not bad at all.


You could also make little cuts all around the circle like shown below for more give.


You could ditch the square with the hole entirely and punch two holes at the top of your tie and string through some ribbon, twin or light weight wire to hang your ties.


I think these ties dress up the bottles so nicely and they add a personal touch, too.


Take a visit in our shop and see what we have for you.  We are keeping our prices very low as an introductory special.  Grab them while they are this inexpensive.

HERE is the link for the free book mark.  Laminate it for extra rigidity and enjoy.

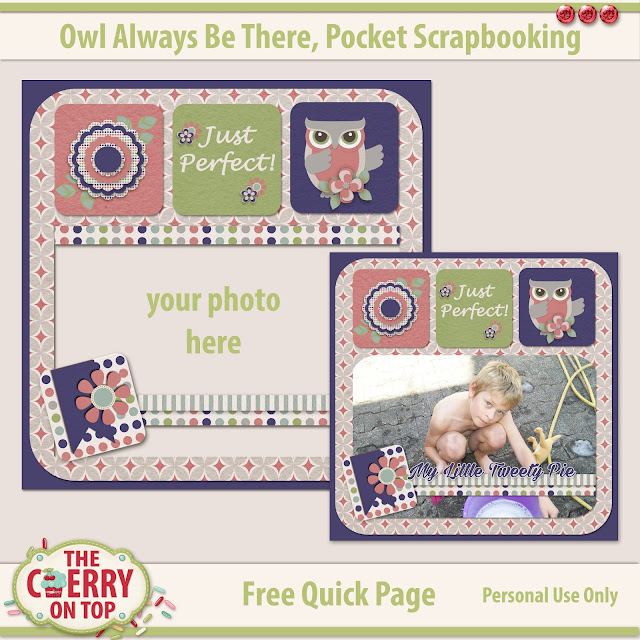
This is what you missed yesterday.  A lovely, free pocket scrapbooking quick page.  check it out and learn more about the awesomeness of pocket scrapbooking and Owl Always Be There.


 Free quick page from The Cherry On Top


All of our freebies and printables are for Personal Use ONLY.

Thanks so much for joining us!  If you are on the hunt for even more freebies, than join our group, page and or Pinterest.  We show off free stuff nearly every single day.

Have a super scrappy weekend!


Friday, December 2, 2016

Kreative Design Studio, Scrapbooking and Freebies

Welcome to The Cherry On Top's Freebie Friday!

We've got a huge announcement!  Paty Greif Digital Designer and The Cherry have teamed up and opened our very own Etsy shop, Kreative Design Studio.  You'll find Paty's amazingly creative designs there as well as our templates, printables and designing hand with Paty's lovelies.

We make one heck of a pair and I'm sure you are going to love the things we are making together.  Paty and I have been working together for several years now and we chat nearly every single day.  Why not do something great together?

We both love creative expression in the various forms.  I have a hard time choosing between digital scrapbooking and traditional.  I do both and our designs are going to be great for traditional, digital and those scrappers on the fence.

We design at 300 dpi, which means superior quality in your printables.  Keep reading to see some of our first goodies in the shop, get mega serious inspiration with our products, learn important tips on printing, grab our freebie and get an exclusive peek at tomorrow's freebie.


One of the products in our shop are these pocket printables.  I had offered them for free to see how they'd do and our wonderful viewers, showed us that they are worth your while.  If you don't want to miss out on our freebies, make sure you are following us.  I also offer even more exclusive freebies in my group on Facebook.  Join us there, too.  We get into all kinds of lovely chatter and share our projects.  Whether you like glue on your fingers or the mouse nestled gently in your palm, we want to see those projects.


Check out my blogs on pocket scrapbooking.  I started designing pocket scrap materials because it makes scrapbooking so, so fast!  Print, cut, adhere and embellish, all in a snap.  Either digitally or traditionally.  I tried out using jpg's digitally and it worked really well with the help of cropping and the marquee tool.  See more about pocket scrapbooking, here.


 owl Always Be There, Pocket Scrapbooking Kit

There's the look at our pocket scrap kit.  Journal cards, borders, extra embellishments, a frame cluster and fun sized squares and just .99 cents!

IMPORTANT:  When printing downloads, make sure your printer settings are on best quality.  Not all printers are the same and each one will give a different result.  Your paper is also very important when it comes to the best image.  I find for my printer, paper with a touch of gloss gives the most crisp, true representative of the original.


 Owl Always Be There card Making kit

Above and below, you'll see our card making kit.  Papers, embellishments and even clusters are included. The kit is just .99 cents.

 Pocket Scrapbooking freebie

Above, you'll find today's freebie.  Grab it while it's free!  Soon, it will join our other products in the shop.

 Simply Circles Templates

Another product from The Cherry in the shop is this pack of templates.  You get three templates in png, tiff and psd versions for just 1.79 Euro.  See what kind of lovely pages you can create with them.


Kim used, Keep Going by Red Ivy Designs for her gorgeous layout.

 Raspberry Road Designs

Jodi from Throwing Some Scraps Around used a kit from Raspberry Road Designs.  (If freebies are your thing, you will love this site!)


My gal Ella did a bang up job, as usual with Simply Circles and this beautiful Christmas inspired kit, A Christmas Wonderland from Kristin Cronin Barrow.


Magalie is a super scrappy sister.  This is the kit, Joy To World from Illonka and Perline.  Just gorgeous!


Rae always does such lovely work.  This is Home Made Christmas from WendyP Designs.  So warm and cozy, eh?!


This last one is mine.  I used Paty Greif's collection, Hello, Winter which you'll find more coordinating goodies of, in our shop.


Another really awesome template, October Skies is also in our Etsy shop for just .99 cents.


 Jenna always scraps so lovely!


Here's another from Magalie.


These planner printables are designed by The Cherry with Paty's Greif goodies from Hello, Winter.  Find them in our shop at a super introductory price of just 1.99!


I just love the way these titles came out!  Paty Greif's Santa's Little Helpers has been a huge success.  We thought we'd design a few more goodies for the fans.


Use our titles or word art in your scrapbooking pages or other paper projects.  Perhaps even for a card.  Send your card around digitally or make a traditional card.  There are so many options.


What a super collection to show off those pictures with the man in red!


Above, is a peep at what's on tap for tomorrow's hybrid entry.  More goodies from our new shop and a free sample for you!   Make sure to drop by tomorrow to get it, while it's free.

Do you need a daily fix of freebies?  Then be sure you follow us on Pinterest and on Facebook.  We've got freebies nearly every single day from all around DigiLand and if you know of good ones, let us know and we'll spread the word.

Thank you so much for dropping by The Cherry.  I hope to see you visit our new store.  Especially, with our introductory prices.

Happy scrapping!


SaveSaveSaveSave

Tuesday, November 29, 2016

Scrap Simply and Beautifully With Graphic 45 and The Cherry On Top

Welcome to Traditional Scrapbooking Tuesday with The Cherry On Top.

We've been bringing you quick, inexpensive, up cycled holiday cards for weeks now.  We asked our readers to join us in making hand made cards with old cards, scraps and things that are already in your stash.

Today, we are not up cycling, but we are keeping it simple.  I just love the collections and inspiration from Graphic 45.  I get the newsletter and I even have a board dedicated to their projects and products.  I don't own too much, but I love what I do have.  I managed to find a couple packs of Christmas goodies, here in Belgium and couldn't wait to put them to use.

Scroll through the tutorial, get some pointers and join us in our card making challenge.


I don't know if you are familiar with Graphic 45's design team, but they are unbelievably talented.  I ooh and aaah at the finished lovelies.  I can't help but to start guessing how much the projects most cost to make.  Hehehe...I'm sure one heck of a pretty penny.  Some might call it over the top, but either way, it's always beautiful due to the product.


These are not coordinating packs, but the colours were fairly similar so I went with it.  Working with collections makes scrapbooking and card making so much faster.  One of the longest processes otherwise, is to go through all of your stash trying to find elements and papers that will coordinate.  With collections, it's all done for you.  Huge time saver!


I'm lazy when it comes to journaling. That's why I chose this frame and insert.  Hehehe...  You may be able to tell that after punching out, the paper is very uneven, but no worries, use your cutter and even it up.  You also get those tiny paper dots where the paper is attached.  I use either my fussy scissors or a nail file to get rid of them.


I went through several different papers until I found the combination I liked best.  The frame and insert used real red, but the chipboard flowers used a deeper red.  Mmmm...I experimented with both and decided on the deep red.


I don't glue until the very last minute.  I always change my mind!  I cut around the uneven edging in the insert and by doing so, exposed the deep red paper from underneath to show off another layer in the card.  Use double sided foam tape to give your projects lift.


All we need to do now is play with the flowers.  I wanted to keep them on the card itself, so the card would easily fit in an envelope.  Play with the different sizes and colours until you have the desired look you want.  Get rid of those tiny paper dots and consider inking or painting around the edges.  Maybe you'd like some glitter.  Tip:  Gently fold back or forward, the petals for the look you want. 


I pushed the petals down for my large, red flower and pushed them up for the yellow and green ones.

TIP:Take advantage of the clear plastic of your bling by sizing up the one you need without first removing it. 


I glued down the flower with a huge, thick glue dot for extra dimension.


I showed off this tip before.  Take large swirls and cut them if they are too, big.  They were much too large for my card.  Now, they fit perfect.


I can never resist a touch of bling.  I used coordinating, tiny gold dots on the glittery swirls for a touch of luxury, but not over stated.


This is what the collection looks like so far.  I only need two more cards for my collection.  How about you?

Thanks for taking a peep.  We've got big news coming this week.  Freebie Friday and Hybrid Saturday will stay sizzling as usual.  You won't want to miss!

We'd love to see what you create with paper or your digital designs.  Show them off in our group on Facebook or leave us a link in the comments.

Happy scrapping!