Saturday, April 29, 2017

Free Printable Labels from The Cherry On Top

Welcome to Hybrid Saturday with The Cherry On Top.

It's going to get really hot around here.  International Scrapbooking Day is right around the corner and I've been working really hard with my designers so that we can bring you awesome digital and hybrid goodies and freebies.

The fun starts Friday with Flash Freebies.  I'll be posting the best sales of the year on all of my scrappy sites as well as links to freebies and gorgeous inspiration that will have you downloading and itching to get scrappy.

Check out the new, free hybrid for today, the tutorial of various sorts, new goods in the shop and more.  Keep reading and scroll for the link for this freebie.


I need labels for my recycled jars where I put my loose tea.  I've been wanting to work with this colour palette and thought it was fairly versatile.  When you download, you'll get the blank labels for you to customise as well as the printed labels.  I can certainly use these as well.  My tea and herbs are in the same cabinet and it is a crazy amalgamation of recycled pots and scents.


Pull up your jpg labels in your software of choice.  I'm using PSE14.  Click on the green T (hehehe...) and place the cursor where you want your font.


Choose your desired font.  I'm a bit blind, so I went with bold and big.  Hehehe...My herb labels are a bit more fancy shmancy.  Goes a bit with my farm style kitchen.


Use the tool area to get the right size.  The first font I chose gave a huge space between words so I changed it.  Consider that if you want all of your fonts exactly the same size, that all of your wording will have to fit in the space provided.  If ya keep it a bit smaller, it may work out better in the end and you won't have to distort your text either.


I want my text to be the exact same colour as my matting so I'm using the colour picker tool which is the eye dropper in your tool bar area.  Click on the dropper, then click on whatever colour you want.


High light over your text then click over your pink colour box to change the colour of the text.


Yip!  Perfect!  Now click ok and you have perfectly matching font.


Now, I want my pearls to match perfectly, too.  I've selected a pearl.  Go to the layers column and click on the second icon from the left and choose, hue saturation.  You can see it in my image, above.


Click on the colourize box.  Since your box was already the right colour, it should automatically change the colour to a close match.  If your colour box is not the right colour, use the eye dropper/colour picker tool to get the right colour.

Move the bars in your adjustment field to get just the colour you desire.


Use any kind elements you like to adorn your labels.  A tea cup, swirls, pearls...Customise your labels to fit your requirements.


I put the four pearls in each corner for a touch of sophistication and simplicity. 


Print out whichever printables you prefer or both and then get out the scissors.  Don't forget, moving the paper instead of the scissors will give you a much better result.


If you don't want to do the fussy cutting, you can always cut closely to the label and shape it up as a rectangle, like I did, above.


I used two tiny glue dots at either end of the label to adhere it on to my recycled Nutella jar now tea jar.  Hehehe...You can either rip off the label or put another one over the top of it with new glue dots.

Check out what I've got on tap for you next week!


These are just a couple of the freebies I'll have for iNSD weekend.  They won't be up long so make sure you are following closely.  Our group on FB is going to be THE best place to keep up.  The blog will be there for the wrap up.


This template will be available on the 1st along with links for the rest of the freebie train and there will be another round of free templates for the Love For Layout Templates blog train as well as free ones for the flash give aways.  Your template stash is going to rock!

Here's a peek at some new templates in the shop.


 Love YourSelfie templates

Our hottest templates to date!  Love YourSelfie!


 simple scatter templates

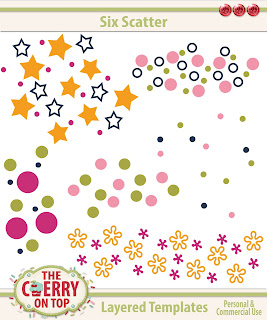
I blogged about this layered scattered template, yesterday.  If you missed it, click here.  I've got several examples in tutorial form on how to use them and of course, several freebies!


 Tech Templates

Here's some very useful technology inspired, layered templates.


 Creative Design Studio

Check out this promotion in our Kreative Design Studio shop.  You could win something from your wish list!  

This is your free download for the labels.

Thanks so much for checking out The Cherry!  We'll see you next week for all of the fabulous festivities and freebies for International Scrapbooking day.

Friday, April 28, 2017

Scrapbooking Freebies Every Friday

Welcome to The Cherry On Top.

This Freebie Friday, I've got a tutorial, some new templates in the shop, inspiration, a peek at some freebies that will be available for iNSD and your favourite, links to freebies.

 Scatter templates

I've put a few new Commercial Use, layered templates in the shop.  I thought I'd show off the different ways you can change them up.  They are a super substitute when your favourite scrappy kit doesn't include scatter or you want to customise your scatter to fit your page perfectly.  Of course, if you are a template designer, you'll definitely want to add these to your stash.

Check out just a few ways you can alter the templates and start thinking how you are going to use them.


Hmm...I'll have to work on better images.  Thank goodness all of the crud from my computer screen doesn't show up!  Hehehe...  Let me explain...Bring up your template in your favourite scrap program that allows use of layers.


Choose the layer you wish to work on and if you like, add an effect.  I chose Mommyish beaded styles.  You get a neat glossy, 3D effect, totally changing the flatness of the template.  


There!  All three layers were layered using the chosen beaded effect.  You can see there are a lot to choose from in this style from Mommyish.


Many designers have glitters in their collections.  Some have glitter paper.  You can use either to pimp up your templates.  I used some glitter styles from Just So Scrappy.  This would look nifty on a Halloween themed page.


Back to more styles from Mommyish.  These were switched up by using felt styles.  There are six different styles to fit your desires.  I used two different ones to add more texture and dimension.  Consider adding some splatter underneath.  That would look super!


This scatter shows off more Mommyish styles.  This time puffy styles.  Look at all of the options!  18!  She's got a few different puffy styles in her shop to choose from. I think I have all of them.  Hehehe...


I recently bought some Water colour styles from Mommyish and couldn't wait to try them out.  There are 8 styles and I liked this one best.  You gotta love all of the choices and different ways to change up your templates.

Mommyish is my go to gal for Commercial Use goodies.  Especially, for styles.  If you want to try them out, head over to The Lilypad and check out the Free Commercial Use Club.  Then look through Leah's shop.  She has great promotions and tutorials.


These are cork board styles.  Look at all of that fantastic dimension and texture! My, what styles can do?!


Another style that's been in my stash that I just tried out are Kraft styles from AHartline.  They gave a nice, soft textural feel.  I used it for some papers in my freebie for Saturday's hybrid.  Come back tomorrow to grab those.

Check out how I use the templates.


 Clever Clusters Templates

I needed a variety of scatter to use in the templates I design for you and I wanted to be able to use them for Commercial Use as well.  I simply change out the colours when I use them like this.  Easy peasy!  If there are a few pieces of scatter you don't want, crop or use the marquee tool to ditch them.


I've got new, fabulous templates ready for you, but there is a catch.  They are FREE!  Hehehe...  Get these Cluster Queen templates for free when you purchase anything from our Kreative Design Studio shop at Etsy during iNSD weekend May 5th-May 7th.  I'll send them to you in a separate e-mail.

 heart scatter templates

Here are some more scatter I've got in the shop.  I used the plain hearts with red glitter.  They looked awesome!  Remember this one?  It's still live on the blog and it's free!


 free template

I've got a sneak peak for you!  Eek!  The Cherry is going to be one hot spot for International Scrapbooking Day.  Here are just a few of the freebies I'll be giving exclusively in various social spots.  There will be even more including full templates and hot freebies from other designers as well as kicking sales that don't get better than for iNSD.  Next Friday's blog is going to be epic!  Hehehe...I'll be offering a freebie from each designer I work with, sharing the links for their own freebies as well as their amazing promotions.


Make sure you are following us here, FacebookPinterest and Instagram.  You won't want to miss all of the action and fabulous free scrap stuff.


Have you seen our win it promotion from our shop?  I'd love to see what your favourite items are and maybe you'll win one, too!


These will be your freebie for tomorrow.  I've got some recycled jars I use for tea that I need to label. We'll see you here, tomorrow too!

Let's move on to the freebies that are now available.

 free kit from Designs By Helly

If you are a fan of The Cherry's page on Facebook, then you may have seen this fabulous freebie.  It's all linked up to Design By Helly's blog.  You certainly won't want to miss that one.  I have no idea how long it will be live.

 freebie from Eudora Designs

How is this for a gorgeous freebie?  Eudora often has fabulous freebie that we share with you.  You might seem them posted if you follow our Pinterest board, Free Digi Scrap Stuff.  If you missed this one, check for more.


My Scrappy Sister Andrea, recently shared this fabulous freebie in our group.  I downloaded it just the other day and haven't tried it out yet.  It's been available for quite awhile.  You may want to check your stash to make sure you don't already have it, but I thought it was well worth sharing.


Here are the latest Commercial Use freebies you can find at The Lilypad.  From Just Jamie and...


...Mommyish.  I think I'm all caught up.  I post them to our Free CU board on Pinterest.  Hop over there and check out some other freebies you may not have.

One thing I have to give all of our wonderful readers is, your patience.  Hehehe...Our blogs are often a bit lengthy, but we hope all of this inspiration, free stuff and overall content is worth it.

See you tomorrow for Hybrid Saturday.  If you missed, I posted my last page in that purse mini along with all of the pages, in one spot for our Traditional Tuesday blog.  Scrap fast, inexpensively and beautifully with The Cherry On Top.

 Mini pages with Webster's


Happy scrapping!


Thursday, April 27, 2017

How To Delete Fonts

Welcome to a special edition from The Cherry On Top.

I recently heard that having too many fonts in your PSE (Photoshop Elements) can totally slow down the program.  I've seen it myself and when I cut back on styles and brushes as well, the program ran much smoother.

The idea is to install your styles, fonts, brushes as needed.  I leave a couple of favourites, but I have to admit, my program is running a lot better and faster now that I have fixed this.

Another scrappy sister inquired about the slowing of her program and I suggested this, but she didn't know how to do it and I totally forgot.  So typical!  Hehehe...I went immediately to the net and found NOTHING.  Ugh!  Talk about a time suck!  I asked on my personal Facebook and got a reaction from a designer friend with the solution.  Yay!

The best part is, it is so easy.  Double yay, yay!  Hehehe...

I and she have a Mac so the directions are different than that of Windows.  There were a few tutorials out there for Windows, but I could find none for Mac.

Ready?  Here we go...

Go to your Applications folder.  (Mine is a blue folder with a litter "A" designed from a pencil, paint brush and ruler.)


Double click on Font Book.  (It's a grey book with a big letter "F".)


Check that out!  All of the fonts that you have installed will come up. 

Click on the font you wish to discard. Another window will pop up.

Choose "Remove....."

How easy is that?!

Apparently, there is a way to get rid of ALL of the fonts you don't want. Even the ones that come with the program. I'd love to ditch all of those foreign languages and I did find an explanation.  It was extremely lengthy and it's possible that you could later have problems, but I'll hit you up with the link:  (This is Microsoft only)


Here is a video on how to get rid of fonts in Windows when the other way is not working.

I hope we were able to help you.

Happy scrapping!


Tuesday, April 25, 2017

The Last Page of Maya Road's Mini Album with Webster's Pages Warehouse Box

Welcome to The Cherry On Top's Traditional Tuesday.

We are finally showing off our very last page to finish up this album.  Though, I still have to choose, size and fit all of my photos.  Yikes!  I also have to decorate my cover/purse mini album which is usually my favourite part.  We'll show that to you when we get there as well as the easiest way to get tiny photos onto these little pages.

On to our last page.


I sometimes feel bad when it only takes a couple of minutes to design a page, but scrapbooking isn't always about pages that take hours to design.  You can just as easily love a page that is simple, inexpensive and quickly put together.

Remember, when you have awesome products that you love, your pages will come out super.


Check out how easy this is!  Trace your chosen paper around your page template, cut and adhere.  Don't forget those holes.  Another thing you should decide, in the beginning of your project, is how you want to juxtapose your pages in your album.  Some of my pages will appear upside down because of the way I designed the page.  If that would drive you nuts, then make sure you consider this in the beginning.

I found a fabulous cluster on one of the papers from my Webster's Warehouse box and used my fussy cutting scissors around it.  It just didn't fit, but still looks great.  I slightly bent around the very edges of my cluster to make it look more like it's coming off of the page.


Then I chopped off the excess of this word strip and layered it up on a coordinating scrap piece of paper to give more colour, dimension and balance to my overall look.


If you are wondering what happened to the other half of that pink flower, I tucked it under my cluster to add more colour.  Then clipped out another flower cluster from my paper and added it to the top for more balance and another splash of colour.  Use double sided foam tape to lift your layered word strip off of the page.  That's it!


Here's my page from last week.  Simple and fun!


Another really fun page!


I'll show off the rest of the pages so you can see them all in one place.


Use the gem strips in the warehouse box for mega wow!


All of these materials are from the Warehouse box.  Making it so easy to coordinate the pieces and have pretty pages.


I just love this page!  Fold the wings gently to make it look like your butterfly has life.  Maybe add a couple of liquid dots.


THIS page is pretty sweet, too.  I just cut out the bike from a paper and traced around it with glitter glue.  There are a lot of liquid dots on this page to make an exciting border across the top.  Fussy cut those kites to add even more interest.  Use more glitter glue on the strings and ribbons of the kite to show them off and send them high off of the page with large glue dots.


You could keep it very simple.  Three, different coordinating papers, separated with ribbon.  Add a few matching flowers and more liquid dots for a finished page.


Another great one with very few elements used.  Two coordinating papers, one fabulous flower, more clipped word strips, a touch of decorative ribbon and a few gems. Voila!


The simplicity of this page is staggering!  Three different papers cut to perfection and layered.  One cut out from the paper packs.  Webster's mega awesome ribbon and another inexpensive paper flower to top it off.


Ink around the edges of your elements and papers for a polished page.  Using the same kind of flowers throughout your book will lend a cohesive feel.


Cut out your favourite clusters from the papers and or add a bit of bling with dimensional types of adhesives.


Layering always looks so super.  I used pearls throughout my mini for more cohesion and more of the same flowers in different colours.


Keep your wording generic if you're not sure what photos you are going to use on the page.


I finished with this fun page.  All coordinating papers, with a touch of contrast.  More gems to make the balloons stand out.  A bit of textiles for softness and pretty, little flowers with coordinating bling to round it all off.

That's it!  The pages are finally finished and after 4 years!  Even a super scrapper like me can take forever to finish an album.  So don't beat yourself up if things are being dragged out.  Scrapbooking should be an enjoyable experience from start to finish.

Thanks so much for following our progress on this soon to be fabulous mini.