Saturday, October 28, 2017

November's Free Calendar, Free Halloween Printables and Autumn Decor Ideas

Howdy, happy hybriders!

Look at me all early with yet another calendar. Whoo hoo!  Hehehe...I'm still using the lovely goodies from Throwing Some Scraps Around.  Continue reading to find out more about this lovely kit, see a new kit from TSSA and check out our round up of free printables for Halloween.  They might come in handy in the next few days.


Free Calendar, right click and save to your downloads

Jodi is such a doll for providing us with all of this year's free calendars.  I will have calendars again for next year and all with a nifty twist and super, free mini scrapbooking kits for newsletter subscribers.  Make sure you are following us everywhere so you don't miss out on our spoiling of the fans.  Hehehe...You will only get one chance to grab our free mini's and then they are going into the shop.  Sign up on the blog or on our Facebook Page.

This kit is called Celebrate Our Love.  You can find it in Jodi's shop along with a lot of other gorgeous goodies.

Halloween is just around the corner.  Our village has decided to have our festivities an entire week ahead of time.  I'm not thrilled with it.  That means we already had it.  I didn't bother dressing, up standing outside giving candy like I usually do.  Last year so many people wanted to use our bathroom and breast feed their babies in our home.  I was not pleased at all.  This year, they were even knocking on the door at 10:30 pm!  Hello!  Not a lot of encouragement to keep participating, that's for sure.  I did put out some fall decor in the yard and I decorated my window again.  Here's a photo.  This year I didn't put nearly as much work into it, but it looks ok and people even took pictures. 


Here are other windows and home decor I used in other years.


This one is fairly similar to this years, but had a pirate theme.


 One of the scenes from last year's pirate theme.


 Another pirate scene.  Just really a bunch of junk from the garage!  Hehehe...

My hubs went all out and bought a costume.  I just put on a long sleeve white shirt, black vest, a lot of jewellery and a bandana.


I loved my first window I did.  Just painted some cardboard I drew on and cut out.  Easy, but a bit of work.


Just stuff some old clothes with newspaper and or plastic bags.

I did a Boo your neighbour pack that is still live.  Check out the full tutorial and grab the download.

 free boo your neighbours printables

Head over to this blog for this free set of Bingo cards.  They are not your typical cards. They are for smaller kids who don't get the whole diagonal thing.  My boys with Autism, at the time didn't understand diagonal so they couldn't play the standard bingo and would get very frustrated.  This is meant to go in just straight lines.

If you are planning a pirate party, this free printable might come of use.  Just grab a rigid board and prop it up on some cinder blocks and you've got a walk the plank game ready.  Click here to get the link.


Click here if you'd like to see more fall decor ideas.


So, there ya go!  Make it a good one this year.

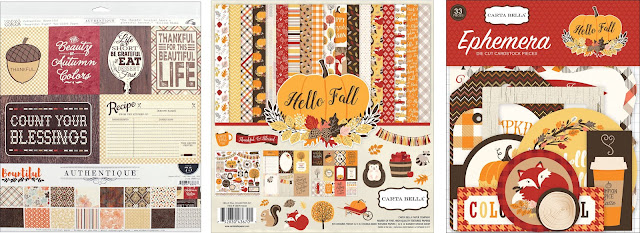
If you are still needing some nifty products for Fall or Halloween check out CreateForLess.  I found these awesome goodies there amongst tons of other great deals.  Pop over and see if there is something for you.  I also some great mini pumpkins!

 CreateForLess

I just love getting collections like this one from Carta Bella.  It makes scrapbooking fast and easy.  You can use this to make cards, place settings, home decor...

We have a super, free quick page from yesterday if ya missed that one.  On Tuesday, we showed off our last page insert for our simple, traditional scrapbooking mini.  See it here.

Thank you for stopping by The Cherry! 


Friday, October 27, 2017

Cutting Edge Scrapbooking Templates and a Festive Free Halloween Quick Page

Welcome to The Cherry On Top.

I've got yet another blog packed full of gorgeous inspiration with our newest templates from my totally awesome Creative Team, a few new releases from some of my favourite designers, a great freebie and my two pages from the third round of the Layout Artist competition at the Digital Scrapbooking Studio.

Dive into today's creative crazy blog!

 Flourish Templates

How'z about those new templates, huh?  Pretty amazing and different, right?  I layered like crazy when it came to those edges and scatter and splatter.  Pain stakingly detailed so you don't have to do all of the work.  It's been done for you!  I scrapped all of these templates, as you will see further down the blog and I was so pleased how easy and fast my pages were scrapped.  That is the point of templates, in my mind at least, yet sometimes I can take forever to scrap a page with templates, but not these.  You've got to give them a try and see just how gorgeous your pages are going to be!

Is Dana's page not mega fab?!  It is exactly what I thought a page with this template should like.  Smashing!!!

 Flourish templates #2 and Shining Stars by Aprilisa

Laureen is new to our team and she's also played with all of the templates.  Look at her pretty page.

 Flourish Templates #1 and Louise L, My Baby Love

This is another page from Laureen.  I love that carousel element.

Flourish Templates #3 and Harvest Festival from Laura Burger

How about this fabulous page, also from Laureen.  Just wow!

 Flourish Templates #2 and Boho Soul from Laura Burger

How about the splendid clustering Michal did on this fantastic page.  You don't have to use the silhouette provided.  They are supposed to be a guide.  They are there to give you an idea of what kind of element would look good in that place.

 Flourish Template#1 The Beauty of Crafting from BooLand and Valentina

Rachelle also provides you with a double layout using templates #2 and #3.  I'll be selling these separately in the shop due to their uniqueness.

 Flourish Template #3 and the Warrior bundle from Just So Scrappy

Flourish Template #2 and the Warrior Bundle from Just So Scrappy

My gal Robyn from Scrapbook Crazy Creations by Robyn stepped in to help produce a couple of pages with her own scrapbooking products.  Her pages are pretty darn fabulous, too!

 Flourish Template #1 and Happiness from Robyn

I just love how Robyn made my silhouette witchy!  What a great idea!

 Flourish Template #2 and Wendy Witch from Robyn Scrapbook Crazy

If you are tiring from fall colours, this springy page will perk you up.  So soft and pretty, from Rochelle.

 Flourish Template #3 and Enjoy The Moment from Heartstrings Scrap Art

Here's a page of mine using colour Me Autumn from Paty Greif.  I used a different image as well, for the center.  This is what I was referring to when I said to consider the shape given in the template and use a similar shape for your page if ours doesn't fit.  I don't have any ballerina's in the family.  Hehehe...

 Flourish Template #1 and Paty Greif's Colour Me Autumn

This is another one of my pages using Throwing Some Scraps Around new, vibrantly beautiful kit, Beauty Is All Around Us.  It sure is, right?  Take a deep breath outside.  Feel the grass between your toes or enjoy the fresh cool air as it goes through your nose and into your lungs.  Mmmm...

Flourish Template #3 and Beauty is All Around Us from TSSA

Moving on to more new goodies around DigiLand...

This is my page using Made By Keuntje's new kit, Witch's Brew.  So my kind of kit!  Black kitties, lots o' purple, glamorous gold and so many fun, hand drawn characters.  I really, really love those.  You'll see the inspiration in today's freebie from this page.

I made an attempt at an extraction of me.  Ugh!  Hehehe..It didn't come out all that great so I was thrilled to use Dana's messy stamps to help conceal the imperfections of my extraction.  Hehehe...Just like in traditional scrapbooking, I use embellishments to hide my errors!  BUAH!  Hehehe...


 Because Templates and Witch's Brew
Because Templates from TCOT and Witch's Brew from MBK


Dana is also having a CT call if you are interested.

Here is today's freebie made by me and sponsored by Made By Keuntje.  What a super kit!

This is no longer free. Make sure you sign up for our newsletter to stay up to date and so you don't miss any free stuff.

 Free quick page from The Cherry On Top and Made By Keuntje


I've been sharing my page entries in the Digital Scrapbooking Studio's Layout Artist competition.  This is for the traditional category for round #3 and it's Aimee Harrison's Collection, Celebration of You.

Go vote for your favourite or do the play along at the Studio.

This is my artistic page for round #3.  Didn't think I'd make it to round #2 so I'm really, really thrilled to still be in this competition.  It's been making me scrap better and try things I wouldn't normally do and I get to use some designers goodies I've never scrapped with.


Tomorrow, I'll be back with a rather extensive Halloween recap.  I'll share any links that are still live of our previous, free Halloween printables as well as our blogs featuring Halloween in case you are needing inspiration.

Needing more freebies?  Follow our page on Facebook where we share free stuff nearly every single day or our Pinterest Boards featuring all kinds of free goodies.

Thank you so, so much for checking out The Cherry.  I hope you take a pop in our shop and check out our goodies.  Support The Cherry so we can keep bringing you all of this luscious scrappy goodness.

Happy scrapping!

Monday, October 23, 2017

Simple Scrapbooking Pages Album Continued

Welcome To The Cherry On Top.

I surly hope you all are not nearly as bad as I am when it comes to finishing up projects.  I'm sitting on quite a few unfinished projects, but slowly, they are getting wrapped up.  Like this one.  All I need to do is the cover and inside cover page and it's finally finished.

I've got several other entries for this project.  Click here to see more step by steps for these pages.

I'm using Barista from Basic Grey for most of the album.  The chipboard album is from Maya Road and I can say this about this particular chipboard book, it's awesome.  One main reason I do not use liquid glue is because it wrinkles your paper, which isn't a big deal because you can flatten it once it dries, but with this book, wrinkling is not an issue.  I love that!  Scrapbook.com has SO many albums to choose from.  I dare you stop at just one!  Hehehe...


Let me explain a few things about the image, above.  It's matted in a coordinating paper to match with the rest of the pages in the album.  All from Barista from Basic Grey and a bit of my own scraps.  I printed my photos of this album on semi gloss paper and the result of the photos was meh.  When you cut the pics, you get imperfections.  There are a few things you can do about that, though.

One is to stress out the pic, like I did above with a nail file.  You could ink around the photo to cover the white part so it looks totally intentional or you could cut out a fine border frame to set over your picture or image.

I distressed the outline of my paper above the pic as well to make it all match.

My next step was to make a flip page by matting my photo and scoring across the top.  I score with my Fiskars cutting machine.  Switch out the orange blade with the black scorer.  You can also easily score with a ruler and a small, blunt object like the rounded edge of a paper clip, a coin...


Scoring about 1/4 inch from the top of my mat.

The next step is adding your adhesive.  What kind will you use?  I want to use double sided tape so that I don't have to wait for it to dry and I find this kind of adhesive perfect for this task.  Check out the different sizes of double sided tape there are.  There's larger and smaller still.  Choose the size that works best.


The adhesive has been applied to the back side of my page I want to flip.


Something very cool with this paper from Basic Grey was that typically useless piece at the bottom of a 12x12, they gave us some tabs.  Sweet!  of course, I used them.  See them at the bottom of my photo?  I distressed them as well.


There is my finished page to flip, of my lovely hubs with our favourite glass of wine at a nice restaurant in Mehring, Germany.  I layered a fun sticker embellishment from the collection on black paper to give the embellishment more interest and have it stand out a bit from the photo.

A very clean and simple page...


I could have left the inside as it was, but I chose to add just a few layered embellishments.  The chevron sticker was from the collection, but could easily be done yourself.

I triple layered one of my FREE wordies for extra pop and contrast.  A really simple thing to do with scraps and it looks fab.


Taking a break from our regularly scheduled program...hehehe...

I'd like to share this idea with you.  To easily take pictures of your projects, consider this.  Use a clean pizza box and leave in the box, several different colours of card stock.  Change them out to fit your project.  This worked like magic.  Can't believe it took me this long to figure it out.  Excuse how dark it is.  It was very stormy that day.  Hehehe...


Here's another page from my book.


Pretty simple, right?  Not too time consuming either.


This is the book missing it's cover.  That'll be for next time.  I still have to plan it all out and see if I have more pictures.  See the pull out photo?  It's a nifty trick to get more pics on your page besides flip pages, like today.


Make sure ya check out Scrapbook.com and Cricut to make totally awesome pages easily and quickly.  They have top quality products and customer service.  Make them a part of your scrapbooking repertoire.

Did ya see my finished hybrid challenge on Saturday's blog?  Nifty result!


Thanks so much for checking out The Cherry and happy crafting!


Saturday, October 21, 2017

Hybrid Scrapbooking With Lissy Kay Designs and Echo Park

Howdy, Happy Hybriders!

Today, I'm wrapping up the digital to traditional to hybrid challenge we started a couple of weeks ago.  I strongly feel it essential to mingle all three forms of scrapbooking to give you the edge to the best projects.  I'll show ya what we've got so far for this particular challenge.  We've got others and have some in the future planned, too.

Check out how we took this digital page and bought it to a hybrid one using the Happy Days collection from Lori Whitlock and Echo Park.  Here is the first part of the tutorial.  Here is the second part if you want to do this totally traditionally.

The PuurFect Scrapbooking Kit from The Cherry On Top and template from Lissy Kay

Here ya get a look at the collection I'm using.  Are you like me and always use the packaging?  I found the packaging for today's project better than the goodies inside.  They were not only smaller and fit better on my page, but the colours were different and worked better as well.

As you can see, I took the basic components of Lissy's template and filled them in digitally and printed it out.  I knew what colours were in the collection because I used it to make an awesome mini.  It's mega great and easy.  I chose the craziest pics I could find and we do crazy really well, here.  Check out the step by step for it, here.

 Mini accordion album with Echo Park


More really fun photos in today's project, too.  I used plain coordinating colours in the hybrid part of the page.  What a great collection from Echo Park.  If you hit up Scrapbook.com you'll find that Echo Park has over 50 pages of scrapbooking fabulousness even dies!  There were a lot of sale items, too.


I took out the papers from the Happy Days collection and played around until I found a combination I liked.  I'll be adding the green and orange later. I liked the basic black and white papers with the blue.


Layering adds depth, interest and often contrast to your pages.

Use your paper cutter for the desired size you want, adhere your layers together and place them on your page.  So easy, right?


All we have to do now, is cluster up our corners with lovely embellishments and almost all of the ones I'm using are from the packaging.

See how simple it can be.  I took a journal pice or word art from the collection pack and matted it for contrast, depth and interest. I did use foam tape for extra dimension on the word art.  The banners I cut out from the packaging and matted them to match as well.  I used their paper preview from the packaging as borders for my page.  I needed to get those greens and oranges from my hybrid piece into my page.


For a bit of blingy, pow and wow, I cut out a section from this stuff I got in a Webster's Warehouse Box.  I used my fussy scissors and could cut just what I needed.  I used liquid glue to adhere.  I love Elmer's liquid glue pens with dual tips.  Check out CreateForLess for options.  They got Cherry prices over there.


 See all of the cool goodies on the packaging?  The paper strips, cake and flag?


Voila!  Easy stuff!


Making your own embellishments is a great way to save money, use up your scraps and get a custom item.  I used a simple flower punch, my large hole puncher and a red rhinestone for an interesting element.


There's some green and orange and my flower.  I duplicated the rhinestone to bring the cluster together.  Repetition will help keep your pages cohesive and balanced.  There's more of the metal bling and more paper borders.  The pack contained a page of journal cards, but they are really large.  I cut it down to fit better on my page and filled in some journaling.  Finally!  Hehehe...

I'm a bit sad because that handsome gentlemen there recently passed. :(  I do LOVE that about scrapbooking though.  It's a nifty way to feel close to people who are far or waiting for us on the other side.


So, we've layered up our hybrid paper, clustered up the top right and bottom left corner of our page and that's a wrap!  It took me just under 2 hours to do this page and I really, sat back, took my time and enjoyed every step of the process.  I hope you did, too.


If ya dig hybrids, I've got two free Project Life cards.  One is offered in the newsletter and the other on yesterday's blog.  They are in png format so you may use them digitally or print them out and use them traditionally.  I'll be doing both of course.  Wait until ya see what I've got on tap!


Two of these cards are offered for free on the blog and in the newsletter.

I'll have these printables in the shop very soon.  They coordinate with our Trolla Bolla Collection.  Fun, eh?!

 Trolla Bolla Collection


I hope you enjoyed our hybrid project and that you try it out for yourself sometime.

Happy scrapping!