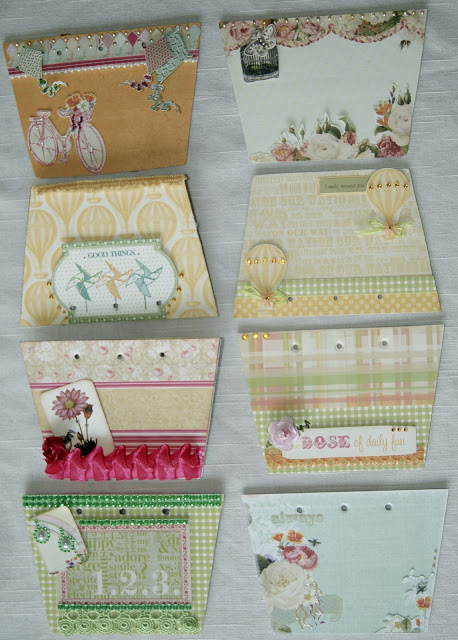
I've got another mini page finished in my Maya Road purse album. I also finally decided what to do with it. I had thought I'd give it to my aunty to fill with her pictures, but because the purse and pages are so small, it might not be an easy task. I'm just going to fill it with my own photos and then decide who or IF I'm going to give it away. Hehehe...
I don't know about you, but I'm one of those very frugal scrappers who buy lovely things and is "afraid" to use them. Hehehe...I'm finally getting over this and just diving into the gorgeous goodies. No holds barred any more and my pages are really looking good because of it.
None of my pages are really over the top or decked out with expensive elements. I'd say they are all pretty glamorous not too shabby pages with still very little money spent on the total project. Take a look at today's page that's made quickly, simply and with just a very few supplies.
My camera batteries were dead when I finally got the time to scrap this up. So I don't have a step by step, but I'll walk you through it. It's pretty direct and simple.
As usual, trace around your page shape onto your desired paper. I recommend cutting out the holes so that you don't glue something over them.
My page was looking fairly plain when I started placing my word bits around, but once I layered them up in coordinating papers from the warehouse box and added these tiny flowers and leaves my mom sent me, everything started coming into play nicely.
This is the sheet with the word bits. I cut off a lot of the extra, blank space on the sentence so it would fit better on my page.
I finally used these tiny flowers and leaves my mom sent. I used tiny glue dots to place most of the elements on this page and double sided foam tape for the large circle and largest word bit. Then polished it up by adding these tiny pearls onto the centre of my tiny flowers. A steady hand was needed! Hehehe...
Remember, using some of the same elements and colours on a page will make your layout look balanced and cohesive. Despite the fact that I used several different collections, it all goes well together.
You can click on this image to get to my other blog entry with even more pages. I'll be back next week with my last and final page! Then I'm on to figure out how to cover the purse, finish it up, get the pictures adjusted and printed, then it's finally finished.
Thank you so much for stopping by our Traditional Tuesday. I hope you look around at other entries and come back again, soon.


No comments:
Post a Comment