Welcome to The Cherry On Top's Hybrid Saturday.
As you may have seen from yesterday's blog, we are celebrating my birthday. There are coupons, awesome new collections, pages and pages of gorgeous scrapbooking layouts and of course, free stuff. A lot of free stuff!
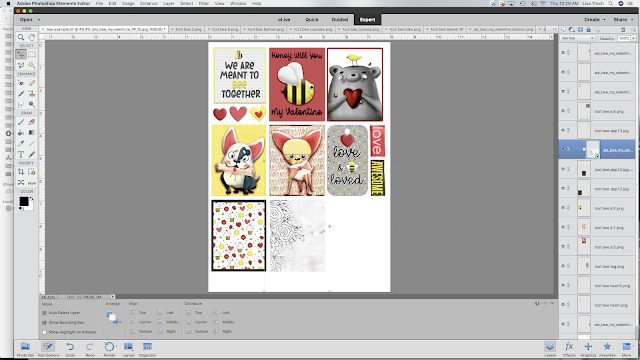
Today, I'm showing you how to quickly design a sticker sheet to print and use with our collection, Bee My Valentine that we've designed with Art & Life Scraps.
Grab the free printable in our group.
Save $3 on nearly everything in our GingerScraps Shop.
So if you are a hybrid or traditional scrapper, then you too will love digital products like the ones we sell. I'll show ya how you can quickly design a sheet to print and use on your traditional projects.
I'm using PhotoShop elements. It's a super easy program to use. It's not very expensive and it's a one time fee. You do not need to subscribe and pay monthly. (Yet!)
Open a blank document in a printable size. (I have a custom size of 8x11 so most people around the world can easily print our stuffs.) Slide in an element you like from the collection. Square ones are super, super easy to cut after finishing. If you don't have a cutting machine, it's really easy this way. Size it to how you want it.
You may want to back up or mat your card for more contrast and interest. You could add a stroke by going to the "effects" tool or you could slide in a coordinating solid paper and position it to fit under your card.

Duplicate the card again, in the size you need and repeat the process. I took one of Cindy's graphics, placed it over the card layer and cropped it to fit perfectly on it, then again, matted the card.
You are ready to print!
You could merge everything all together and save it as jpg. Now you have no more layers so you won't be able to make corrections. It's best to save a layered copy in either psd or tif (tif is smaller) and another one in a merged jpg format. Jpg formats are much smaller and will save space on your computer.
Here's a look at our collection. There is so much in here, including a pack of templates from yours truly. I certainly advise scrolling back to yesterday's blog and find out about all of the other freebies on offer and check out the fabulous layouts from the team.
Take advantage of this awesome deal throughout the week and thanks so much for checking out The Cherry!


No comments:
Post a Comment