Saturday, June 17, 2017

New Summer Bucket List Free Printable

Welcome to Hybrid Saturday with The Cherry On Top.

Last year, I had these free printable bucket lists for young kids and teens.  This year, I'm providing a blank list that you can fill in yourself.  We all live in different places and have different desires and likes so this way you can create your own, customised list.

I will provide another list of some more ideas in case you need some help.  It sure is a huge benefit for everyone when you have this type of resource to go to when discipline is becoming a problem which usually means boredom has set in.  Nip it in the bud with a bucket list or a jar full of ideas.

Don't forget to get a chore list going, too.  The kids have plenty of time in the summer to learn new life skills that will help them and YOU, too!  No excuses on this one.  All kids can do stuff around the house.  Our deal is no games or phones until the chores are done and believe me, it works like magic. Even with kids that have disabilities and differentiating functionality.

Trust me, you will thank yourself and you'll be giving your kids a feeling of accomplishment and responsibility.  Click here and here to see some of our posts on chore charts.

This link no longer exists.  The blog is full of fabulous freebies.  Check out our newer posts.


 Free Summer Bucket List Printable


Here is the free printable.  Let's look at some things you can put in there.  You can bring up this page in your software of choice and type in your very own list or you can print and write them in.  Maybe the kids would like to write them in?

I have two bucket lists from last year.  One for older kids and the other for little ones.  To get to them, click here.  There will be more ideas there and the lists are ready to go.  Just print them out.

In just any order, here are some things you can put on your list:

-  collect sea shells                            
-  play frisbee
-  have a glow party   (I've linked up a bunch of ideas on Pinterest for you.)
-  go on a night walk
-  build a Fairy House   (Here are more ideas from Pinterest.)
-  paint a rock
-  eat dessert first (I love that one!  This is our dessert board.)
-  plant a container garden  (More ideas for you.)
-  make a tie dye shirt  (A few tutorials can be found here.)
-  build a fort
-  volunteer
-  go swimming at night
-  bake something yummy
-  make dinner for the family
-  read a book (or 10)
-  go to the park
-  make home made pizza  (A lot of recipe ideas for you.)
-  play flash light tag
-  make sun tea  (I love sun tea.  It's very easy and there's a lot of recipes.)
-  play in the rain
-  have a family game night (or 2)
-  start a journal
-  go bowling
-  go to the library
-  wash the car
-  have a movie night
-  make s'mores  (More recipes for you.)
-  go swimming
-  fly a kite   (Here are some ideas on how to build a kite.)
-  sew something  (Our Sew Easy board.)
-  send a letter or post card
-  make your own slime or play dough  (Many recipes for both.  I'm definitely doing this over the summer with my boys.)


 Best Summer Ever
Best Summer Ever, Kim Cameron Designs

Isn't it great?!  All of the things you can do with scrapbooking kits?  I designed this page in a traditional fashion.  Yes, my boys are in pyjamas.  I was just thrilled they not only wanted to go outside, but they also wanted to ride bikes.  It could have all been blown if I told them they had to change.  Hehehehe...

 Best Summer Ever
Best Summer Ever, Kim Cameron Designs

Here's a look at Kim Cameron's awesome kit.  I bet you can use it for so many things besides your super summer photos.

Thanks so much for checking out The Cherry.  I hope you and your family have the best summer, ever.

Happy crafting!
Friday, June 16, 2017

Freebie Friday with New Scrapbooking Templates and Some Free Ones

Welcome to The Cherry On Top.

As promised, we are back with more freebies, new templates and a couple of tutorials on how to use our most recent templates.

Read through today's blog and get an eyeful of lovely page inspiration and make sure you have all of these free templates in your stash.  Then head over to our store and get our newest templates, Luv U 2 Pieces.

 Luv U 2 Pieces Templates

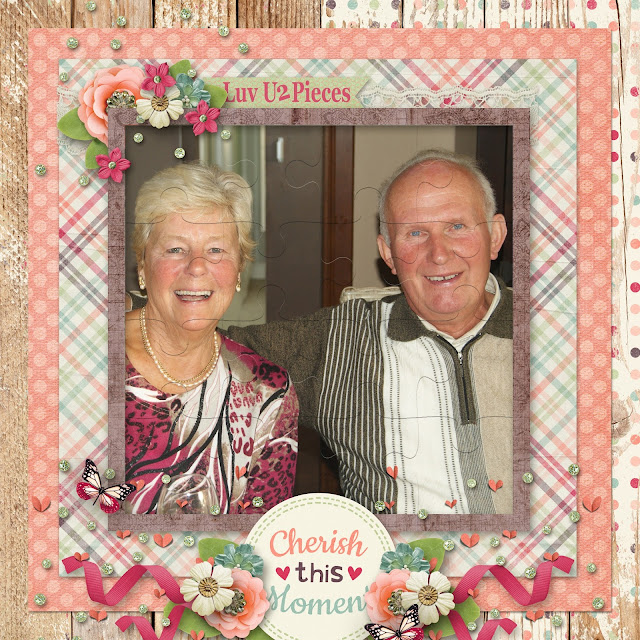
I was a bit worried that these template might be difficult to use because I didn't merge each individual piece, but it really was easy.  Yay!  Keep reading to see how we did it.

Isn't this kit so fabulous?!  This is Memory Keeper from the DigiChick blog hop and it's so gorgeous!  If you're following us on Facebook, you'd know about this collection.  We link up our fans with freebies nearly every day.


 Luv U 2 Pieces Templates

This collection is also from a free blog hop,  the Digi Scrap Parade.  Once again, we did inform our fans of this huge hop of gorgeousness.  I hope ya got it all.

 Luv U 2 Pieces

Here are our newest templates in the shop for just 2,99.  They are going to look great with an autism collection as well.  I have two boys with Autism and I'll be doing a page or so for that as well.


Dana has made a gorgeous page using her kit, Serenity.  These colours are so fabulous and what a beauty!

 Luv U 2 Pieces

Jodi has scrapped up her little jelly bean.


 Luv U 2 Pieces

Magalie's pages are always magical!

I played with these puzzle pieces for a while and could not figure out a way to merge the pieces without losing the inner outline of each piece.  As you can see on the third template with the 5 frames.  However, it was pretty easy to get my photo in the large photo spot in the second template.  I'll show you how I did it in PSE.


I chose a nice, large photo that was fairly close up and without a lot of detail.  I have a feeling if you use a busy photo, it won't look as nice, but you can always try.

Make sure your photo will look good in a square shape.  Then crop your photo to a near perfect square and just keep sliding it into the right piece, piece by piece and clipping it in each time with the, "create clipping mask" option as seen below.

I went in order to be sure, starting at the top, left corner and working my way to the bottom right, but it probably doesn't matter as long as you don't adjust the photo.  Save it for last.


See my progress.  You may notice the picture isn't fitting in perfectly, but no worries...


Once you have ALL of the pieces in place and you have NOT moved your photo at all...


Click or high light all of the photo only layers (Look at the image below) and then slide it right into place.  I used my arrow keys just to be sure and it came out perfect!  Yay!  I thought it was going to be so much more difficult.


Here's my new Bonkers for Banners digital templates with a few examples of what you can do with them.  I've got another step by step tut her, too.  Yes, I have a thing for alliteration.  Hehehe...


 Bonkers For Banner Templates

Here is how I built my banners with the new templates, Bonkers For Banners.


I opened my template in PSE and this is what it looks like.  You can't get the individual layers in PSE if you try to slide it on to another page.

My paper was tiny in this huge template.  You can do a few things to work with these templates.  One is to go to  "Image", then "resize" and then "canvas size" and change it to whatever page size you like.  Usually 12 x12 inches.  Then you can do your entire page on this new canvas you've created.

Another choice is to command and the - to minimise your image and then you can enlarge the paper.  Check to make sure you like the result before you do all of the flags.

This way is the last way to do it.  I just slid the paper I inserted over the banner I wanted to clip.  You can see in the image above where there was an overlap, but once you slide it, it disappears.  Yay!


Bottom row is all finished.  Now, for the top layer of flags.


Use the same method of sliding them into place.


And voila!  Of course, you can always merge your layers if you want the same paper in each flag.  Just remove the shadow and add it again when you're finished.


I dragged my finished template into my page and embellished it there.


What a nifty cluster!


Here's another example for you using the method above.


I slid in my background papers and even adjusted each one so that they were all a little different and so the design showed up nicely in each flag.

If you want to use just one paper, you can always, delete the shadow effects, merge the layers you want the same, say the entire bottom layer or the top and clip in, adding back your shadows once you have finished.


Here's an idea of a different way to use banners.


Make your banner the feature!  I simply designed a huge cluster using my banner.  I placed a few elements in the background, added a frame and then duplicated my background and moved it to the layers I needed which was right behind the frame and resized it to fit in the frame.  This way I can easily crop in my photo.


All we need are perhaps a few more layers and a great picture.

Aimee Harrison Designs FREEBIE
Aimee Harrison's June Facebook Freebie

Ah!  Perfect!  This is Aimee Harrison's Facebook freebie for this month, by the way.

Here are some more of our templates.

Men In Mind Templates

Free Template
Last month's free template is still available for you!

 free template
Here's another great, free template from The Cherry.


 free template
Here's another recent free template found on the blog.

 free template
Definitely a crowd pleasing, free template that you can still download.

 free template
My gal Dana from Made By Keuntje has the free template.


This is a peek at tomorrow's, free hybrid printable.

How's that for some fabulous freebies?!  I'll have a new, free template available on July 1st for the Love For Layout Templates Blog Hop. I know you are going to love it.  Make sure you're following us on all of our social sites so ya don't miss it!

Thanks so much for giving The Cherry a little piece of your day.

Happy scrapping!


Tuesday, June 13, 2017

Scrapbooking Is For Everyone, Even You

Welcome to The Cherry On Top.

I got scrappy with my aunt last week and thought I'd show off our pages.  She's making a book for her son's 50th birthday.  She drove all of the way over from Antwerp so I brought out a nice stash of things from my hobby room.  I told her to just bring her photos and I'll take care of the rest.


I haven't been traditional scrapping for a few weeks.  It felt great to get glue on my fingers and try to enhance my traditional skills.


Perhaps you can see with my pictures, that I don't really have a sophisticated scrap stash.  Just purchases from here and there and no fancy tools either.  For my aunt, it's pretty impressive.  Hehehe...


Above, I used goodies from a Graphic 45 collection.  Collections save so much time and they are the best way of ensuring an awesome page.  Often when people try to match things up from all over the place, it looks like it.  It looks busy, cluttered, the colours are off and there is no cohesion.  Avoid all of that by purchasing collections.  They might be pricey if you can't get them on sale, but they often go a very long way.

My aunt would often ask advice on the basic format and it was not easy.  Our styles are completely different so my advice was often snubbed.  No worries.  She asked, I answered and she didn't like those answers.  Hehehe...That's just the way it goes sometimes.

Everyone has their own style and it's not to say that one is better than the other.  They are all just different.  I've been doing this for nearly two decades and I often reminded my aunt of this so she didn't have to keep beating herself up.


I kept telling her the most important thing is that she's having fun scrapbooking.  Even the result isn't as important as enjoying the process.  She admitted that she indeed, really like scrapbooking. Yay!  That's her page, above.  Not a bad result at all, I find.  Decent balance and repetition with an emphasis on the photos.  Great!


Here is another one of her pages.  Funny how the paper looks a lot like that wall paper.  Hehehe...She's definitely in to getting a lot of photos on one page.  She reminded me that her son is 50 years old.  That's a LOT of pictures!  hehehe...


I had up a page from Pinterest on my computer that she could reference for some basic design layouts.  She really liked that idea.  Here's a coordinating, simple, pretty page she scrapped up.


As the day was winding down, I did get a feeling that she wanted to get as many pages finished as possible.  Hehehe...  I can totally understand that!  I wish I could get more than 2 pages out a day.  It rarely often is, though.


Here was my second page.  We have to keep our pages very flat because of the type of scrapbook she is using.  It's got like 100 pages in it, you can't take the pages out and it has that vellum sheet to go over the top of each page.  This is from a collection.  Hence, the perfectly matching papers and embellishments.

To me this page is mega basic and simple.  She called it "special".  I love it as a basis, but I'm ready to add a lot more goodies.  Hehehe...


I'm leaving you with this photo of my washi organiser.  I'd love to take credit for this great idea, but I found it on Pinterest.  Hehehe...It's one of those mug trees.  I haven't used this thing in years, until now.

Please, scrapbook because you love it.  Don't bother comparing your pages with other people's.  If you are enjoying the process, that's really all that matters.  The End.

Happy scrapping!

Saturday, June 10, 2017

Free Father's Day Printables From The Cherry On Top

Welcome to The Cherry On Top.

Yesterday, we showed off some serious, manly, scrapbooking inspiration, linked you up to some dad related freebies around the web and gave some examples of a few of our own Dad's Day projects in both hybrid and traditional scrap.

Today, I've got a fun page of printables for dear ole dad.

There are three tags and two labels.  I surfed the net for ideas and really liked the labels idea.  Put them around dad's favourite soda, beer or around a canister or 5 of dad's favourite snacks.  Consider recycling some jars or using the very popular Mason jars if you prefer.


Right click on the image and save to your downloads.  Remember our goodies are for Personal Use ONLY.  

Print them out as many times as you need.

 Cut and get something to adhere.  String, ribbon, tape, glue dots...


 Consider dad's favourite snack and recycle some glass jars.

 You could use popcorn already popped or soda if ya want to play with words.


Nuts, sweets, beer, soda, bacon bits.  I even checked out a bacon candy recipe that looked interesting.

I used the same colour palette from our Men In Mind Templates that you can find in the shop.  We've got a gallery of inspiration with these templates there as well.

Men IN Mind Templates
Men In Mind Templates


I've also got some more new templates in the shop, this week.


These are layered banner templates.  I'll be blogging a step by step tutorial for them and giving several examples for inspiration and ideas, later next week.


Here's one I made with Made By Keuntje's free mini kit that I gave the links for in yesterday's blog.  If you missed it, click here.

If you need more ideas for Dad, visit our Gifts For Guys board on Pinterest.  It's full of all kinds of ideas.  Things the kids can make.  Hand made crafts and expensive as well as inexpensive ideas.

Thanks so much for stopping by The Cherry!