
Welcome to Traditional Tuesday with The Cherry On Top.
Have you ever started something and didn't finish it? I'm just terrible at finishing things off, but I'm awesome at starting a million new things! Hehehe... I'm back with another page from my mini purse album that I started ages ago. It was a vacation project. Every time I went on vacation, I worked on this book. I've only got a couple more pages to finish and it's done! Of course, I still have to add photos. I don't even know what I want to do with it. I did want to make it for my aunt because I know she would appreciate all of the work put in to it. I wanted to use photos of her family, but came up too short of those. I still may use photos of me, my boys, hubs and maybe a couple of my mom and dad with the boys. We'll see.
Keep reading to get some serious scrappy inspiration on a small scale because this mini is mega mini and it's not always easy coming up with layout ideas for such small pages. I've also got a shot of some other pages, previously posted and a link to see much more.

Do you know about Webster's Pages warehouse boxes? They are short from amazing! They are packed full of gorgeous papers, ribbons, fabric, buttons, flowers, stickers...and all for a spot on price that ya just can't beat. I've ordered two so far, years ago and I still have SO much stuff to work with.

Here's a look at my most recent page. It was so cold in my attic crafty spot! I'm glad this page went pretty fast. Hehehe... It isn't ideal to keep your scrappy stuff in a place with fluctuating temperatures. Just so ya know!

There is a completed page on the back of this card so I traced the template shape and finished the page before applying so as not to squish or mar the other side.
It's crucial that ya don't forget the holes at the top. I found out the hard way, in the beginning of this project. Hehehe...
I started with that green paper. Then I just used a glue pen and made the shape I wanted for my twine. I wish I would have stayed a little closer to those holes. I did like the swirl at the ends. It filled in the corners nicely. I started with my twine at one end and very slowly and carefully, placed it to my glue line. It went really well!

Above, you can see where and how I cute out the swimwear. Easy embellishments! I only used glue at the VERY TOP of each garment because the photo needs to slide under them. Before the glue dried, I took my template photo shaped paper and slid up and under the laundry to make sure there was no glue where it didn't need to be. Fussy cutting scissors made this job very easy.

I needed more pizazz on my page so I added my favourite, BLING. How much cuter are these flip flops with the tiny gem stone at the toe? I used larger gem stones on my wash line, too. This helps give the page a more cohesive feel. Repeating colours and elements is great for that.

You can see right where my photo can slip in. I used a small glue dot at the top of each flip flop so that can happen. I applied this tiny strip of the cloth ribbon from the box for an added touch of fabric and I have these cute clothes pins, but they were just a touch too big for my page. Darn!
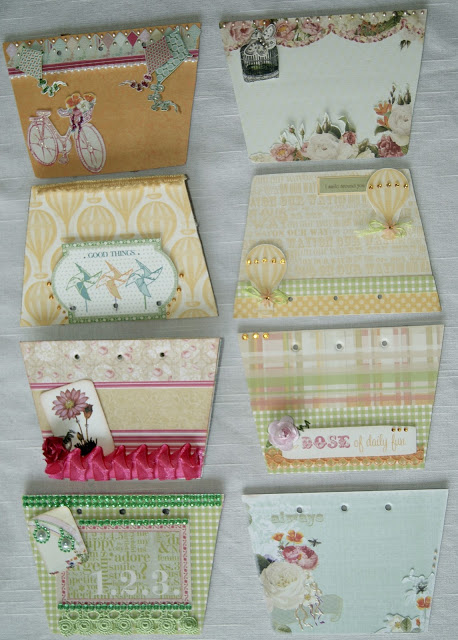
There's a look at my other pages I've done. Click on the image to get to the blog to see more detail.
I'm so closed to finishing, I just have to push on through. So, you can expect to see another page next week.
Thanks so much for hanging with The Cherry.
Happy Crafting!
No comments:
Post a Comment