Welcome to The Cherry On Top.
We're continuing a project we started last weekend. You can grab the second part of the tutorial right here, the first part here and check out the video showing you how to perfectly size and print your photos to fit in the pockets.
The Project Life cards you see here are still free on the blog for a limited time. Click on the image to get to last Friday's blog where you can get the link. You can also find out how to hop around our social spots and grab the rest of this coordinating mini scrapbooking kit. Sorry, this is no longer available for free.
I've also got a free template on hybrid Saturday's blog. It's in png format so you can use it digitally, traditionally and hybrid style. Click on the image to get to the blog for the download.
I'm just uploading a little video on how to get the perfectly cropped pics for in your pockets. It only took me a couple of minutes with PSE. If you need the template for the pics follow these directions:
1) download the free template pictured here
2) open the template in your scrappy program
3) crop the style of card you want, rounded edges or typcial
4) shrink your card of choice just slightly
5) double check that the insert will fit by placing it over the original template
Here's the rest of the tutorial for you.
We left off where you needed to just finish up your project with pics and our favourite part, embellishing!
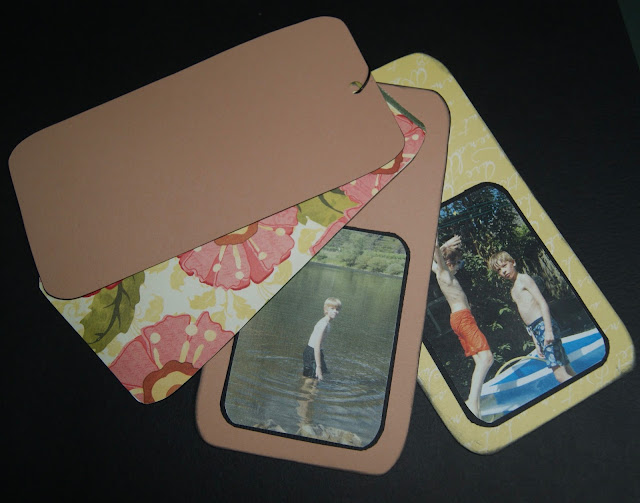
There's my photos, perfectly cropped and printed thanks to the video and previous tutorial.
Are you like me and try to scrimp and scrape every scrap possible? I have very limited supplies and no shops around to buy lovely scrapbooking and paper products for projects so I have to be resourceful as possible. I fit all of my photos on some left over, black card stock that a friend brought for me from the States. Use your paper cutter and if you like, your corner punch to round the edges of your matting.
Most of my book has a black outline so black matting seemed most appropriate. Check it out first and make sure your matting goes with your photos.
I got so lucky to find such a perfectly matching, old paper in my stash. These are just discount store goodies and they are pretty terrible, quality wise, but when that's all you can get...Make do with you have, right? It doesn't have to cost a fortune to be pretty and if you use your own "good" adhesive, it'll be fine.
See how I cut out a flower and a leaf from paper. Of course, I tried to get a flower as close to the edge as possible. Hehehe... Trying to save that paper. I inked around the edge of my flower and leaf so it matches the rest and gives a touch of contrast to my background paper. A nice gem in the middle of my flower and a few of those nifty clear dots along the bottom of my photo. The paper is already pretty busy so I didn't feel the need to over embellish. Like I would EVER over embellish?! Hehehe...
I'm going to be totally honest with you...I didn't mean to put the holes in the center of my backing. I wanted to put holes in the center of my photos and I thought it looked totally redundant to do both. Ha! My original plan was to punch holes in the corner of the backing, not the center, but it looks totally ok, right? Hehehe... I might have been able to embellish over the holes, but meh. This is ok.
There's my book all finished. I want to send it through the mail, so I don't want to put too many goodies on there. I'm pretty sure my mom is mostly concerned with the photos, after all. Always consider who is receiving the gift and how much they will appreciate your efforts, if you care that is.
There is the other side. There's more space for more photos and perhaps a touch of journaling, too. You could even turn your matted photos into pockets if you needed more space.
If you don't know much about Project Life, we got a few blogs here with Project Life pages. Check it out on Pinterest and I'll show ya a couple of things you can get at a great shop like Scrapbook.com.
You get a book similar to a traditional 12x12, like the one pictured here.
You can use sleeves similar to these pictured here and use purchased or hand made cards and your photos to go to into the small sleeves.
I'll be blogging again about different ways to use Project Life cards. Ever since I designed a few and printed them out, I really start liking project life. I do think it's a mega easy way to scrap, if you just wanna scrap fast and don't care about all of those embellishments, but you totally can take Project Life to stunning, artistic levels. Stay tuned to The Cherry and see how we do it!
Above, you'll see our Trolla Bolla Project Life cards. I blinged them up so I can traditionally scrap them in future. Ya know, I'll be sure to share the project with you.
Thanks so much for stopping by The Cherry. We've got a gallery in our Facebook group, if you ever want to show off any of your paper, hybrid or digital projects. I'd so love to see more traditional and hybrid pages there.
Happy scrapping!


