Monday, January 27, 2014

Throwing Some Scraps Around & Freebies


Is it Monday already?!

Hey there fans!  Welcome back To The Cherry On Top.  Today's blog is filled with inspiration, tips, mega clustering, some designer information and of course, FREE stuff.

Throwing Some Scraps Around is one of my favourite designers.  Can you see why?  Hello, Gorgeous!!!  I won this kit and to show my gratitude, I made a layout featuring one of my favourite pictures of Jeffrey.  I got offered a job on the CT right away.  Ha!  Of course I didn't have to think about it.  Scroll further and see some other fabulous kits by Throwing Some Scraps Around.

This may have been one of my first mega clusters, ever.  I'm still ok with the way it turned out.  I'm not a great cluster-er, but there is improvement.  How do you do it?  I don't know!!!  I just keep building and building and tweaking and tweaking.  Sometimes I just can't get it right.  It has a lot to do with balance and texture and getting those shadows just right.  I don't know much about shadowing either.  It's all just a feeling.  How on earth do you explain that?!

As you can see, this particular cluster is heavier in the center and gets thinner on the way to the edges.  That's typically how I do it.  I like to involve different textures, too.  Look at the smaller cluster to the right.  I used tall and long, roundish, left to right, right to left...variety!


How about this gorgeous kit?  Chocolate Therapy is just dreamy.  I loved this shade of blue and that gem.  That gem!  Wow!  Take a look at the amazing variety in there.  Texture, colour, shape and size is all accounted for.  That's how you can make such awesome layouts and clusters.

This layout is from Jodi, herself.  She's the brains and creative wizard from Throwing Some Scraps Around.  Like me, she too has boys and is not ashamed to use some glittery bling on boy layouts.  You go, Girl!  This is one of her favourite kits.  What draws a designer to a kit?  Here's what Jodi says.  " What draws me to a kit...Nicely contrasting and varying colors. I am not into the monochromatic 

color palettes. 10 shades of pink will put me in a coma!"  Ha! Agreed, Jodi! " I like a kit to be highly realistic. '

I asked her what she doesn't like to see in a kit and that was a resounding, repetition of colour with the same element. Also, when there is no greenery. "I like to use a lot of leaves!!" I think we can all agree with that one.

These are three things she considers when designing a kit:

"1. Will whoever uses this kit have enough variety in papers to work with? When designing a kit, I usually start with papers. I like to make sure there are large and small patterned papers and enough solids for a scrapper to get a good contrast when layering the papers." 

"2. Are you offering more than one selection of each element? I try to do more than one of each type of element. 2 different buttons or a brad and a button, 2 types of bows, 2 different curly ribbons, 2 frames. I like to pick and choose and I am assuming others would like the same option when creating a layout." 

"3. I try to sit and feel something while looking at a color palette I am about to work with. Titles do not come easy to me so it may take me a while to start. Once a feeling comes to me,I try to name a kit after that feeling and design a kit around the title. I have never started a kit without naming it first. I need the direction I am going in first or I will be all over the place with it."


Here's the layout I used with Jeffrey.  He had so much that day.  I think you can see that.  I used flowers and bling, despite that a boy is the main focus.


I thought I would share another favourite layout with you.  This one means so much.  These two are childhood friends of mine.  They are brother and sister.  Unfortunately, Hugh was taken from us a long time ago by a drunk driver.  Such sadness I feel when I see this picture, but the cluster surrounding it reminds me of life, vivid with colour.  Trying to balance pain and joy is not an easy task.  This kit is called, "Glorious".  The glory days of yesterday.


Here's the same kit with a totally different twist.  I love matching colours of my photos with the papers and elements in the kit.  It brings everything together so nicely.  This one is a bit more funky and fresh.  Great versatility and quality in TSSA's kits.


I still don't know how I pulled this layout off!  Ha!  I totally scrap lifted it from Pinterest.  Another favourite picture of Liam, at the beach.  It's a new kit from Throwing Some Scraps Around and it is called, "Beach Lover" which indeed, I am.  This layout is linked up to TSSA's Blog where you can see the kit up close and get a coupon.  Yay!

 blog

Throwing Some Scraps Around has a lovely FREEBIE over on the Facebook Page as well.  I've got a TSSA board over on Pinterest, too.  It's a great place to keep up.

How about this amazing deal going on for the rest of the month?!  Get these absolutely wonderful kits for just $2.00.  Now, THAT is a price good enough for The Cherry!

 Etsy

As in good ole' TCOT fashion, I have a FREEBIE for you.  I made ya a little cluster using Throwing Some Scraps Around's, mini kit I picked up for free at The Studio a while back.  You better grab it fast because she's doing it up and putting it in her shop soon.  Then I have to take it down.  Enjoy it and thanks for giving me a look see.  Hehehe...

 download

Now, go get your scrap on.  You deserve it!


Wednesday, January 15, 2014

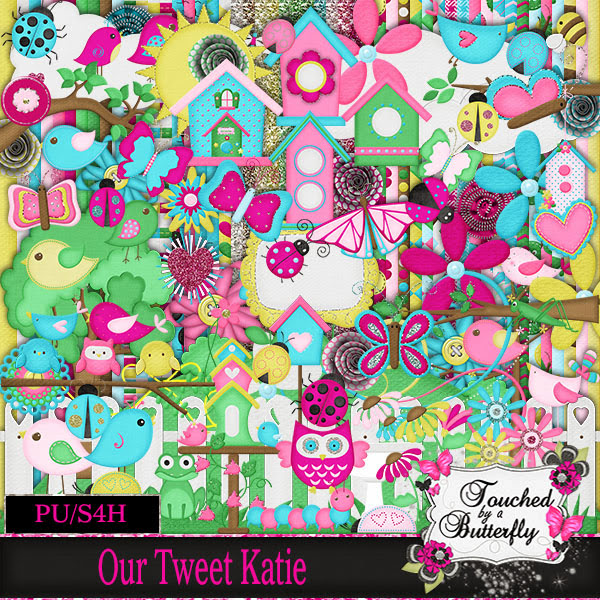
"Our Tweet Katie"


Good Day!

"Our Tweet Katie" is a new kit from Touched By A Butterfly.  It's super, super special because every penny sold for this kit will go directly to help Katie.  Yay!  The Creative Team has been working feverishly for Katie. We're making her a photo book of our layouts as well as spreading the word.  I've been out there spreading the word, too!  You know how much money it costs to have special children in special situations?  I know for sure!  I have a hubby with a heart condition and two kids with Autism.  My youngest goes to a special school and has three different therapists.  It costs a lot more when they need medical attention and medication as well.

So, help us out, by helping Katie.  You can read all about Katie and the fund raising on a link I'm providing.  You can "Like" her Facebook Page, share it around as much as possible.  That's almost as good as buying the kit.  The sales have been pretty good so far, but they could be better.

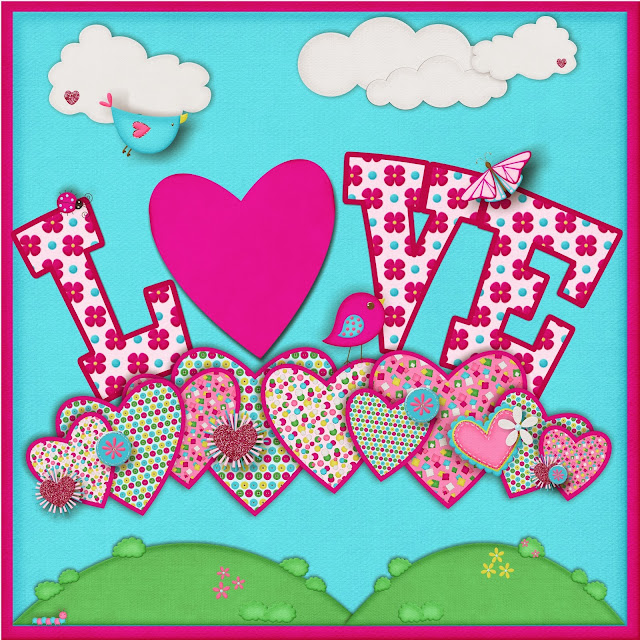
Here are the layouts I made for Sweet Katie and I have a freebie for you, too.  Keep scrolling to check it out and please considering purchasing this awesome, cheerful kit chock full'o goodies or make your own contribution!


 TBAB

Please excuse my lack of computer knowledge here.  I wanted to cut out the heart, but couldn't figure it out.  You watch!  I'll get it!  Hehehe...For now, simply shape your picture into a heart form and paste it over the heart.  You may choose to leave a little of the matting like the other letters. It could also make a cute embellishment or card!

 QP FREEBIE

Thank you for stopping by The Cherry On Top.  Make sure ya do it again.

Saturday, December 28, 2013

Printables and Ideas

Welcome to The Cherry On Top!

I'm taking a slight side step from my digital obsession to bring a special blog featuring printables.  I've only just begun using them.  Amanda from A-Manda Creation introduced me to them.  I was a bit pessimistic about it in the beginning, but when I saw how easy, fast and cheap it was, I was hooked!  I shook my head with incredulity at the ease of it all.  If you know me, you know, the easier the better.  Fast?  Even better still. 

I'm here to show ya exactly what they are, what you can do with them, alternative ideas and of course, hook you up with some links so you can try  it out, too.

Below you will see a 4th of July set from A-Manda Creation.  These are the bubble wrappers.  Just print, cut and wrap them around your bubbles.  It literally takes only a few minutes.  Great for picnics, weddings, birthday parties...You name it and there is a printable for it!

 etsy

How about a little token to put in your kid's lunch box to let them know you are thinking of them?  I used tiny, glue dots on four corners and put some stickers in the little pocket.  If you laminate them you could use them over and over and it will help with smudging.

 etsy

I used a french fry printable on some old scraps and made a gift basket full of cookies for the teachers at my son's school.  The only cost here was for the ink!  Printing on scrap paper is an excellent money saver!

 etsy

There are more teacher and gift printables than you can shake a stick at!  You've got these little lovelies for under Kisses.
 etsy

Or you could use your circle punch, cut out two and glue dot a paper clip in-between.

 etsy

Check out this spread down here!  Banners, subway art, muffin wrappers, picks, bottle wrappers, candy wrappers...It's ALL here!  My guest's jaws dropped when they saw this spread!

 etsy

Planning a bowling party?  Check out all of the things you can do with printables.

 etsy

Want a little something more for your toothless wonder?  How cool is this?!

 etsy

I loved this set for the 4th of July!  I took the candy wrappers, both big and small and wrapped them around the wine bottle.  Concealing the cheap brand.  Ha!

 etsy


The printables above are so bright and fun.  I actually use them over and over to serve the boys pretzels and popcorn.  The lolly wrappers are really easy and they are great for bringing everything together.  Printables are awesome for us "Matchy Matchy" people!  Hehehe...

Check out Amanda's newest printable release.  You can even have them customised!

 etsy


I was lucky enough to start helping Dora with Dora's Digitals, make her printables.  I have a few here for you to see what they look like close up.  You download, print, cut and adhere.  That is it!  Be ready to be amazed at just how easy and fast it is!  Follow the perforated lines to fold and look for the places where to glue.  They are also marked.

 Below, is a favour box.  Good for smaller sentiments.

 MM Store

The ever useful, money holder.  Of course you could use it for other small, flatter goodies.

 MM Store
 The pillow box is used pretty much the same was as the money holder.

 MM Store

Then my favourite, the gift bag!  I love these!  Find the right printable for your occasion, download, print, cut and adhere.  You're set and you have a totally custom look.  Add some ribbons, bling, flowers, whatever you want to pimp it up even more.


 MM Store

Keep an out in the MyMemories.com shop for new trends and great deals on printables.  A-Manda Creation, like other designers have an Etsy shop where you can get their goodies, too.  You'll be pleasantly surprised at just how inexpensive printables are.

Printables are downloads so that means you can print them over and over and keep them for future use as well!

I hope you give printables a try.  It will change the way you do parties.  That's for sure!  I have other blogs with tutorials on how to assemble them and other ways to use them to make gifts.


I've also got a board just for printables.  Click on here and it will take ya to Pinterest.  I have a board of jut my designs at MyMemories as well.  That's here.

If you have any questions, feel free to leave them here and I'll help ya out!

Thanks for stopping by!


Saturday, December 21, 2013

A Hybrid Gift From Boutique Cute Dolls


Happy holidays!  Thanks for stopping by The Cherry On Top.

Yay!!!  I'm teamed up with Boutique Cute Dolls this week.   We've got a super hybrid project for you!  Hurry!  Grab your scissors, glitter and goodies because you won't want to miss out on this one!

It's what's pictured below.  Just click on the image and download.  Then come back here and see how I put it all together and pimped it up.  Place a photo of the gift receiver in each designated space.  When the gift giving is over, get all of the tags together, fasten and give again!


Here's is ideally how it looks.


Cut out your tags, after printing them on decent card stock.  Maybe something with a nice underside or adhere them to scrap card stock that matches, like I did.


Get some of your favourite embellishers and get set!


I simply dabbed a few drops of glitter glue to get a splash of bling and dimension.


Plop on a few pearls for some serious pizazz!


Just one drop of glitter glue and a rhinestone.  Bingo!


Dress it up even by more adding ink.  Simply rub it over the area you want.


Use a deep dark brown ink for a more antique look.


Don't forget to ink up the back.


As you can see, I've punched a small hole in the right corner of each tag.  Make sure there are no embellishments in the way!


Use a small ribbon to attach the tag to your gift.


Then keep a long ribbon handy.  For this is what you can use to string them all together, like I did here, below.  You could use a ring or long pin brad.

(The printable FREEBIE is no longer available.)


You can even use it as an ornament on the tree!


Seriously, I had this baby together in about an hour and I'm super stoked with the result.  Thanks to Boutique Cute Dolls for sparing all of these gorgeous goodies!  I used a bit from several different collections to make this.

Thanks again, for checkin us out.  Pin this if ya don't mind and if you are really into FREE stuff, then take a visit to my Facebook Page, The Cherry On Top.  I've got tons of free stuff over there, everyday and not just digital stuff either!

Happy, happy holidays!!!

Wednesday, December 11, 2013

Boutique Cute Dolls and ME!!!

A very happy day to crafters and scrappers across the globe!
I made my blogging debut for Boutique Cute Dolls! What an honour working with such a talented designer and design team. 
For my first BCD entry, I talked about Boutique Cute Dolls newest release, “Always Remember” with focus on photos, aesthetic and simple observation. I chose a couple of layouts that high light just what I’m referring to. 
Janyelle has included two photos of what looks like a very special day.The one in the centre, framed, drawing your eye first. The second, taking a back seat, yet its presence also noticeable for its fun and the use of the large bracket. The photos are a huge part of this layout. Not only because we’ve all been to a wedding or have been in one ourselves, but we understand the importance of this very special event. A layout like this is a sweet reminder of the magic of marriage. Is the frame not a symbol of the rings and eternity as well? A subconscious choice? Maybe, but still excellent. Especially, with it’s centred positioning. Creating even more impact with the red flower and contrasting, green bow. Excellent!
 oscraps

Julia created this layout with emphasis on the large photo. Ah, childhood. What a time to remember and what better way than documenting through pictures. Is this not why we scrap? Coupling our memories with craft, design, art. What a fantastic way to express ourselves and through diverse media as well. Going back to the layout. The large photo is definitely an attention grabber, but the framed, contrasting, coloured picture also draws your eye. A good layout should draw the viewers eye around the page. These layouts definitely do that. Julia has chosen three focal points. The last being a super, duper stacked layer, right dab in the centre. Perfect! I told you these ladies were good!
 oscraps

Let’s look at Ellen’s layout next. Where is your eye drawn and why is it drawn there? The frame, the picture its location? Bingo! Centering our layouts is very often a preference and we may at times try to fight it, but sometimes it just turns out perfect by doing so. I love looking at pictures and cherish old pictures, too. Ellen has this same appreciation. Not only did she frame what we are supposed to be focusing on, but she also placed the photos on the apex of her layering. Wow! Have you ever even thought to analyse a layout like this? How else do you learn and become the ultimate scrapper?! Hehehe…I’ve only been scrapping over a year, but through observation and just playing around, I’ve come along way, Baby and so can you, by scanning layouts with an observing eye.
 oscraps

Of course you don’t always have to have photos. An awesome grouping with word art can have a lot of impact as well as a knockout layout with a beautiful sentiment or words of encouragement. Your work doesn’t have to be perfect or as good or better than someone else’s. What matters most is that you have fun doing it.

Here is my layout with "Always Remember" from Boutique Cute Doll (FB).  OK, the layout is pretty cool and a bit intricate, but that photo!  That photo!  My friend, Cormac is quite the photographer.  I cannot take such a good picture.  To me, this picture steals the show.  

Having fun scrapping is the most important aspect.  There are some rules and science involved, but it all comes natural when you keep doing it and you keep looking into the art of design rather than just "at" the design.

I've got a lot of links if you are interested in Boutique Cute Dolls designs.  Every image is linked up and of course, the purple high lighted words are also linked to the Oscraps store where you can find her lovely kits.

Happy scrapping!  Until we meet again.  I'll be participating in Romajo's blog 12 days of Christmas FREEBIE-A-Thon so stay tuned!

Friday, November 8, 2013

Easy, Cheap Meal Ideas

Thanks for coming to visit The Cherry On Top!

Today I'm starved and thought I might share with you some meal ideas.  One is super duper easy to whip up and you might just have all of the ingredients in your house at least most of the time.  The other is a popular Belgian meal that I thought anyone would love.

Let's start off easy!  I grabbed these pictures from the internet.  My pictures of food usually look ...not so yummy.  Hehehe...

This is pasta carbonara.  I only recently started making it, but it is so popular even with my extremely picky, Autistic, sensory sensitive children.  As you are preparing your pasta to boil, you start on the sauce.  First, fry up some bacon pieces.  Chop'm up if they aren't already, then put them to the side.  You can use many different things to make this creamy, cheesy sauce.  I've used cream cheese, herbed cream cheese and sour cream, although most recipes call for heavy cream.   Seeing how my hubby has heart complications, I go for the "Light" cream cheese or "Light" sour cream.  I also find that when I use this, the consistency comes out perfect!  No rue or starch needs to be added for the thick consistency.

Use a container of cream cheese or sour cream or even mix them up if you don't have a full one. (This is for two adults and two little ones.)  Keep the temperature low so nothing sticks to the pan and just keep on stirring slowly.  Put in peas if you like.  Add some parmesan cheese or some other kind of hard-ish cheese.  I used emmental once it was just as delicious. A touch of white cheddar might be ok, too.  Wait until it melts, throw in the bacon to warm it through and add some pepper.  You don't need salt because your bacon is salty enough.  It would probably be pretty good if you just sprinkled that, in the can parm, too. If you didn't have any other cheese.  Get the consistency you like by adding more cheese or more cream.  Ready in about 5 minutes!  Wow!


Uitsmijter is a typical Belgian meal.  I absolutely love it for so many reasons.  Though, I totally pimp it up!  American style, baby!  Hehehe...

First, wrestle up some over easy eggs.  I put my eggs in a sleek, slim skillet and cook them just until they set.  You are gonna want to have them a little oozy.  Mmmmm....Put them aside.  Use the same pan for the rest of the meal.

Second, ya get your slices of bread.  I cut mine thick.  Then I melt butter or herbed butter, even better and spread it all over both sides of my bread.  The beauty is, the bread doesn't have to be fresh because your gonna toast it up in the pan!  Awesome, right?!

When one side is finished toasting (maybe a minute or two) flip it over, add a nice thick piece of cheese and a generous slice or two of ham, rather thinly sliced, then slap those eggs on top and let it get nice and warm all the way through.

If ya wanna do an extra step, you could pop it in the oven for just a few minutes.  Your egg will cook a little more if you don't like it too, gooey and the ham will start to get crispy if you used thinner ham.

I serve mine up with a bit of rucola or a small, simple salad for some roughage.  Mayo is a nice compliment and I MUST have hot sauce.  Hehehe...

The kids are not a fan.  So, I just make them either eggs and ham or a ham and cheese sandwich, which they absolutely love.


If you need more details let me know.  I'll be happy to help!  Until the next time. Bon appetite!