Friday, January 27, 2023

Super Cute Funny and Free Printable Gnome For All Seasons and Holidays Card

Welcome to The Cherry on Top.

If you love gnomes then you are so going to love this funny and free all seasons and holidays card.  I did go with the major holidays from the U.S.  Take a close look and find the ones represented.  I wanted to come up with a cute title for the card and was surprised that it didn't take me long.  Gnome One Wants to Miss a Holiday.  I've filled the background with glitter sprinkled, fluffy clouds, quirky pine trees, corn stalks and other flowers and foliage.  There are 6 different gnomes and a ton of other extras.  Obviously, this design took me hours to make and I used some of my all time favorite Design Bundles designer's goodies.

I've also included some links to similar products that I designed for Plus (Sadly, I'm no longer designing for Plus.) that might interest you as well as a link for last week's blog that has a free digital scrapbooking kit. Read about new tutorials. Both digital and paper projects.  Find out how to get started digital scrapbooking cheap and easy.

free funny gnome cute
This printable has a white background and comes in jpg format only.

free gnome card
Click here for the download link.

Here are a few products that you can find in Plus that I designed with the same style.  Go to the search and type in things like fall gnomes, spring gnomes, gnome printables... Maybe you'll find other awesome designs.

fall scrapbook paper
Think of all the things you can design with these papers.  Cards, tags, stickers...

cute gnome paper
This is another pack of papers.  Make sure ya get both!

spring gnome printable

I love, love, love these fun printable papers, above.  I made the cutest darn junk journal style book with them and so can you.  Quickly and easily! Download, print, fold and if necessary, cut off any extra.  Below is the 12x12 paper pack.  Above, 8x11 inches.

cute gnome paper

I wanted to amp up these super cute gnome designs and this was the result.  These frames are vivid, modern and mega fun!  Turn them into stickers.  Use them in planners, scrapbook layouts, cards...

fantastic gnome frames

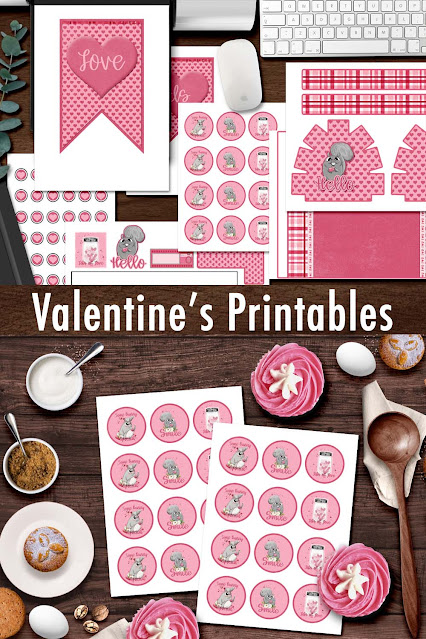
If you are a last minute kind of person, you've still got some time to put together this cute Valentine's Day mailbox. There's a step by step tutorial on the blog.

printable mailbox
The shapes are easy to cut with scissors and ya only need glue.

Here's more awesome printables.

Valentine's Day scrapbooking
I've included an Easy To Print sheet for stickers and more.

digital scrapbooking kit
This is the Love Bug digital scrapbooking kit with papers and elements.


ladybug scrapbooking
There are TWELVE digital templates that coordinate with Love Bug.  Design an album!

how to digital scrapbook
Follow our videos on how to digital scrapbook.  It's crazy easy!

I've added a few more videos to our You Tube channel.  These two new videos take you step by step on how to get started digital scrapbooking using DesignScape.  This software is free to Plus members.  It's pretty easy to use.  Especially when you've got our videos showing you how to do it.  You'll love it!  

Just think!  If you want to get started digital scrapbooking how about getting a Plus membership? Download tons of digital scrapbooking items that I and other designers put in there. Then use them with the free software.  You're not obligated to stay a member so you can give Plus, DesignScape and digital scrapbooking a test drive for just a couple of bucks.  Programs like Photoshop Elements costs over $100.  So, think of the money you'll save!

Feel free to scroll back through our award winning blog.  We're celebrating TEN years of blogging consistently this year.  Whoo hoo!  I better design something totally awesome for it.  Leave a suggestion if you've got one.  We recently posted a free scrapbook kit and template. Feel free to download and show us in our group, what you did with them.  Go digital or hybrid.  We'd love to see what you do.  I'm sure you'll find plenty of inspiration in our group.  Members post lovely inspiration all of the time and I often give away free goodies, too.

Thanks again for popping by The Cherry.  I hope you'll consider joining our newsletter and visiting our shop, Kreative Design Studio in Design Bundles.

Happy crafting!


Monday, January 9, 2023

Valentine's Day Paper Mailbox Template Tutorial

Welcome to The Cherry's Kreative Design Studio.

I've put together a pictorial for our printable mailbox template.  It's fairly simple to put together and ya don't need a lot of tools.  Scissors and glue is all you need.  Follow along and put together this really cute and fun Valentine's Mailbox.  The kids can use it for school.  You can take it to the office.  Use it as a gift box.  Put it on the mantel or in your tiered tray.

I've got this for sale in the shop and I've put it in a huge printable bundle as well.  So if you're looking for more Valentine's Day fun, you'll love it.  The bundle is great for school, scrapbooking, planners and much more. Oh!  It's all 50% off!

printable Valentine's Day template
Here's the mailbox. It is sold separately and in the bundle.

valentine's day printables
Super fun printables! Kiss stickers, toppers, a banner...

cupcake toppers
Printable stickers and or cupcake stoppers.

Valentine's Day printables
Easy to Print and Cut Valentine's Day Cards or Journal Cards

Without further ado, here's the step by step on how to put this mailbox together.  It's really not that difficult and an older child or student can probably put it together.  Maybe with a little help. Only scissors and glue are needed.  It took me about 15 minutes going really slow and careful.  As usual! (wink wink)

Download the goodies from our shop, The Cherry's Kreative Design Studio and print out the sheets you want.  There are three for the mailbox.  I'd use rigid paper for this project.  Especially, if you are using it for a box to hold something heavier. You'll love how easy the shapes are to cut.

step 1

These are the basic easy shapes you need. I used one of the designs on my door before printing.  So can you!  Cut the easy shapes.

step 2

Gently fold the tabs, apply glue to them and run the border around the door shape.  Put the border right to the edge the door shape and cut off any excess if you have it.  (Consider putting the strip over the door and body for the back closure.)

step 3

Here is what it will look like.

image

If you're not fully satisfied with the shape of your door, give it an extra hard pinch all around the edges and especially the bottom fold.  It's will hug the door better and make it more rigid.

image

You may have a little bit over.  No worries.  It's better to have a little too much than not enough.  I never know just what materials you'll use in regards to weight of paper and type of adhesive.  So, I often leave a little room to play with my templates.

image

There's more than one way to put this box together.  I might try putting both "doors" on the base first and then hug the main body over the top.  I'd leave the second strip, for the back and adhere that over the top as well.  For the front door, you'll have to do the strip around the door as shown, above.

The base is a little bigger than you need.  Again, more is better.  After you've glued the body to the base, you can cut off the extra.  You can measure where you'll glue and cut first, if you prefer.  Those two small strips are my extras.  You can use the print out base because it's the bottom, but I wanted a coordinating color and more rigidity so I grabbed a matching paper from my stash and used the base as a template.

image

Fold where indicated on the main body of the template, like shown and glue as shown, to the edge of the long part of the base.  Cut off the extra. (I LOVE this glue stick.  You can carefully take adjust with it and it dries fairly quickly.  My layers rarely move.

image

You can fold and glue the door either before or after gluing the body. Play a bit first with the parts and decide what will work best for you.  Read a bit further for an alternate idea for construction.

image

Cut out the flag.  Fold it in half.  Adhere the halves together. Use a hole punch or a pointy instrument to make a hole for the fastener if you are going to use one, like this pink brad.  If you glue it down, you won't be able to lift the arm.

step 5

Punch a hole in the body of the mailbox.  Add your flag exactly where ya like it.  (Keep that border along the door in mind.  I'd close the door first to gauge where to put your flag.) I had to pinch my brad really tight to make the arm more rigid.  If my hole was smaller I might not of needed to do this.

step 6


image

In the download for the mailbox are extra images.  You can customize the mailbox to your liking by adding any of the images or perhaps something from your own stash.  You could add it digitally and then print, like I did or add it last.  One of the extras has a space for a name or sentiment.

printable alternative

A super handy tip for paper crafting is using a dot of glue at the tip of a rigid scrap.  Gently and carefully slide the glued tip under the spot that needs some extra adherence.  I needed it around some of the plaid edging.  Notice how it is a little raised in some places.  If there's a little room, it might do this.  If you applied this strip over the top of the body and the door shape, it might come out better.  You can only do this for the back door unless you don't want the front door to open.

gluing tips

See how much better?

image

Another addition you can add to the mailbox is a handle.  This is ideal if the kids are taking it to school or if you're using it as a box.  It is super easy!  Take the extra strip from an extra you've got.  Cut it just how you like it and fold it just like I did below, here.  You can either glue it to the top of your box or use more of those brads that you used for the flag for cohesion.  Keep that door in mind, again when placing the handle.

image

I often use a tiny glue dot to keep a door "closed".  It's so small, that you can still open the door. A tiny dot of glue will do as well. If you've never tried this before, do a test on some scrap paper.

glue dots

Here are some images of the finished product.


Take your time and have fun with the cute project for Valentine's Day, Romantic occasion or any day.

Feel free to peruse our blog.  It's full of crafty projects, scrapbooking inspiration, hybrid projects, recipes, printables, freebies of all kinds and so much more.


Friday, January 6, 2023

Books N' Coffee Vintage Watercolor Scrapbooking Craft Fair Bundle Inspiration and Freebies

Welcome to The Cherry On Top.

Today, I've got a new Bundle in the shop and a throw back bundle, too.  Peruse our scrapbooking inspiration and other crafty design ideas.  Scroll down for a fun freebie that coordinates with our new Books N' Coffee bundle.  I've put the shop on a Winter Sale at 50% off.  So you can save a few bucks in these rough times.

watercolor vintage scrapbooking

The bundle has a pack of textured solid papers.  A pack of 12x12 inch design papers.  8x11 inch Easy-To-Print papers.  10 lovely journal cards and a page of sticker sheets.  I've also got each sticker separate.  (You can always use the marquee tool to ditch the white outline of stickers. Insert winking emoji. hehehe...)

books and coffee scrapbooking

vintage scrapbooking stickers


solid texture digital paper


scrapbooking elements for sublimation
Scrapbooking goodies can be used for so many craft projects.

pretty design papers
These are the 12x12 inch pack.

watercolor sublimation design
Design home decor quickly, easily and beautifully.

easy to print paper
Go hybrid with the Easy-To-Print papers. Perfect for Junk Journals

designs for planners
I'll be using these pretty designs in my agenda.  Use them in your planners, too.


craft fair bundle
The Big Bundle!

craft fair
Scrapbook beautiful page layouts quickly and easily with templates.

digital scrapbook paper
There are nearly 2 dozen papers in this bundle.

Remember this big project of mine?  I took a digital scrapbooking page (the one on the right), ripped each layer, then took each layer and put it on an 8x11 inch document, cut each layer (OMG) and then adhered it, piece by piece to match my digital page.  I call it the perfect page kit.  You can check out the step by step tutorial here and I've also made some similar designs for Plus in Design Bundles.

mix your hybrid scrapbooking

cat scrapbooking

Here's yet another fun hybrid project.  I designed a cute mini scrapbook from journal cards.

digital templates
Gorgeous digital scrapbooking templates.


craft fair bundle
Page inspiration with the bundle and collection.


digital template

digital template

If the Craft Fair bundle looks familiar to you.  It's because it is still in my shop at GingerScraps.  That pack at GingerScraps has tons of elements in it.  I paired up with Art & Life Scraps for that collaboration. Be sure to read the details for the bundle to see exactly what ya get.


free scrapbook sample
Here's today's free mini from the new bundle.

Thanks so much for checking out The Cherry.  Feel free to visit the side bar for out social spots.  Scrappy sisters are posting layouts and freebies everyday in our group for you to get inspired.  You'll love it there.

Remember to find time to do the things you love.

Happy crafting!