Welcome to The Cherry On Top's, Hybrid Hipsters.
I've got Clever Monkey Graphics back on the stage and our gorgeous and sweet kitty, Pluisje. (I know, right?! It would be pronounced..pl-ow-sh-ya) He is by far, THE most photo friendly kitty we've had so. Our boys just love him to pieces and they often get some great shots of him. He loves the camera! What can I say? Just look at that face. On a side note, both of my boys have Autism and we experimented with all kinds of pets and found cats, by far the best pets for both of our boys. If you want to read more about pets and Autism, check out this blog. It's an oldie, but a goodie.
I'm not that much into the glue and scissors any more. Especially, now that I've been struck down with arthritis. Grrrr....But an accordion album, flip book, match book or cornered ring album is put together so quickly and easily, it's totally worth the time which, by the way, can realistically be whipped up in around 30 minutes.
So let me walk you through a few basic and towards the end, I've got several more examples with blog links that lead to other tutorials and ideas for you. Maybe even a few template freebies, that might be still up and running.
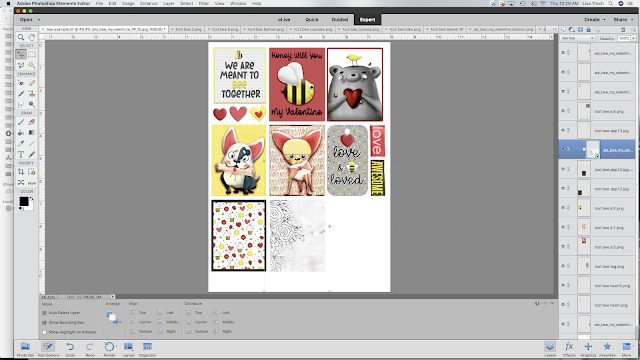
I always design my cards in an 8x11 format for easy printing. (Don't forget I live in Europe.) Then I turn the image so that I can get more cards on one piece of paper. This way you can get 6 instead of four and you don't have to work in an awkward position.
If you chose a white background, then all you have to do is duplicate the background and size it to the card shape and size you want. I kept mine with straight corners this time instead of rounded ones. It certainly is easier to cut. You could do an inside layer with a rounded corner because you don't have to cut there unless, you are going to cut and layer traditionally.
So keep shaping and duplicating that background for as many cards and photo spots you want or even for as many extra layers you'll want with that same shape. I've put a few extra layers or matting on some of my cards. It's a great way to provide more interest and contrast or even to help balance out colors.
It is also SO much easier to crop in your photos this way rather than trying to resize it just the way you need. Just use those corners so you don't distort the image or papers.
Use word art, papers and any elements or alpha from your collection. Working with collections are a huge time saver. If you have to go through all of your stash to match everything up just right, it could take a long time and the chances of it all coming together perfectly are pretty slim, too. Collections keep your entire album cohesive throughout. I totally recommend them.
Once you've layered up your cards just the way you want, check your print settings, choose a paper with some gloss or even sticker paper for the best results, cut and choose your method of binding. There are SO many choices. If you see I've missed an obvious format, link a sister up in the comments. Scroll down to get to the blog with the format you want to use for your album, for the full step by step tutorial. It may be easier than you think.
Just look how adorable!
I LOVE Tracey's journal cards. You can do so much with them.
How's this for a selection of kitties?
If you want to take Tracey's goodies for a test drive, get this freebie from her group.
Here are some more accordion ideas for you. The first one is digital! Easier on your hands. That's for sure. Click on the image to learn more.
I used our Puurfect kit for this tiny album. It's also very easy to put together. Click on the image for the full tutorial.
Accordions like this are SO easy to make. This image is also linked up.
For this project I simply adhered my accordion to a box. It cleans up very neatly. Yip! There's a tutorial for this, too.
I turned an old bbq match box into yet another fun accordion mini and it's stored easily as well. If you love Graphic 45 and minis, check out the full tutorial.
I'm always looking for other ways to use conventional items. For this project, I used journal cards as pockets. A totally different idea for you. Find out more on that blog by clicking on the image.
I've got one more last example for you and it is SO fun. I gathered all kinds of crazy pictures and used a fabulous scrap collection. Yet another full tutorial for you to enjoy. I hope you get a good laugh from the pictures, too.If you missed our latest releases, here's a quick look for you. Feel free to scroll back to other blogs to see more.
The Bee My Valentine Collection is still just $5. That's for the kit AND a pack of templates.
Then there's the What's Cook'n Bundle. It too is only $5 for a kit and templates and quite the hot seller at the moment. Thanks if you were a part of that.
And here is the re release of Revel In Ribbons from yesterday. It's only $2 throughout the weekend.
Don't forget $2 Tuesdays! See what you may have missed?!
Thanks so much for hanging with The Cherries. We love when you do that.
If you are looking for something specific, needing help with scrap related issues or just want to hang with us, then join us in the group. Show us your latest picture you want to scrap or your new puppy. We'd love to see what you are up to.


