Showing posts with label free printable. Show all posts

Friday, July 10, 2026

The Best Travel Food With a Free Printable List

Welcome to The Cherry On Top.

Let's dive into great travel food ideas. Whether you're going on a short trip or a long trip or if you're taking your car or going with public transport, packing the perfect snacks can make your trip a lot more enjoyable. 

cheese salad
A delicious cheese salad. Cubed cheese, cuc, radish, scallion, herbs, s&p, oil & vinegar.

I can't even begin to emphasize how happy I was that I packed such great snacks for my travel for the many reason which I will share with you.

When traveling (in Europe) or other strange places, you will learn that different places close at different times. Sometimes they close very early. Sometimes they close for hours over lunch. Occasionally, there will be a three day holiday where even the cafes are closed! Ha! I have to laugh out loud as I type this because that is exactly what happened to me in Sweden. I was in Scandinavia for the longest day of the year which is apparently a 3 day celebration and very, very big deal.

Getting creative with time restraints and no refrigeration.

At least I found a small grocer that happened to be open for 4 more minutes. LOL! It felt like a game show! I had to literally run through this strange shop and find a handful of items that would get me through the next few days. I just so happened to be staying in a BnB with no kitchen and no refrigerator which made the entire situation even more challenging. If you are interested, I bought the above items. Grapefruit, radishes, cucumber, sliced cheese, heavy full grain bread (a small pack), yogurt and beer. I just had to deal with it not being cold. 

FYI, the sliced cheese was fine over several days. All of it was and it was far from cool in my room. It was very stuffy and not even a fan was provided. That's for another blog I'll dedicate to BnB's. Speaking of hot and not totally off the subject, I found that watery fruit and veg are a really awesome way to stay hydrated. The grapefruit was fab as was the cucumber. Also grapes and watermelon. I was totally relishing as I was munching on my watermelon in a very hot and sticky German train car.

printable travel food chart
Click on the above image, download and print.

Sitting on my desk, right under my nose, is my paper pack of bamboo fork and knife (compostable). I have no idea where the heck they came from, but I saw it on the island in the kitchen, right before I left and put them in my small backpack. They didn't take up any space and they didn't weigh a thing. They came in handy more than once and I knew I could just throw them out if they got nasty, which they did not. I would definitely recommend this over heavy, bulky metalware. 

I'm very disappointed that I didn't take pictures of my power balls or my naked bars. I will remedy that the next time I make them. They are insanely easy to make. They would be the perfect summer project for the little ones. It's that easy. Never mind the name of these nut bars. They are ideal for travel.

I made a pretty big batch of naked bars for my trip. Nuts, nut bars, power balls are all pretty healthy. Especially if you make them yourself and only add healthy ingredients like organic nuts and fruit and local honey. They really are that simple. Just a variety of nuts, dried fruit and honey, maple syrup or agave syrup. I'll definitely come back with a few recipes. I'm sure I Pinned some if you want to check those out in the mean time.


I boiled 6 eggs before I left and put them in a smaller, rigid plastic box. This turned out to be a great idea. Having one, small plastic box that you can use over and over kept my smaller, soft items safe like a piece of expensive brie or even part of a restaurant meal that I couldn't finish.

Jerky, dried sausages and Slim Jim's are perfect for travel. They will definitely last as long as your trip. I was so grateful for my jerky and slim dried sausages. When I finished the ones I brought from home, I bought some more in Norway. Paul och Thom's Texas Bull Classics were amazing.

Darn Ai. They are not like the wider, cut sausage shown, but those packaged.

My hubs makes jerky and it is addictive! As far as I can see, it's fairly easy. Get a good, grass fed cut of meat from your local butcher, slice thin, marinade and throw in the dehydrator.


Cakes and breads, in my opinion are not all that ideal. They crumble and if you use eggs and butter, milk, etc it'll only last ya a day or two. You'd also have to put it in a plastic, protective box that will take up precious space. This is my husband's bread pudding with extra raisins and cranberries. It's a good rigid cake which would be better for traveling.

bread pudding

Fresh fruit and veg is ideal for travel. Choose raw firm items like celery and carrot sticks. I left my cucumber whole and sliced it (with my travel knife) when I needed it. You could dice up a melon and stick it in a zip lock, but watch out for squishing if you're putting it in a backpack.

raw fruit and veg for travel food

I love the different sized bags. These are actually ready for my freezer, but I wanted to show you how you can store your sturdy fruit and veg like this instead of a box that's bulky and not as flexible. When space matters, go with the zip locks. I was very nervous about putting liquidy fruit like oranges and grapes in my back pack. I left them on top and kept my eyes out for leaks.

zip locked fruit for travel

When traveling, pop into a fresh baker and get some yummies for on the train.

grab as you go travel food
Grab as you go whenever you can. Eating local food is a super way to dive into the culture.

How fun is it to go into a different country's grocery stores? It's one of my all time favorite things to do when traveling to a "new to me" country. I grabbed these sour cream and onion, bite sized rice cakes and granola bars in Denmark. They were pretty good and a fairly healthy choice. They lasted much better than my pretzels. The twisty pretzels are definitely better than the sticks. I learned!

travel food

We had a quick pause when our train ride from Bergen to Geilo had a longer stop in Flam. I ran out and grabbed some huge hot dogs that they were selling in the station. We were so hungry. The train was nearly empty. So it was no problem to put up our feet and enjoy our dogs and the amazing scenery.

eat as you go to save luggage space

So what did I miss? Let me know in the comments what your favorite travel snacks are.

I hope this list helps you out. Enjoy your next adventure and thanks for hanging with The Cherry.


Sunday, July 6, 2025

Eggplant a Beautiful and Delicious Ornamental Plant Some Recipes and Free Printables

Welcome to The Cherry On Top.

If you follow me, you'll know I've been gardening for several years, but not so well. I'm a lazy gardener and I'm limited in space as well. My success are few, but since I've had some pretty darn good luck with eggplants, I thought I'd share my experience with ya.

eggplant recipes

That large potted plant was my eggplant from last year. I find the plant so pretty. The huge green leaves and lovely, purple flowers. I bet you could use it as an ornamental plant. If you don't like the fruit, give it to your neighbors, feed it to the chickens or sell them.

Light and water is a must and keep your eyes out for slugs, too.

growing eggplant

Eggplant is a really mild tasting vegetable. I'm the only one in the family that likes it, but I have discovered a few ways to get the rest of the gang to eat it. Slice it, top it with tomato sauce and shredded cheese and bake for mini pizzas. Try it with squash, too. 

Another way to use eggplant for those not a fan is to chop it small, add it to a sauce like spaghetti. No one knows it's in there! Isn't that great?! The longer you cook the sauce, the better. I do the same with mushrooms.

growing eggplant

I had success with both potted and in the ground, in my greenhouse. Potted and in the greenhouse was not a good idea. When it got a bit hotter, it got moldy. My yield wasn't quite as good either with the potted plant, but that might be ok if you really don't want too much. Of course, you could freeze or can them, I think. I don't do too much freezing because I have a tiny freezer and I still find canning a bit daunting. I'll can and put in the fridge, but that's as far as I got. Call me chicken!

Pictured above is a small eggplant from this year's, gorgeous plant. I've cut 4 so far and it's not even July! I'm super pleased that I can harvest something already. You can see the rest of the garden still needs a lot of time. 

Here are just a few links for delicious recipes you can make using eggplant. Feel free to peruse Pinterest or our Food Board there for more recipes.

eggplant hummus
eggplant hummus

eggplant recipes
moussaka

pasta with eggplant
pasta with eggplant
(Add some ground lamb or hamburger if you want a meat version.)

eggplant roll ups
eggplant rolls
(This recipe looks amazing! I've not made it yet.)

Pinterest is full of awesome recipe inspiration. It's my go to spot when menu planning.

Feel free to download some designs I designed for Design Bundles Plus. There's a huge collection there.


Some fun, free garden word art.

garden sticker freebie
Download these stickers for free.


free recipe card
Download the free recipe card.

If you like this kind of thing, you may also like our huge series of free chicken designs.

free chicken designs

I also gave away this entire cooking collection.

free cooking collection

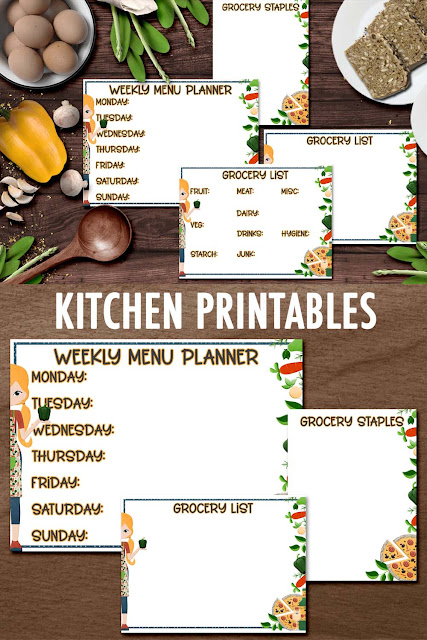
This blog is a must if you're still not menu planning.

free kitchen printables

Feel free to share any garden tips you've got or recipes. I love to hear from you.

Happy gardening!


Friday, February 17, 2023

How To Craft a Digital Tag Tutorial and Free Summer Tag Printable

Awesome designs from the Plus Club at Design Bundles

Welcome, crafters!

As promised, I've got a full pictorial for you on how to design a digital gift tag in PhotoShop Elements as well as a delicious free printable with mason jar crafts.  Check out the step by step tutorial and give designing your own digital tag a try and or download our lovely free printable sheet and get crafty, today.

In last weeks blog, I gave dozens of ideas and craft inspiration including mason jars.  Mason jars are so popular and the ideas and concepts that you can team up with them are really, truly fantastic. I encourage you to pop over to that blog and check it out. I'm sure you'll find something you will love.

Let's jump right into the tutorial.  If you don't have PhotoShop elements, it will still help with PhotoShop and you could just use the ideas and techniques in your own software or even apply them to a traditional style with paper and glue.

If you are a Plus member, it will also be similar.  Use DesignScape for quick and easy scrapbooking and designing.

First, grab a tag shape you like. Of course, you can find awesome ones like the one I used, in the shop. The choices are crazy. Take a visit and see which ones you prefer. I chose a basic yet extensive bundle that might interest you.


Your next step is to clip in your chosen paper.  Drag it over the layer you want covered and right clip/clipping mask in the layers panel.


Third step, slide in any embellishments or digital elements you'd like on your tag and size to perfection by using the corners of the box around your element. It's really important that you use the corners.  Otherwise, you will distort the image.


This next step is optional. I often like to add a stroke or outline when I want more interest, contrast, a sticker effect or if it just needs to stand out more. You'll find strokes under effects. Black is the default color, but it's really easy to change up.  


Go to the layers panel, quickly double click the tiny fx symbol and this box will pop up. Click on the black box and you'll be given the opportunity to choose your own color either with the program's or you can use the color picker and choose a color from your image. I always choose that when possible.


There we go! Another extra step if you are interested is adding a shadow. By adding a shadow you'll give your element lift.  It will make it look like you adhered it to the tag. I just love this realistic effect.  It also lends a touch of contrast, which makes it look great, too.  See the same menu.  Closer to the top are the drop shadow options and boy are there several. Play with the size, distance, opacity and even the color if you like.  Tip: The closer an item is to the page, the smaller and more intense the shadow should be.

Go ahead and merge layers if you want. It might make it easier for you if you're going to add a lot more steps, which I intend to do.  Just note that you cannot undo this once you get further into the process.

I'm going to show you a really cool way to get the perfect sized shape under an existing shape without having to deal with distortions by adjusting the size. Let's give an outline to our tag.  Just like I showed you, above.

Once you've added the stroke in the size you want, duplicate that layer. Then go to your original layer (the one on the bottom) and right click and simply layer.  The little fx will disappear and now you can clip in whatever paper you want. I LOVE this tip and use it all of the time. Especially, for word art.

The yellow paper makes a wonderful contrast to the lime green. Go ahead and clip it in like I explained earlier.


You may want to shadow the second layer, now. That's under effects. Explained above.


Just look at our darling tag! We are going to crop it and then do another one.  Look at the left tool bar and note the highlighted crop tool. Use your mouse, box your element giving it a little bit of room all around and then click the check mark.

You can either make your elements invisible by clicking on the eye in the layers panel or you can delete it AFTER SAVING IT. PSE does not automatically save. I highly recommend saving every few minutes. You can duplicate the bottom or background layer OR you can add a new layer by clicking on the tiny piece of corner folded white paper at the top of the layers panel and then paint bucket whatever color you want it to be. Size it how you want, similar to what I did, below.

Here's another more advanced tip. I didn't think there was enough contrast with the green so I clicked on the circle with two colors at the top of the layers panel and chose levels. Here I can adjust the color exactly how I want. You can see in the pop up menu, that there are a plethora of choices.

Toggle to perfection and then create a clipping mask with it over the exact layer.  This way you won't recolor the entire image.


Shadow the new layer exactly as you did the second. Either by choosing the same shadow or by copying the layer style from the second layer and applying or pasting it to the new layer with the right and left click respectively.


Don't forget to delete your background or make it invisible unless you're printing on white paper.

Now, you know how to design and customize a wonderful tag and you've learned so many useful tips along the way.  Shadowing, adding strokes, changing the color of both and some serious personalizing of color by using levels.

Consider printing front and back or print them separately and hang them individually, but all together on your mason jar or gift of choice.  You've got a lovely blank card to type or write in a recipe or word of thanks or encouragement.

Use a natural kind of string or a sassy bow to go around the jar for further glam bam, if you like.

Feel free to share your projects with us in our craft-a-licious forum.  We'd love to see you there!


Saturday, February 13, 2021

Free Printable and Helpful Tutorial On How To Scrap Hybrid Style

Welcome to The Cherry On Top's Hybrid Saturday.

As you may have seen from yesterday's blog, we are celebrating my birthday.  There are coupons, awesome new collections, pages and pages of gorgeous scrapbooking layouts and of course, free stuff.  A lot of free stuff!  

Today, I'm showing you how to quickly design a sticker sheet to print and use with our collection, Bee My Valentine that we've designed with Art & Life Scraps.

Grab the free printable in our group.

Save $3 on nearly everything in our GingerScraps Shop.

So if you are a hybrid or traditional scrapper, then you too will love digital products like the ones we sell.  I'll show ya how you can quickly design a sheet to print and use on your traditional projects.

I'm using PhotoShop elements.  It's a super easy program to use.  It's not very expensive and it's a one time fee.  You do not need to subscribe and pay monthly. (Yet!)

Open a blank document in a printable size.  (I have a custom size of 8x11 so most people around the world can easily print our stuffs.) Slide in an element you like from the collection.  Square ones are super, super easy to cut after finishing.  If you don't have a cutting machine, it's really easy this way.  Size it to how you want it.


I simply dragged in my journal cards, tag and filled in the odd spots with smaller embellishments from the collection and sized them all to fit neatly on the page and to be cohesive on my project.


I want more journal cards.  Let me show ya how to design them really simply, next.  Go to your layers bar and duplicate one of the journal cards.  This way it is the exact same size as the others.


Then drag in a paper from the collection and put it on the layer over the card you just duplicated.  Click on "create clipping mask".  This will crop the paper perfectly over what is underneath of it.  If you've got a design paper, you may want to bump and move it around so it fits just the way you like.


You may want to back up or mat your card for more contrast and interest.  You could add a stroke by going to the "effects" tool or you could slide in a coordinating solid paper and position it to fit under your card.


Duplicate the card again, in the size you need and repeat the process.  I took one of Cindy's graphics, placed it over the card layer and cropped it to fit perfectly on it, then again, matted the card.


Just another card layer and some fun elements from the collection.  Don't forget to shadow!  They make your embellishments and papers pop. You can find the shadows under the "effects' tools.

You are ready to print!


You could merge everything all together and save it as jpg.  Now you have no more layers so you won't be able to make corrections.  It's best to save a layered copy in either psd or tif (tif is smaller) and another one in a merged jpg format.  Jpg formats are much smaller and will save space on your computer.


Here's a look at our collection.  There is so much in here, including a pack of templates from yours truly.  I certainly advise scrolling back to yesterday's blog and find out about all of the other freebies on offer and check out the fabulous layouts from the team.


Take advantage of this awesome deal throughout the week and thanks so much for checking out The Cherry!