Showing posts with label ideas. Show all posts

Wednesday, December 6, 2017

10 Fabulous Christmas Paper Crafts

Welcome to The Cherry On Top.

I've got a different kind of blog, today.  Like many of you, I'm also a huge fan of Scrapbook.com.  I've had my gallery there for many years now and way before I started designing myself.  You can shop, get inspiration, tutorials and super ideas for your crafty projects.  Don't forget about gift ideas.  Whether you plan on making your gifts or giving a gift card or goody for your scrappy friends and family.

I chose just a few projects that I thought were fairly simple to replicate, lift or aspire to craft or scrap.  Personally, I'm a bit of a tight budget scrapper.  I rarely spend more than a few hours on a project as well.  I'm always on the hunt for simple, inexpensive and quicker projects.

I've taken each one of these projects, enlarged the image and I'll quickly walk ya through each one, giving ideas, alternatives and of course, links to help you even further.

 scrapbook.com
How absolutely fabulous is this light, bright page?!  It may have felt lost if that tree weren't backed up on this simple, design paper and where the journaling is, it is plain.  Otherwise, the journaling wouldn't pop like it does now.  Consider washi, word strips, paper strips and keep building up to your desired look.  Picture placement is pretty versatile with this kind of base.  Move a bit left, right up or down and it will still look great.  Consider a mat under your pic if you think it looks too busy or your photo is not popping enough.

 scrapbook.com

I love making my own cards.  I've got several blogs dedicating to making cards from older cards.  I'll share those link with you later in the blog.

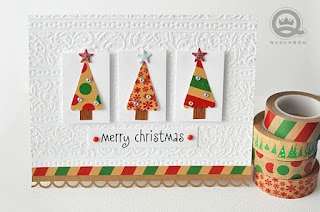
Look at the simplicity here.  A large, design background, a plain mat and more design on top of that.  Check out your washi stash or use up scraps from your favourite Christmas paper.  Tiny patterns or plain will give you the best results.


 scrapbook.com

Wow!  Wow!  I dig the not so traditional colour palette with this next one.  Think of all of the scraps you might be able to use up and unlike the first page, you can go a bit more crazy with your strips, word strips, washi...It doesn't have to be as calculated too, so you can save time in that department.  I'd highly recommend matting your photos so they stand out on what might be a busy background.


 scrapbook.com

Inspired yet?  I sure am!  I really do love traditional scrap pages and this one epitomises one.  Don'cha just love using large photos?  Especially, when they are this nice.  Even the dog got in the shot.  Awe!

This is really a super example of how to use those papers with a large design on them.  I'm not so great at finding the right layout with them.  This page is a great example on how to use large design paper.  Staring with the largest for the base and then layering up with smaller design paper for a contrast.  The border usage is great, too.  Simple clusters at opposing corners and you're scrapped.


 scrapbook.com

More fabulousness?  I'll say!  I've got a few blogs dedicated to top hats.  Tutorials and free templates so you can make your own.  Think of any occasion, not just Christmas.


 scrapbook.com

Here are a few of the hats I designed.  You don't need a lot of supplies at all and you can totally let your creativity run wild.


 top hat tutorial and free template

 top hat tutorial and free template

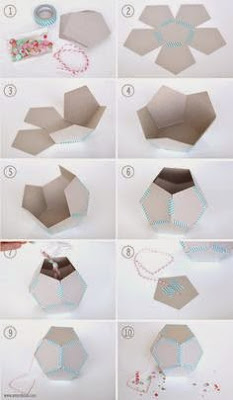
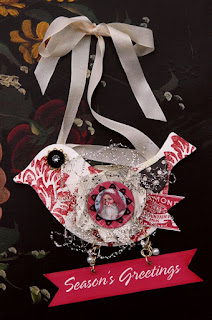
This ornament would be a great gift idea.  You could use it as a tag as well.  Consider using a photo in the center for an alternative idea.  Just a bit of your scrap paper and few small embellishments and you'll have crafted up something super.

The basic concept is great.  Think of other shapes that would look good.  How about a tree or gift box?
scrapbook.com

This page is so super versatile.  You could place your precious pics in anyone of those spots.  Use design paper with a smaller print for the prettiest results.  Just a couple of small embellishments and really love the pocket idea.  Consider using journaling in place of one of the squares?
 scrapbook.com

This card is the perfect example of how just the right embellishments and going large can make scrapping look totally awesome and not take up too much of your craft time.  A couple of layers and really fab embellishments, and your card is nearly ready.  The scalloping and stitching is the cherry on top.


 scrapbook.com

I'm leaving you with two of my own Christmasy creations.  This is my invitation this year.  I will make a confession as well as give you an idea.  This started off as a quick page, where you simply place a photo in the spot.  In place of the photo, I've layered up a few papers and added my important information.  In another Christmas blog post, I re-scrapped a few pages for a nifty up cycled gift idea.  You can click here to see it.  Consider scrapping your invitations either digitally, traditionally or hybrid. It will certainly save you time if time is an issue.


Design your own cards, save money and use up those lovely scraps.  Click here to see another blog from The Cherry and use those scraps to make something gorgeous this Christmas.
 re cycle Christmas cards


I'll leave you with a few great products that will make your craft time even more enjoyable.

There are holiday deals, gift guides and FREEBIES at Scrapbook.com, too!  If you want to check out the gallery, click here.

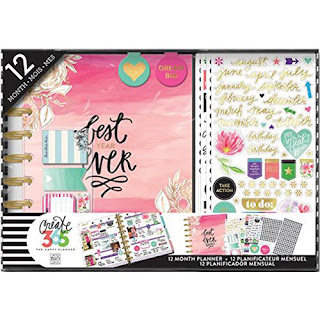
Have you got someone on your list that could use a planner?  This one from Create 365 is really awesome AND it's in the clearance section.
 scrapbook.com
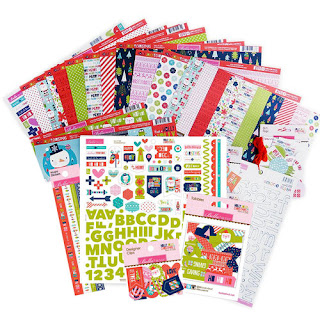
If you're like me and love bang for your buck, THIS  is it!  An entire collection from Bella Boulevard and it's on sale for just 14,99.  It was nearly 50!  There are several collections at this super price.  Find the one you like best.
 scrapbook.com
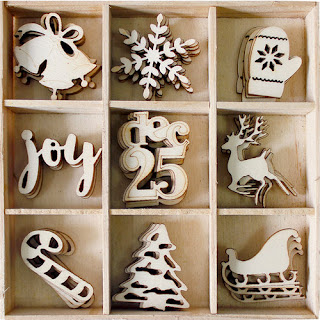
BoBunny is definitely a favourite of mine.  They've got these nifty wood shapes for under $5.  Paint them to match, spray, glitter or bling them up.  I've got a lot of these wood shapes and they are light and small so you can use them in most projects. Did you see how I used them in my top hat from Graphic 45?

 scrapbook.com

I sure hope we've given you ideas and inspired you to get crafty.

Thanks for checking out The Cherry.


Wednesday, May 13, 2015

Insanely Fast, Easy and No Cost Minecraft Piñata

Welcome to a DIY edition of The Cherry On Top.

Piñatas are not popular in Europe, so I'm finding. I want to bring it to life, here. One of the best things about a party is the piñata. I have childhood memories of them and they are very fond. My kid saw the concept on a TV show and said he wanted one for his birthday. Since he is a fan of Minecraft, I had to go for the Creeper Piñata.

Hit up the Party Ideas board on Pinterest for more piñata ideas. Here are just a couple more. I've already made a template for this one! Be looking for a future blog.

party ideas

Pinterets

I fist checked out to see if I could purchase one here, in Belgium and found a store in the area that sold them for 25 Euros, unfilled. So at least another 15 Euros or so to fill it and I'm talking about 40 Euros or just under $45 for something that was going to battered and broken and I really don't think the kids care all that much waht is in the piñata besides the candy.  Hmmm...

Hitting up Pinterest first, I found some cool ideas, researched the basic construction, glue recipe and came up with a much easier, faster and cheaper way to make this Creeper (from Minecraft) piñata.  I want to credit The Coupon Closet for the spark. I took their idea and made it a heck of a lot easier.

This piñata took me under two hours to make from start to finish and with a lot of interruptions in-between.


Here is what you will need:

2 paper bags, whatever size you want. 
coloured paper (greens and black for a creeper) for the outside
paper cutter or scissors
light weight candy
light weight toys or other stuffers if you choose
balloons and confetti
1/2 cup flour
3/4 cup water
pastry brush

I keep all of these lovely paper bags from retailers. They come in so handy. I found two nice sized, bigger bags that fit perfectly into one another. They really were not all that rigid as you can tell from the image. They were not coated and there was no plastic in any component. In the beginning I was worried that it wasn't going to hold the stuff inside. I simply folded inward, the handles for the inside bag.


Then I did a forehead slap and thought, I'll put all kinds of light stuff in there to keep the weight of the piñata down. Take a look at all of the light weight goodies I put in there. I took all of the packaging off that I could as well.

I recycled stuff that my boys didn't like or use or things we had doubles of. FYI, those little parachute dudes were a huge hit for the boys of this party. They were between the ages of 7-11. Glow bracelets, whoopee cushions (always a hit), Pez dispenser filled...Think light as possible.

Here's a link to a blog that has a list of non candy ideas for piñatas.

pinata stuffers

I never buy candy. I don't have to because everyone else does. I used candy that we already had in the cabinet. I chose the lightest candy from the bunch and still had a ton left over. There was a sweet variety of spek which are those pink marshmallows you see, chocolate cents, a few lollies and just a couple of other small, light candy to help fill up the bag, balloons and confetti. All seriously light things. You could always put in coupons, gift cards even a couple of dollars or paper money. I thought a 5 Euro bill would be cool or a coupon for a night's stay at our place.


After filling it, I checked to make sure the bag still fit nicely inside each other.  No problem!  Lift up your piñata by the handles and make sure they are going to hold all of your goodies.  You could consider extra reinforcement on them.  I didn't need any.


I hit up my colored paper stash and grabbed green and black as well as my paper cutter and scissors. I folded standard a4 sized paper in fours and cut, but the size really doesn't matter because you have to overlap anyway.  


Then made the glue of flour of water. I used a half a cup of flour and 3/4 cup water. I just blended until I had a decent consistency having no idea at all of just what a decent consistency was. Hehehe...Not too thick. Not too thin. I still had left over.


I grabbed my ever trusty, silicone brush and started the work of applying the paper. The bottom is where I started. It also probably doesn't matter where you start. This dried really fast. I made this piñata on our granite island and nothing stuck, but just keep that in mind as your gluing.


Over lapping is important. Just about a half an inch is ideal. You'll see as you go what is best. Try not to let it get too wet either. Remember, your bags are also from paper.


Work your way around the bag until all of the outside is covered. I continually checked to make sure my piñata was not sticking to the counter top and the spaz I am, kept wiping off the area where I was applying the glue so the clean up was a breeze.


I used two square for the eyes, a longer rectangle for the...the mouth thingy and then two more skinnier rectangles for those side bits. There he was in his green glory. Mama's creeper!

Now, for the big day. Would I be able to blog about this piñata or was it going to be a bust?

The guy jumping there is my oldest and the birthday boy. He was just a little excited. As you can see, we started off with this plastic golf club because I really thought this thing wasn't going to last.


After over a dozen strikes and still no wreckage, we went for a bamboo stick. Hmmm...Still no breakage.


We got an even bigger stick AND took the blind fold off! Funny how one of the boys had on a creeper T-shirt!


Finally!  LOL!  I could not believe how rigid my piñata was! I may have only needed the one bag or maybe because the boys were still kind of small, but keep this in your thoughts, too.


It took them a while to break it and they had an absolute blast with the entire event. Tip: I had bags for them to put their goodies in. Think about doing this at one of your parties and remember, piñatas are not just for kids.


I hope this blog has helped. We've got plenty more party ideas on our Pinterest. This blog also contains ideas for Lego parties. Head up to the top of the blog and look for the search window on the right because we've got a few blogs over Lego. Here's another.

Thanks for your visit and good luck with that piñata!