Showing posts with label card making tutorial. Show all posts

Sunday, December 8, 2019

How to Design a 4x4 Digital Card With Free Template and Free Printable Card

Welcome to another special edition of The Cherry On Top.

I've got a super crafty hybrid project for you.  It's one that you'll probably use over and over.  I do have several on this subject, but this time I'm specifically explaining how to make the single sheet 4x4 inch card with outside and inside.  I love that!  Only one piece of paper.  Just print, snip, fold and you're set.  I've also got a few free templates that will help make gift giving hands on, cheap and fun.  There is a free printable card and I've posted more freebies on yesterday's and Friday's blog along with a very valuable coupon code to save big time in both of our shops.

I saw a few pages around DigiLand with Clever Monkey Graphics kit, Rustic Plaid Christmas and I had to have it.  I love plaid and the cozy feel of this kit.  Every year or so, I design my mom a frame cluster for on her refrigerator.  That way she can always see us.  It's very, very easy to do.  I do have a full process tutorial on a previous blog.  Check it out, here.

Tracey is giving Cherry fans their very own coupon code to save BIG time on this bundle.  Eek!  Use code: TCOTrusticplaid and get 50% off the bundleThis deal expires on December 18th at the end of the day so take advantage, now!

I love getting multiple birds with one stone so I designed my mom's frame cluster and stuck in on a few papers and added a nifty snowy overlay from Aimee Harrison.  I used my eraser tool to ditch the snow that was covering up key parts of the photo.  So easy!


Then I designed two different holiday cards with the kit and cluster.  This is a basic card I designed.  You could use it as desk top, too.  The text will also be used for my other card.  Keep scrolling to see how.  Tracey from Clever Monkey Graphics has given us permission to download this card.  Sweet, eh?


 Rustic Plaid Christmas


I've made a video with a tutorial if you'd rather that.  It explains how to design this 4x4 card, step by step and it only takes 7 minutes so you know it's really fast.

This is what my card looks like when printed out...

I used Tracey's alphabet that comes with the collection.  Put your grid on to get the letters just perfect.  Find it on the tool bar across the top of your screen under "Tools".


So you've got your perfectly square page all ready and another page with whatever journaling or whatever you want for the inside of the card.

The next thing you need to do is place the two on a new document.  I use 8x11 so most people around the world can use it in their printers.

I designed myself a template specifically to make these kinds of cards since I make them so often and I'm sharing it with you today, too.  Keep scrolling to get this free template and another one.


Slide both of your pages onto the template as shown above.  Get them just right in the box by adjusting the size and positioning them just right.  It's very important to get your text right.  If it's already on a page, like mine, it's really easy to make it fit in the box.  You also have to change the text both vertically AND horizontally as shown.  You can't put it normally or it won't show up right in the card.

Another VERY important thing to remember is to either delete the squares I've provided or click on the eye to make them invisible.  Otherwise, they will print out.  I forgot this step...hehehe...


I can never successfully print from PSE so I use my Preview on my Mac.  Let me walk you through it, just in case you need.  I first turn my page into a jpg.


Then I go to my Finder, Open With and Select Preview, as shown above.


Then scroll down to Print on the open window.


You could and probably should double check your Printer Features or options to make sure you're going get the best printable possible.


Fine is often a category you can choose or Best for a better quality print.  In my experience, you totally have to play with your printer and try all kinds of stuff to see what really is the best setting and or combination.  I've got another blog about how to get the best printed results.


I thought I'd show you a little something that might help if you end up with a less than wonderful result of your printed card.

Above, you can see that the card is much darker and it came out of my printer really dark!  Not like the screen shot or how it looked on my computer, but ridiculously dark and grainy.  I certainly could never recommend my Brother DCP 9020CDW to anyone.  

To help with this, I went back to my card in PSE and adjusted the brightness.  It came out a little better.  Hopefully, you will not experience this problem.


You can just barely see the difference in quality, but paper does have a huge impact on your print quality.  Consider how rigid you want your paper as well.  Regular printer paper looks and feels pretty cheap.  Consider who the receiver is.  Also, if you handle your card too much, the ink might rub off so keep that in mind as well.


I totally recommend cutting the excess off of your paper like this:

-  Fold lightly to perfection.

-  Lay out flat and use a paper cutter to cut off the excess.  The folds will help guide you.

-  Refold your card with considerable pressure to give it a good form.


If you fold your card and cut it whilst folded, it will not come out right.  Trust me!


See how grainy?  My camera isn't perfect, but my printer is far from perfect.  I left a touch of white all around my card.  You can choose if you want to do the same or cut and fold it really close and ditch the white.

If you are needing a tutorial and or template for envelops, check this out here (there are also free holiday cards here) Here is another free template and tutorial or go to somewhere like Pinterest or even Google for a free template.


If you'd like this template to make your own tags, click here.  You can totally use them in PS or PSE with the png format.  See how I did it?  I just slid it in over the tag I wanted to use and clipped it in.  Then moved and adjusted as usual. 

Be smart about your printing and designing if and when time is of the essence.  I made one cluster and quickly turned it into a page, two cards and even tags.


Thanks so much for stopping by.  The blog is full of freebies, tutorials, etc.  If you scroll way back, we did a lot more traditional and hybrid projects if that'y our thing.  Our boards on Pinterest might help you even further.  Hit up our social spots in the side bar.

Happy scrapping!


Tuesday, September 26, 2017

Traditional Card Making With Digital Templates

Welcome to Traditional Tuesday with The Cherry On Top.

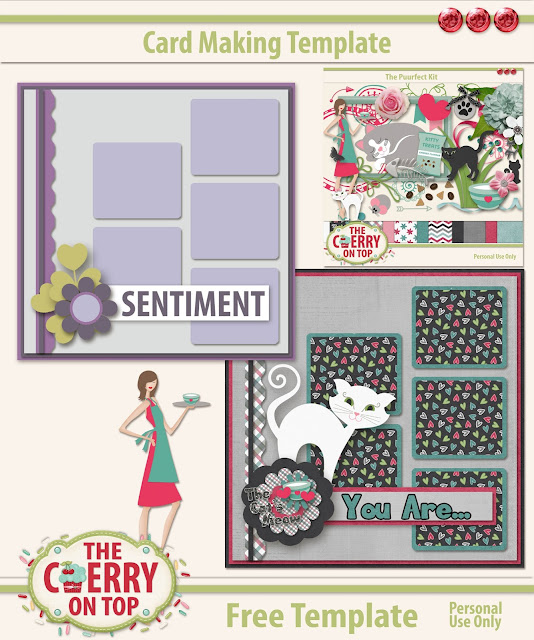
I've got a step by step tutorial for you, today.  Friday I gave away this free, digital template on the blog and Saturday, I gave away the free example showing how you can use the template digitally. Today, I've got the same template and used it traditionally.

Check out the step by, see what you missed Friday and Saturday and I've got some other scrapbooking goodies that might make your crafting faster and easier, too.

free card making template in action, traditionally


Here's the template I used to make today's card.  It's on Friday's blog and it is a digital template.

 free template

Once you've scrapped up your project digitally, it will look like this when you print it.


All you have to do it cut out the squares if you set it up like this in your scrap program and adhere back to back or adhere on to some rigid card stock if you prefer or if you didn't print on rigid paper.  Easy right?  Especially, if you don't have a lot of time to scrap traditionally or if you don't have just the right traditional scrapbooking materials.

quick and easy

 really cute, fast, easy and cheap

I've also got some free printable word bits on the blog from a few weeks ago. In one of the traditional scrapbooking Facebook groups I'm in, someone was asking for something like this and I thought I'd share them with you.  I've got several sets on the blog.  It was asked of me, by a traditional scrapbooker that I make these and I love and use them all of the time.  Especially, since I can customise the look, size, font, colour...

 free word bits

I have these set up so it's SO easy to cut.  You don't even need a special cutting machine to do it easily, neatly and quickly.  I just used my scissors and a basic paper cutter.


Voila!  All of my word bits are ready to use!  At virtually no cost!

 free word bits

On to our tutorial...How to use our templates to make your own traditional cards.  Ahh, the beauty of using layouts and pages as a kind of sketch to customise your very own pages. I do it all of the time and so should you.  I have a Pinterest board I go to when I need some inspiration before I head up to my scrap table.  I want at least a few ideas of how I might layout the pages I want to work on.

Here's what I'm using.  These papers are from one of those cheapy paper tablets I got from a discount store. I don't have any scrapbooking stores where I live, nearby.  So I just grab things when I find them if I think they'll work for scrapbooking.  Collections really help make beautiful pages and you can scrap a lot faster with them as well because you don't have to go through your entire stash looking for coordinating goodies.


Let's take a look at how I gathered my goodies.  The pages came from the same book so that's easy. Even those borders came with the papers, but I didn't end up using them.  The ribbons matched beautifully, but I didn't use those either. Hehehe...And the washi matched super, too.  Then, the grande finale were these Christmas tags my mother sent.  They totally fit and brought glitter, dimension and was an easy element to add.  Keep reading to see how I used them.

 an inexpensive touch of glam

These are super cheap rhinestones or gems from the discount store.  I love the clear background.  I can see which size fits best before I take them off the backing.


Here's another tip.  I'm still experimenting with adhesive.  Like I said, I can't just stroll into a scrapbooking shop or even a paper craft store and buy the best. This is double sided tape from a local discount store.  I already ruled out a discount store's double sided tape because it was terrible.  I like to keep things very positive here, but ya might want to double think the double sided tape from Boekenvoordeel.  Hehehe...This is from Action. I wrote it on the inside so I remember.  Some scrappy friends say it's ok.


This is going to be my back page.  I want to be able to set this card on a table and want it to look good from all angles.  A paper from the tablet, inked around the edges.  Then I cut out this journaling from an old Christmas card I received and layered that baby up, inking around the edges and then added the gems in the corner where it was a touch blank and to add some Christmas glam.


I'm showing off the brand because so far, I find them to be superior than the junk at the discount store. The ink is from Tim Holtz and it is FAR better than the cheap stuff. It's over a year old and works like the day I bought it.  Tesa is a pretty big brand name for adhesive here and this is one of the first times I'm trying it.  So far, so good. I love the duo tip.  One tiny and one large.  Perfect for paper crafting.  I use the Elmer's brand mostly, but have to have it shipped from the States.

I've inked around the outside of my pages as well.  It just ties the whole look together and gives a more polished finish.


I'm mega lazy when it comes to journaling and alphabets and stickers.  I've got stamps and tons of alpha stickers, but meh.  Hehehe...  I go to my bag O' cards and look for just the right wording.


There we go!  The inside of the card.  The sentiment all layered and inked up to match the rest of the card. Then we will get started on the front of the card.


Cut some matching or coordinating papers for the strips.  This is a 6x6 square, by the way.  I chose to ink my borders as well.  Make them the same size width or differing.  You could even cut a thinner strip and start layering the borders as well.

Here are the shapes resembling my template.  You can see that it really isn't such a perfect square shape because my squares are a touch too small for the size of my corner punch.  You don't have to corner your squares if you don't want to.  Check your corner punch if you don't want shapes like this.  I inked around the edges for all of the layers.


Let's move on to those tags and how I used them.

See the three different inks I used?  From a light metallic, than a warmer brown and the really dark and dramatic near black/brown for the very edges.  I added a drop of water onto my dry ink pads.  It's kind of cool to work with them when they are dry because you can control the ink easier. 


Have you ever sanded around your edges?  It adds texture and an aged look. If you do all of the layers this way, you'll have cohesion, too.  I just use an old nail file to soften my paper and then ink around with gentle, short strokes and use my finger tips to blend.  The green colour on my lettering here, was not matching so I filed most of the colour away and inked lightly over it as well.


I showed off this tip before in a previous blog.   I have these largish flourishes in a few different colours and most of the time, they are too big.  No worries, though.  There is a perfect spot for separation.  I use my very sharp, fussy cutting scissors and carefully make the cut.  Now, I have TWO smaller flourishes that fit perfectly.


Tuck in your flourishes behind the elevated tag.  Once again, the adhesive to these are terrible.  I couldn't even get the backing off.  I used good glue to adhere them to the page.  If I'm not sure about the quality of my adhesive, I use the good stuff to make sure.  If you can get good adhesive, by all means don't skimp there.


I like the gold everywhere.  In my papers, on my tag and now added glittering gold with my flourishes making it feel like all of this stuff came together in a kit.

Let's finish up the cluster.


I found a tiny bag full of these coated berries in a local discount shop.  I use a small paint brush to wrap the green wire around and shape to my desire.  Then I tucked the berries behind Santy as well, leaving the green bits.  You could snip them off with a wire cutter if you don't like them.  I used a good glue dot to adhere the berries.  The Zots brand of adhesive works really, really great.  I had to order them and have them shipped from the Sates.


I originally wanted to use washi tape to adhere my two pages together, but the quality of the washi wasn't good enough to do this successfully.  Thank goodness washi is designed to be taken off without destroying your paper when done carefully.  Hehehe...

So what did I end up doing?  I carefully scored across the top of my cover page or front of the card about a 1/4 of an inch from the top.  I used double sided tape on the inside, lined it up perfectly with the back page and pressed gently to adhere the pages together.  Very, very easy to do.  That's it!

Here is what my new templates in the shop look like.  They are just 1,99 for all four templates. Included in the templates are separate png formatted shapes, the exact size needed to make the cards. You could print those out and use them or trace around and use as an actual template.

 Sentimental Sentiments

This is what the png shapes look like.  See how they can be used traditionally once printed?


This is another example of a traditional scrap, up cycled Christmas card following the template-ish.  Hehehe...I chose to weave some of the strips for more added interest.


Here are a few digital versions using the templates.


Shoo!  That was a doozy!  Hehehe...

Thanks so much for dropping by The Cherry On Top.

Happy crafting!