Showing posts with label Ginger Scraps. Show all posts

Friday, November 6, 2015

BoomersGirl Designs Hop Around For Freebies On DSD


Welcome back to The Cherry On Top.

We're still celebrating Digital Scrapbooking this entire week.  Everyday we are offering a freebie as well as links to many, many more freebies and totally awesome promotions.

Boomersgirl Designs is one of my top favourite digital designers.  Lori's cuties are by far, the best out there.  Her kits are always full of fun and can be used with any photos you may want to scrap.  I brought up some of my all time favrite layouts I designed with Boomersgirl's kits.  Take a look, get inspired, hop around to gather the wonderful freebies from our talented Creative Team and then stop off at one of Lori's shops to pick of your must have kits at phenomenal prices.

Check this out!
 gs

Here's my sample of just some of Lori's kits.  Each image is linked up to the shop where you can find the kit shown.
Kit:  Beach Girls
 gs

 Kit:  Barnyard Buddies
 gs

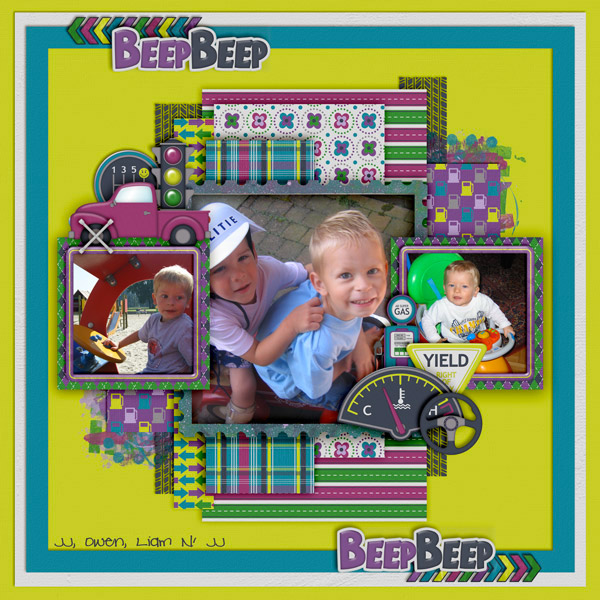
Kit:  Drive Like A Girl
 gs

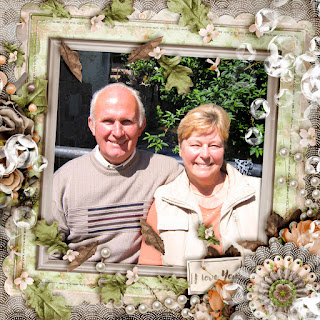
 Kit:  No Place Like Home
 gs

It's now always about the kids.  Lori's kits also have great versatility for more of a grown up style, if you prefer.
Kit:  Pirate's Life
 gs

Kit: The Promise
 gs

Kit:  Scientific Method
 gs

Kit:  Shell-Abrate

Kit:  Ticket To Paradise
 gs

Kit:  Wild, Wild West
 gs

Consider using Boomersgirl for hybrid projects, too.  I designed these lovely project life style cards with this preciously cute kit.  I've also designed book marks, party favours, lunch box notes and many other hands on projects with Lori's goodies.
Kit:  Toadally Loveable
 gs

 gs

Here's the book marker with Lori's newest kit, Crazy for Cats.

 D and D

Kit:  Boys Will Be Boys
 gs

My freebie is coming up.  Here are a couple of examples on how to use them.  When you add some project life style photos and layer them up, the frickie doesn't make the scene like your photos do.


gs

In this layout, the frickie (free, quick page/frame) really stands out and of course you're layout is ready by the simple insert of a great photo.


 gs

This is the free frickie I've designed for you.
 download

No longer available.Here is a fabulous frame cluster from Erika!  Click to download.
 No longer available. This lovely goody is from Tanja.  Click to get the download.
 download


Here is the list of all of the other stops.  You're next stop, if you're going in order is Jen's Facebook Page.  If you get lost you can always come back to this list.

Some of us our early birds.  If one of the stops isn't live yet, check back in the weekend.

The full list of stops for this Hop includes:
BoomersGirl Designs (blog)
(http://boomersgang.blogspot.com/)
Escape the Craziness (blog)
(www.escapethecraziness.blogspot.com)

The Cherry On Top is full of freebies.  We've got freebies for you every single day on our Facebook.  Yesterday's blog was an absolute monster with more freebies than you can shake a stick at.  Go check it out if you're a freebie hoarder like myself.

If you want to see more stuff from BGD, go to our search window at the top right and type in Boomersgirl Designs.

Thanks so much for checking out The Cherry!

Friday, October 16, 2015

How To Use Templates And Some Free Ones

Howdy, Cherry Fans!

We are back with more information on templates, how to use them, where to buy them and of course, a free one to get you started.

I'm fairly new to templates.  In the beginning, I didn't want anything to do with them.  I felt like I was cheating by using them.  Perhaps because I didn't really know what they were or how to use them. Not all templates are created equally and I certainly still have a lot to learn in regards to using and making them, but I'm pretty addicted.

What is a digital template?  Here's the tutorial that I used to get started.  Here's another tutorial for those of you with MyMemories software. If you don't have any software, grab the My Memories free trial and if you love it, use this coupon code (STMMMS18837) to save $10 on the already amazingly cheap price. 

The Digital Scrapbooking Studio is having a sale on templates.  All different kinds of templates.  You'll find hundreds of different style templates there.  Like this one from Manu Scraps.  If you visit the blog, you'll get a sweet, free quick page I designed with Vero-The French Touch's new kit, Romantic Fall.  Scroll the end to get a peek.


 DSS

Yet another kind of page template you can find in the promotion at the Studio is this one from  Sweet Made Inc.  All of these templates are under $2!  This artsy style is great for lots of journaling, too.

 DSS

A digital template is like any kind of template, giving a basic example for us to follow.  Think of a template, where you trace and cut.  Like this one, below.  You could print it out, trace on to your favourite paper, cut and fold.  Following the guidelines.


 TCOT
This freebie is still available.

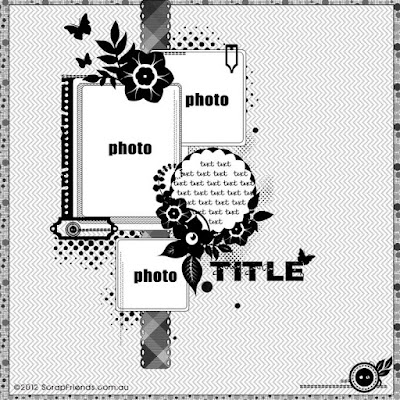
A template can be viewed like a sketch.  A sketch is flat.  There are no layers.  It's just a visual to get your layout started when you're needing a push.  A template is layered and can be adjusted, unlike a sketch. I use sketches often.  Click on the image to see more sketches.

 Pinterest

Here is the sketch in action using Boomersgirl Designs new kit, Pumpkin Guts found at Ginger Scraps.  Click on the image to check out this fabulous festive kit, that's also still in promotion.


So, how do you use templates?  It's different in every software program.  I use PSE on a Mac and honestly, it's nothing more than clicking on the layer you want to work with, dropping in a photo or paper and hitting command G.  That's it!  You may have to play inside the clip by using the arrows to enlarge, shrink or move.  This way is so much easier than going back and forth in a crop, trying to get your photo or paper just right.  It saves a lot of time.  TIP: Often, when I need a photo just the right size and shape, I make a template, insert it in my layout and clip in the photo.  To do that, all you need to do is make a copy of your background, shape or crop it to the size you need and put it where you need it positioned in the layers, then clip in your paper or photo.  That's it!

My photos fit just perfectly because I used templates.  Check out the layers row and see "card base".  That's just my cropped background, cookie cuttered into this rounded edges shape.


These are templates from Brenian Designs.  They are not available yet, but will be on October 24th.  She's got plenty more designs available if you want to take a peek. I want to give you a couple examples of how diverse and flexible templates can be as well as show you how you can make your template stash go further.

 GDS

Take a look at the original template above.  The one on the left.  Then look at this version I designed using the same template, but enlarging the photo, ditching the triangles, date and title and making some subtle adjustments to the positioning of the cluster.


This layout fit perfectly when adjusting the template slightly.  I used Boomersgirl Designs not yet released kit, Work Of Art.  It will release on Wednesday the 21st at Gingerscraps.  You just got yourself a sneak peek!


The second template, I adjusted quite a bit.  Added another matted circle, enlarged the photo spot, ditched the journaling and changed the positioning of the clusters.


What an awesomely fun layout using templates!

 BGD

If you are coming from the Studio where they are having a butt kicking sale on templates, then you may have seen some shaped templates in the Commercial Use section.  Manu had some adorable Penguins, which I had bought, but managed to lose. Ugh!  I did want to show you the results of playing with those kinds of templates as well.

This cute hedgehog is a template from the CU sale they had at the Studio.  It's from BooLand Designs.  Check out the layers bar, to the right.  Those are all of the shapes and what I did was consult my colour palette using the paint dropper to get the exact colour I needed, click back to the cross, high light the layer I wanted to work with, then used the paint bucket to colour the shape or layer.  After all of my colouring, I used effects to get a fuzzy, dimensional critter.

 DSS

 See him in the tag, below?  Each object on this tag was done just as I have explained, above.  Click on the image for more like this and a download.


 TCOT

This template turned out totally awesome!  Tip:  You can reuse your templates.  If you want them to stay in their original form, simply duplicate the template.  Once again, I plugged in papers from my fall colour palette and added some cool effects and shadows to the layers.


This is how I used some of the elemental templates.

 free download
Click here to download this freebie.

You now have the heads up on what templates are, how to use them, a BIG template SALE, free software and now you need a template to try out.  The Cherry will get you there!  Hehehe...Click on this preview and go download our free template and try it out.  Then check out the Studio's big template sale and see all of the fabulous designs there.  The prices are amazing even for a cheap wad like me!

 Free Download

This is quick page that's free at the Studio's blog.

 dss blog


As always, our freebies are for Personal Use Only.  Do not claim them as yours or sell them.

Thanks for spending time with The Cherry.  Now, get scrapping!


Friday, September 25, 2015

Pizza Power, Baby!

Welcome to my dream blog!

Hehehe...I love most things food and home related.  I also love crafts like scrapbooking and digital scrap as well.  This entry is giving me a chance to do both!

I can show off some cool scrappy stuff and set you up with some awesome recipes that will get you on your way to making the best pizza ever.

Our entire family is pizza crazy.  It's always been a favourite of mine.  There are so many ways to make pizza and we'll talk about a few, ranging from mega easy and super cheap to gourmet delicious and a bit more time consuming.  We've also got Paleo/gluten free recipes for you.

Keep scrolling to get your free recipe cards, check out some layout love, view a few lovely, new kits from BoomersGirl Designs and take a gander at some awesome recipes.

 gs

That's Liam and I preparing a pizza with the recipes provided here.  The dough is the best and the sauce is just super.  Any time you can get the kids involved, you should.  My guys love hanging out in the kitchen.  Here they can learn some cooking skills, experiment with food and their favourite part, taste.
My biggest beef I had with dough related recipes was the stickiness.  Until, I figured out that my dough was just too moist.  Keep adding flour a tablespoon at a time and when the dough stops sticking to your fingers, then it's good.  Hehehe...I've made several different recipes and this one I like the most.  No frills ingredients.


Sauce is such a particular, personal kind of taste thing.  The above recipe is a great base.  You can add your favourite veggies in there.  Think about that when your trying to get those veg into picky eaters.  Puree them and stick them in the sauce so they don't know.  I do it all of the time. I also omit the sugar.  Tomatoes are sweet on their own and so are other veggies that you may add.

The above recipe cards are all ready for download.  Right click and save to where you need it.

How about this adorable kit that I used to make these recipe cards and the layout above?  It's from BoomersGirl Designs.  Click on the preview below to get to Lori's shop at GingerScraps and get a closer look.  Pizza Power is Cowabunga Cool!

 BGD @ GS

Let's look at some of those other recipes.

This first one is the easiest and quickest.  Grab a tortilla, spoon a bit of sauce on top.  I use one of those silicone brushes to spread my sauce.  You can also use the back of a spoon.  Sprinkle some shredded cheese over the sauce.  Mix it up!  I often use two or three different types of cheeses.  Fresh mozzarella, goat cheese, cheddar...The choice is yours.  That right there is simple basic pizza.  You don't need any more, but of course you could add shrooms, meats, anchovies, etc.

Bake this sucker at 200C for about 5 minutes and you're ready to eat.  It just has to melt the cheese and heat through.


JJ loves making his own tortilla pizza and I like that he can't complain about his pizza because he made it himself.


Here are two other, alternative ideas for you.  Slice an egg plant about 1/4 inch thick, cook slightly on each side and make your pizza using the egg plant as your crust.  Voila!  In this image, I used freshly diced tomatoes with a lot of herbs, green onions and tried out some vegan mozzarella.  It was delicious!


Another way to cut carbs and get a total protein boost is to use eggs as your crust or base.  Cook up a lovely scramble of eggs, add your sauce and whatever toppings fit your family's dietary requirements.


Pizza Power, Baby!  It keeps the family happy.  It doesn't cost a lot of money and can be ready in under 10 minutes.

Here's another new kit from BoomersGirl Designs.  Let's Shell-ebrate!  All of this bright, fun awesomeness rolled into one fantastic kit that you could use for any pictures or party projects you may have on your to do list.

 gs

Here's the layout I created with Shell-ebrate.

 gs

Remember that all of our free goodies are for PERSONAL USE ONLY and are not to be resold or claimed as your own.

Thanks for giving The Cherry a couple minutes of your time.

Have a super day!

If you are looking for more family friendly recipes, check out these popular posts by clicking on the images.

 TCOT

Click on the below image to get to our blog about meatless lunch ideas for the kids.

 TCOT

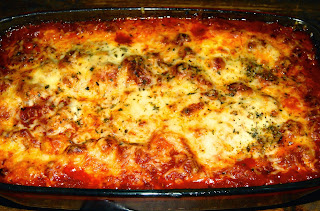
We've also got weeks worth of recipes in our Weekly Menu series.   Check it out by clicking on the image of our pasta bake or going to the search at the top of this blog and enter Weekly Menu.

 Weekly Recipes Board

We are dedicated to getting our readers, inexpensive, healthy, fast, easy and insanely delicious recipes.  Share yours here, if you like.

Tah!