Showing posts with label mini album. Show all posts

Saturday, February 27, 2021

More Hybrid Mini Album Ideas That Might Be Just Be Puurfect For You

Welcome to The Cherry On Top's, Hybrid Hipsters.

I've got Clever Monkey Graphics back on the stage and our gorgeous and sweet kitty, Pluisje.  (I know, right?!  It would be pronounced..pl-ow-sh-ya) He is by far, THE most photo friendly kitty we've had so.  Our boys just love him to pieces and they often get some great shots of him.  He loves the camera!  What can I say?  Just look at that face.  On a side note, both of my boys have Autism and we experimented with all kinds of pets and found cats, by far the best pets for both of our boys.  If you want to read more about pets and Autism, check out this blog.  It's an oldie, but a goodie.

I'm not that much into the glue and scissors any more.  Especially, now that I've been struck down with arthritis.  Grrrr....But an accordion album, flip book, match book or cornered ring album is put together so quickly and easily, it's totally worth the time which, by the way, can realistically be whipped up in around 30 minutes.

So let me walk you through a few basic and towards the end, I've got several more examples with blog links that lead to other tutorials and ideas for you.  Maybe even a few template freebies, that might be still up and running.

I always design my cards in an 8x11 format for easy printing.  (Don't forget I live in Europe.) Then I turn the image so that I can get more cards on one piece of paper.  This way you can get 6 instead of four and you don't have to work in an awkward position.

If you chose a white background, then all you have to do is duplicate the background and size it to the card shape and size you want.  I kept mine with straight corners this time instead of rounded ones.  It certainly is easier to cut.  You could do an inside layer with a rounded corner because you don't have to cut there unless, you are going to cut and layer traditionally.


So keep shaping and duplicating that background for as many cards and photo spots you want or even for as many extra layers you'll want with that same shape.  I've put a few extra layers or matting on some of my cards.  It's a great way to provide more interest and contrast or even to help balance out colors.

It is also SO much easier to crop in your photos this way rather than trying to resize it just the way you need.  Just use those corners so you don't distort the image or papers.

Use word art, papers and any elements or alpha from your collection.  Working with collections are a huge time saver.  If you have to go through all of your stash to match everything up just right, it could take a long time and the chances of it all coming together perfectly are pretty slim, too.  Collections keep your entire album cohesive throughout.  I totally recommend them.


Once you've layered up your cards just the way you want, check your print settings, choose a paper with some gloss or even sticker paper for the best results, cut and choose your method of binding.  There are SO many choices.  If you see I've missed an obvious format, link a sister up in the comments.  Scroll down to get to the blog with the format you want to use for your album, for the full step by step tutorial.  It may be easier than you think.

Just look how adorable!

I LOVE Tracey's journal cards.  You can do so much with them.

How's this for a selection of kitties?

If you want to take Tracey's goodies for a test drive, get this freebie from her group.


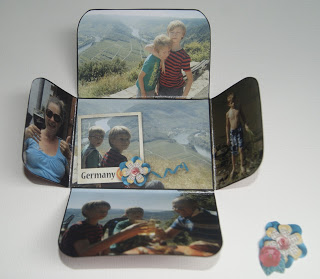
Here are some more accordion ideas for you.  The first one is digital!  Easier on your hands.  That's for sure.  Click on the image to learn more. 


I used our Puurfect kit for this tiny album. It's also very easy to put together.  Click on the image for the full tutorial.


Accordions like this are SO easy to make.  This image is also linked up.


For this project I simply adhered my accordion to a box.  It cleans up very neatly.  Yip!  There's a tutorial for this, too.


I turned an old bbq match box into yet another fun accordion mini and it's stored easily as well.  If you love Graphic 45 and minis, check out the full tutorial.


I'm always looking for other ways to use conventional items.  For this project, I used journal cards as pockets.  A totally different idea for you.  Find out more on that blog by clicking on the image.

I've got one more last example for you and it is SO fun.  I gathered all kinds of crazy pictures and used a fabulous scrap collection.  Yet another full tutorial for you to enjoy.  I hope you get a good laugh from the pictures, too.

If you missed our latest releases, here's a quick look for you.  Feel free to scroll back to other blogs to see more. 

The Bee My Valentine Collection is still just $5.  That's for the kit AND a pack of templates.

Then there's the What's Cook'n Bundle.  It too is only $5 for a kit and templates and quite the hot seller at the moment.  Thanks if you were a part of that.


And here is the re release of Revel In Ribbons from yesterday.  It's only $2 throughout the weekend.


Don't forget $2 Tuesdays!  See what you may have missed?!


Thanks so much for hanging with The Cherries.  We love when you do that.

If you are looking for something specific, needing help with scrap related issues or just want to hang with us, then join us in the group.  Show us your latest picture you want to scrap or your new puppy.  We'd love to see what you are up to.

Happy scrapping!


Saturday, May 9, 2020

Free Printable Mother's Day Card from JoCee Designs and Many More Hybrid Scrapbooking Ideas For You

Welcome to The Cherry On Top's Hybrid Saturday.

UPDATE: My shop at GingerScraps is no longer open. I'm leaving the images for inspiration. I do have a shop at Design Bundles with templates, scrap stuff and a lot more. Maybe check it out?

I'm posting several projects today, both old and new.  So if you are new to The Cherry, you'll get to see a lot of our more popular hybrid projects.


Today's hybrid is brought to you by JoCee Designs new collection, A Mother's Love.

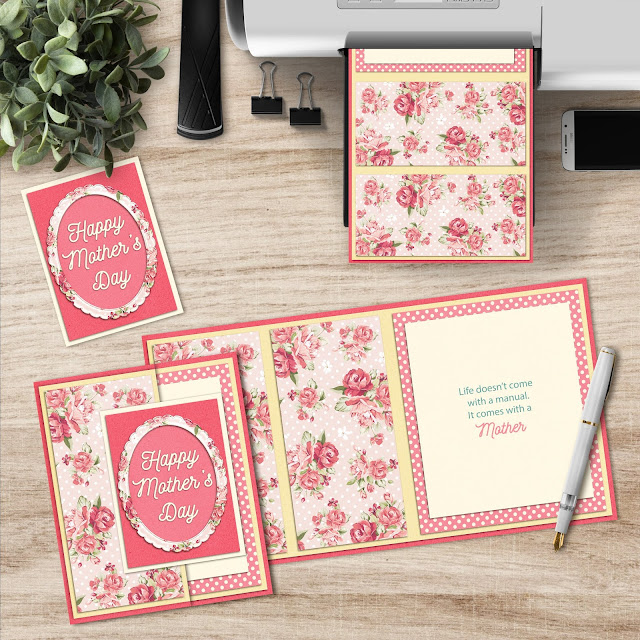
If you still have not got a card for dear ole mom, use ours.  Let me give you a few tips, first.  I've not a printer in our quarantine house so I asked a team member to print this out and tell how it came out.  She said that the journal card came out full sized.  It is designed as a 3x4 standard size, so make sure you check your printer settings before printing.  

Also she didn't get the edging just perfect when she printed it.  The card is exactly 8 inches so if you want to shrink it up just a touch so you get all of the edges, to be sure, then make the adjustments necessary or just around them so it is all even.

Try to use your program's "preview" function for the best results.

After printing, cut off any excess you might have.  Print on rigid paper if it's an option and check those printer settings for best or fine results if it's an option on your printer.  This a folding card.  You'll fold each panel.  Aligning it up just right with the other panel.  Cut your journal card and adhere it to the center of the first panel, as shown in the below image.  Fold it all first THEN adhere the journal card.


free card And template

I'm providing you with not only this card, but the template as well.  Maybe you will use Jo's kit and design your own card?  On the template, where to fold is indicated with lines.

A Mother's Love

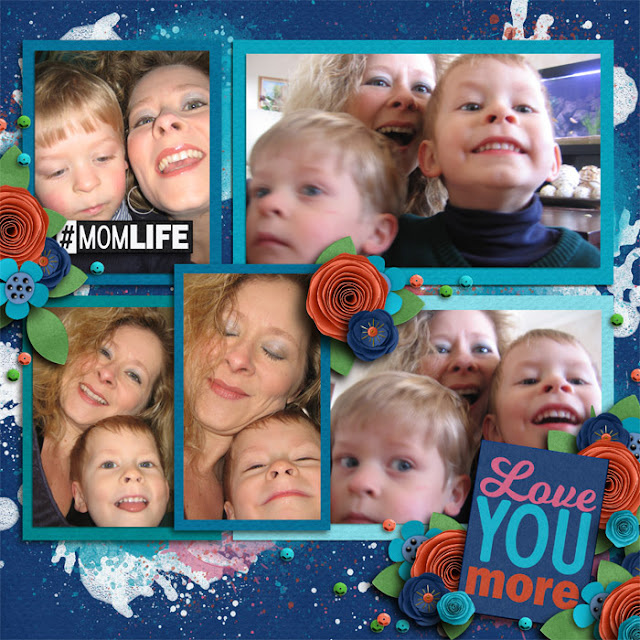
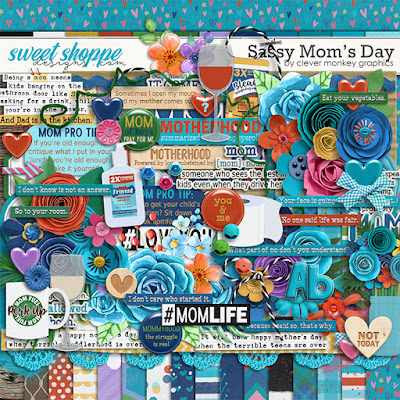
Here's some new goodies from Clever Monkey Graphics.  Sassy Mom's Day.  I used our Fabulous Photos templates.  It's another one of those template packs that I keep going back to.  Great for multiple photo pages.

Fabulous Photos Templates


Sassy Mom's Day

Here are a few of our most popular hybrid projects all linked up for you with tutorials and or more information.

This is by far one of my favorites and if you are into hybrid or you'd like to print out digital scrapbooking goodies and use them traditionally, you'll love these tutorials.

It all started off with this digital page...


I put my page through a png ripping action from Lisa Rosas to get all of these individual images, the exact size as the ones on my page and simply pasted them in 8x11 documents in my PSE program and printed them out.  I printed out my page to so I could see exactly where everything needed to go. Click on either image for the full tutorials.


And Voila!  I call it "The Perfect Page" kit.  If I would have had a cutting machine, this would have went really fast!  Really just making a puzzle. 

step by step tutorial

Here's another less work intensive project for you.  You'll find a free template to whip up this cute, mini album in probably under an hour.  I made it for my niece and designed a pocket for some cash-o-la.


free template

This album is even more simple and Yes!  I am also giving you a free template.  You might be able to crank out a mini in under 10 minutes!  Wait until you see the other side!


fre template

This is still a favorite project of mine and it's an up cycle project as well.


gift idea

I recycled my Christmas card's packaging!  Shrank up some digital pages to 4x4 inches, put them all around the box's sides and stuffed the boxes full of goodies.  My nieces loved their gifts!

gift idea with mini scrapbooking pages

Our dress templates are one of our biggest draws.  Here's one used digitally...


and here are both templates, used traditionally.  They would look cute in a scrapbook or on a card.

Dress Template

This was the dress that started it all and our most popular blog to date.


dress template

This is one of our latest hybrid projects.  It's really easy to design your own things when you have just the right stuff.

hybrid idea

Here's another blog on how to design a mini album very quickly using the word art and frame clusters from collections such as this.


mini album tutorial made fast

Turn a page into...


a cool t-shirt!  I ordered mine and I'm just waiting for it to arrive any day!  I'll show it off if I'm pleased with the result.


I sure hope we were able to inspire you, today.  Try something new and let us help you.  Show us what ya do!

Happy scrapping!

Saturday, February 29, 2020

Awesome Animal Hybrid Mini Album With Full Tutorial Start To Finish in 30 Minutes

Welcome to The Cherry On Top.

Last week, I promised a hybrid using Clever Monkey Graphics and Meagans Creations, Cold Blooded Love Collection.  I've got the full tutorial with pictures ready for you along with some more pages of inspiration with the new goodies from Clever Monkey Graphics and JoCee Designs found at the Sweet Shoppe.

Get your hybrid on with The Cherry!  It's a super way to save money, scrap fast and it's maybe even eco friendly.

But first...I couldn't wait to show you the pretty pages I have with last week's templates and JoCee's Bright, Bold and Beautiful.  You're going to get all giddy and want to add this winning combination of collection and template to your stash, today!

 Fantasia Templates
Fantasia Templates and Big, Bold and Beautiful from JoCee

 Fantasia templates

I've got a few gorgeous pages from my awesome team using this week's templates, With Love and Jo's new collection.

 With Love Templates


 With Love Templates

 With Love Templates

 Bright, Bold and Beautiful

If you zap back to yesterday's blog, you'll see a lot more page inspiration and I've posted some seriously awesome links to freebies, too!

Now, on to our tutorial with Cold Blooded Love from Clever Monkey Graphics and Meagan's Creations.  Ya don't even have to be into cold blooded creatures to love this kit.  It's texture rich, awesome natural colors and really cool goodies that you can use for anything.

 Cold Blooded Love

I'm showing off the entire collection because I will be using a few things like papers and just a few extra elements.  I'm also using Tracey's, Affixed To The Board which is a sweet set of frames, fasteners and backgrounds.  It's a great supplement to your stash, for sure!  You'll see in just a sec.  I'm also using Tracey's Wood Frames #1.

 Cold Blooded Love

How awesome is the word art in this collection?!  Meagan is a genius.  Such great colors and texture! Your pages are going to come to life.  I was very inspired by the word art and new exactly what I wanted to do with it.  Word art or title art is an excellent way to scrap FAST.  Just let me show ya how I designed a mini album in 30 minutes.

Now go get your good glasses or magnifying glass and follow along with our tutorial on how you can quickly scrap up your mini album by using the word art and frames from the shop.

In order for me to print from home, I have to use a smaller than 12x12 format.  My go to size is 8x8 inches, but it depends on the project.  6x6, 4x4 are also great and easy to print right from your home.  If you're needing more details about printing from home, I've got another blog for that.  Go to this blog and get the 411 on how to get the best printing results.

Starting from the beginning, you'll need to start a new document.  Go to File, New and click, Blank...


Then either choose from the selection or type in your own.  I used 8x8.  I can just get it to print on our A format paper.  You'll be able to do the same on a standard U.S. paper and it's why I go to this size, too.


I slid in a frame from Tracey.  You can see a small selection in my gallery, on the image.


Then I changed the position of the frame to go vertical and added the cluster, shadowed it, using my styles from "Snickerdoodle".  Styles make scrapping insanely fast and interesting as well.  Then put in a paper for the background.  Easy so far, right?  

I'm using PSE.  There are shadows that come with the program.  You can get to them by clicking on the "effects' icon at the bottom right.  You can also customize those which I always do.  If you quickly double click on that tiny "fx" icon in your layers bar, you'll get all kinds of options to change your shadows.


For me, it's always super, super easy to make a kind of template for papers and pictures.  I'm going to show ya how to do that.  It's the easiest way to not distort your images and it's really fast.  For this page, I want to add a photo, obviously.  All I do is duplicate the background layer then move that layer to where I need it and size it as needed.  Remember to use the corners when resizing or you'll distort your image.

Now, all you'll have to do is slide in your photo, go to the layers and right click, create clipping mask and use those corners to get it to fit just right.


Here's another page, following the same steps as the first page.  To get the paper just right for the second layer I used the exact same process as above, but instead of clipping in a picture, I clipped in a paper.

Watch those shadows!  These particular frames come with shadows so ya don't have to add yours, but if you do, you may have to tweak them.  Especially, if you go smaller than 12x12.  The shadows are completely different in other sizes.


Moving on to our third page.  I'm sure it's not easy for you to see, but my first screen shot was taken at 9:31 and now we are at 9:42.  So we've got two pages done in about 10 minutes.  Not bad, eh?

I've got my new document.  I've added Tracey's frame stitch from the collection.  There were not a lot of frames in the collection so Tracey's were an excellent addition.  The stitch frame will work great, too.  Because they are light colored, use an intense shadow to make them pop.


If you come up short of frames in a kit or collection or the ones included are not exactly what you are looking for, you can always make your own.  Let me show ya how.

I thought a circular frame would look great with this word art.  Simply go down to the bottom right tool bar and click on Graphics, then scroll through to get the one you want and click or slide it in the document.


It will automatically come out the color that is in your color picker at that moment, but you can change it to anything in a variety of manners.  We'll be clipping in a coordinating paper.  Slide in your desired paper, right click in the layers column and choose create clipping mask.


Voila!  There is your perfect frame totally customized!

I'll show ya another way to get a layer for your photo.  You can duplicate the background like we did previously as shown.


Then you can go to the cookie cutter and or crop tool in the left tool bar and choose the shape you want.  We need a circle shape.  Use your mouse and get the size you need or of course, you can just drag in a circle from the graphics like we did above.


I slid in a pretty paper, doubled up the stitch frame and even clipped a paper over the stitch frame so it shows up better.


On to the next page and we are at 9:49.  Whoo hoo!  We are not only scrapping at lightening speeds, but our pages are really pretty.

This is some epic word art, here.  We are going to let it take over our page and center it.  Because the designers have left their goodies at a nice, large size and we are using small pages, there is absolutely no comprise in quality.

I'm going to use more shapes from the custom graphics in the program and make some more custom frames for this page.  Yip, two!


Slide the desired shape onto your page, clip in the papers you want over your frames, add your favorite paper to the background and shadow it all up to your fancy.


I felt like it looked a little bare.  You might be pleased with a result like that so move on to your next page or...

Make another frame for around the edge as shown.  Slide in the skinniest frame from the graphics for this because you'll have to increase the size and it will expand.  This frame is too thick for the space.  Let me show ya how to quickly fix that.

Got the marquee tool as shown.  It's to the left in the side bar, at the top and make sure it is on the square.  There is also an elliptical option.  Using your mouse, get that square exactly where you want it on or over our frame to get the desired size. Make sure you are on the correct layer (the large frame) and when you've got it just right, click your back space button.  It will erase everything in that space.


Now we've got a nice, slim frame that fits better.  Use the same papers for a nice cohesive look. Our frame matches the wood in the title and it looks really good like that.  Using all kinds of different design or pattered paper can make a page look too busy.


Now ya know how to get the rest of your pages finished.  I pulled in a few papers and sized them exactly as I wanted with the corners from the move tool, slid in Tracey's frame as well as another square from my graphics for our photo spot, plopped over the word art, gave it all a shadow and we're finished!  5 pages in just under 30 minutes.


Don't forget!  Most digital products come in png format so you can make some adjustments and run them through your cutting machines.  It'd be really cool to run the titles through your machine and paste them over your printed pages with some thick glue dots or foam tape for extra dimension.

Last week, I showed a mega simple, fast and cheap way to bind a book like this.


I do all kinds of scrap.  Hybrid, traditional, digital....It depends on the project at hand.  Hybrid really is a great option.  I invite you to give it a try or show us your latest hybrid project in our group.

Thanks for hanging with The Cherry.

Happy scrapping!