Tuesday, November 29, 2016

Scrap Simply and Beautifully With Graphic 45 and The Cherry On Top

Welcome to Traditional Scrapbooking Tuesday with The Cherry On Top.

We've been bringing you quick, inexpensive, up cycled holiday cards for weeks now.  We asked our readers to join us in making hand made cards with old cards, scraps and things that are already in your stash.

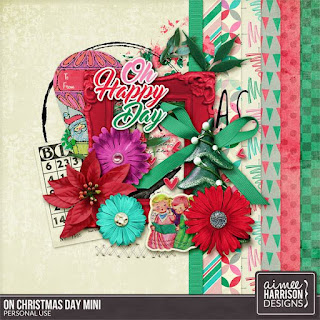
Today, we are not up cycling, but we are keeping it simple.  I just love the collections and inspiration from Graphic 45.  I get the newsletter and I even have a board dedicated to their projects and products.  I don't own too much, but I love what I do have.  I managed to find a couple packs of Christmas goodies, here in Belgium and couldn't wait to put them to use.

Scroll through the tutorial, get some pointers and join us in our card making challenge.


I don't know if you are familiar with Graphic 45's design team, but they are unbelievably talented.  I ooh and aaah at the finished lovelies.  I can't help but to start guessing how much the projects most cost to make.  Hehehe...I'm sure one heck of a pretty penny.  Some might call it over the top, but either way, it's always beautiful due to the product.


These are not coordinating packs, but the colours were fairly similar so I went with it.  Working with collections makes scrapbooking and card making so much faster.  One of the longest processes otherwise, is to go through all of your stash trying to find elements and papers that will coordinate.  With collections, it's all done for you.  Huge time saver!


I'm lazy when it comes to journaling. That's why I chose this frame and insert.  Hehehe...  You may be able to tell that after punching out, the paper is very uneven, but no worries, use your cutter and even it up.  You also get those tiny paper dots where the paper is attached.  I use either my fussy scissors or a nail file to get rid of them.


I went through several different papers until I found the combination I liked best.  The frame and insert used real red, but the chipboard flowers used a deeper red.  Mmmm...I experimented with both and decided on the deep red.


I don't glue until the very last minute.  I always change my mind!  I cut around the uneven edging in the insert and by doing so, exposed the deep red paper from underneath to show off another layer in the card.  Use double sided foam tape to give your projects lift.


All we need to do now is play with the flowers.  I wanted to keep them on the card itself, so the card would easily fit in an envelope.  Play with the different sizes and colours until you have the desired look you want.  Get rid of those tiny paper dots and consider inking or painting around the edges.  Maybe you'd like some glitter.  Tip:  Gently fold back or forward, the petals for the look you want. 


I pushed the petals down for my large, red flower and pushed them up for the yellow and green ones.

TIP:Take advantage of the clear plastic of your bling by sizing up the one you need without first removing it. 


I glued down the flower with a huge, thick glue dot for extra dimension.


I showed off this tip before.  Take large swirls and cut them if they are too, big.  They were much too large for my card.  Now, they fit perfect.


I can never resist a touch of bling.  I used coordinating, tiny gold dots on the glittery swirls for a touch of luxury, but not over stated.


This is what the collection looks like so far.  I only need two more cards for my collection.  How about you?

Thanks for taking a peep.  We've got big news coming this week.  Freebie Friday and Hybrid Saturday will stay sizzling as usual.  You won't want to miss!

We'd love to see what you create with paper or your digital designs.  Show them off in our group on Facebook or leave us a link in the comments.

Happy scrapping!

Saturday, November 26, 2016

Easy Paper Holiday Ornaments

Welcome to Hybrid Saturday with The Cherry On Top.

We've got a really easy tutorial for you, today.  See how we made three different holiday ornaments, find your favourite shapes on our Pinterest board and add some paper gorgeousness to your tree this year.


Ya just have to love Pinterest for ideas, inspiration and freebies, too.  Though these ornaments are so easy to make, you probably have everything you need right in your scrappy stash.


As you may know, I've teamed up with one of my all time favourite digital designers and WE are opening an Etsy store, next weekend.  We'll have these templates with papers shown ready for purchase, but until then, see how they are fashioned and make your very own to suit your tree's needs.  Hehehe...


You can use digital templates for your ornamental choice or grab some cutting templates from our Pinterest board.  We've pinned several.  Take your pick, download, print them out at your desired size and use them to trace onto your favourite paper.


Cut them out, fold them in half as shown in the previous image and glue them back to back.  Perhaps with a different or even two or more different papers.  Try to line them up as carefully as possible or make sure the back is coloured and not white.


I did have white backing, since I did this digitally.  I simply cut off everywhere there was white.  If you are a perfectionist, this one might be tough!  Hehehe...You could choose to ink around your edges.  From my experience, it didn't seem to matter how many trees I used.  Three or more seems just fine and they all looked great.

I tied a very simple bow and used a glue dot for adhesive.  I glued a tiny porcelain flower I had in my stash.  It was the exact same colour green as my tree.  Yay!


It helped me tremendously to line up layers like you see, above.  Just glue, line up as perfectly as you can at the seem and stack, stack, stack, until your heart is content.


I used a glue stick.  As for the grade or weight of paper you use, it's up to you.  I used cheap, standard paper and thought the result was pretty darn good.


Before you adhere your last circle, to make the neat accordion look, glue in your desired hanger.  I used gold wire for some and white ribbon for others.  All worked perfectly!


You can see in this image, that I had a lot of white edging to cut off.


 I did a couple different things to top off my ornaments.  I used a large bead for some, the golden ribbon you saw pictured previously, this puffy glitter paper as well as a scalloped border, cropped and printed, which you'll see further below and what is pictured in the ornament below.  I thought it turned out really great!


This topper is from the foam, glitter paper.  Definitely the easiest!  You could use regular paper if you have that as well.  Ya only need a tiny strip and to adhere it with minimum adhesive at the end.


To get the look of the ornament above, which didn't turn out exactly as planned, keep reading.


The end of the scissors is pointing to a tiny glue dot.  You place the dot about 1/3 of the way and pinch.  Then go to the top of the next paper, 1/3 of the way and pinch...taking turns.  Try it out without glue, first!  Hehehe...


You start off with the regular ball shape.


This is my digital, glitter topper I used.  If you have any savvy, you can make a sheet of these for your ornaments.  I also got the scalloped border template on line, for free!  You know me, if it ain't dirt cheap or free, I'm not interested.  Hehehe...Just go to your search, type in free scalloped border or whatever it is your looking for and see what you find.


I believe this would make a nifty kid's project and you may not have to buy anything for it either.

 Hello Winter, Paty Greif Digital Designer and The Cherry On Top Template

This is a template from my Simply Circles collection available in our Etsy shop, Kreative Design Studio.  I used Paty Greif's kit, Hello, Winter for it and the ornaments shown.

We hope you liked today's blog and that you find the time this weekend to get scrappy!

Friday, November 25, 2016

Fabulous Free Scrapbooking Goodies, Every Friday

Welcome to The Cherry On Top's, Freebie Friday.

Every week we offer at least one scrapbooking freebie, but usually more.   I wanted this week to be a doozy.  I've got 9 freebies pictured here, but if you follow the links and scroll through the blogs, you'll find even more.

I'll be you'll have a lot of photos to scrap with the upcoming holidays.  Let The Cherry On Top help you with that.  We promote scrapbooking freebies, tutorials and provide our readers with beautiful inspiration.  Scroll through our previous blogs and see what you've missed.

Today, I stepped off the beaten path and I'm providing you with links to other digital designers that I normally do not promote.  It's something a little fresh and will introduce you to more different designs, too.


You may know that Aimee Harrison is featured here often.  Her latest Facebook Freebie is just so smashing, I had to share.  I used it to scrap up the above layout of me and my better half.  This free kit has so many goodies in it.  I hardly scratched the surface with what it has to offer.

 free kit from Aimee Harrison

 Click on the image to get to Aimee's Facebook page then look left to find the freebie tab and get this lovely for your stash.


 freebie from Scrapbookcrazy Creations by Robyn

While you're over there, look for Robyn's page, too.  Go to the albums, also a tab to the left and find the album, Freebies.  She's got several in there for you.

 freebie from mydigitalpapers

Dea's Designs provides freebies for her fans, too.  Go check her out!

 Free Quick page

My scrapper sister Laurel, has a beauty for you.  Click on the image and visit her blog.

 Freebie from Cutie Pie Scraps


 Freebie from Cutie Pie Scraps

Cutie Pie Scrap is one of our fan's favourites.  Such bright, fun whimsical designs!  You won't want to miss the many freebies she has on offer for her fans.

 Daily Download from Leigh Penrod

 freebie from Leigh Penrod

How beautiful are these lovelies from Leigh Penrod Designs.  She's hosting the Daily Download.  You've already missed some, so jump over and start downloading.

 Marcy Coate Freebie

Marcy Coate has a sweet freebie for you.  Delicious scrapping!  Hehehe...

Grab all of these fantastic freebies, scrap up something beautiful, then go over to our group on Facebook and show us what you did.

I hope you have a great Turkey Day.  Now, that everything is cleaned up , there is time to scrap, right?

Enjoy!

Tuesday, November 22, 2016

Pretty, Fast And Inexpensive Scrapbooking. No Excuses Not To Scrap.

Welcome to Traditional Scrapbooking Tuesday with The Cherry On Top.

We are back with another simple layout from our Tiny's pizza box event.  We also have another up cycled Christmas card to show off.  It is insanely easy, so cute and you only need scraps.  Read further and join us in our home made card challenge.  

I don't know about you, but I never finish my projects at scrapbooking events.  This mini album was certainly no exception.  I think we're more than half way through and it's looking good.


At Tiny's Pizza Box events in Kortrijk, you get a pizza box full goodies to scrap with.  They hang inspiration all around the workshop and have several experts on hand to help you out.  I love going to events and hanging with my Scrappy Sisters.

Let's break down this page to further illustrate how simple and inexpensive scrapbooking can be.  That usually is, most people's hang up, right?  "I don't have time" or "I don't have money."  We are here to prove you wrong!  Hehehe...


Tip:  Layering gives your page lift. It's an excellent way to use contrast and make your photos pop right off of your page.  It also lends to a more polished finished, look.


Have you ever stuck down sticker and didn't like the result?  All of the time!  I did it here, above with my "Me" sticker.  That beige on the yellow was pretty blah.  Since I already had a black layer, I traced around the sticker, very carefully, with a black Sharpie.  Now, the sticker sticks out.  Hehehe...


This page is only 6x6.  So there isn't too much room to go crazy.  I'm keeping all of the pages fairly simple for consistency, to save time and money as well.  Take a gander at the image above.  The...the...swirly thingy...hehehe...was much too large for my page.  I found a place in the embellishment where I could carefully cut and have two, smaller swirls.  Boom!  It would look really awesome with a tiny pearl or gem in the circles.  (Just thought of that.)


Take a paper flower or use your flower punch and bling it up with a pearl, bead or gem.  Then take glue and precisely go around the edges of the flower.  Sprinkle with your desired coloured glitter for a posh look of luxury.  (I got that sheet full of bling for 1.79 at the Boekenvoordeel.  Kruidvat, Action, Wibra, Zeeman has them as well, at times.  Typically, the quality isn't as good as a craft store.)


TIP:  I always use a piece of paper when glittering.  This way you can shake off the glitter and put it back in the container.


Here's another nifty tip for you.  When your glue pen is running low, put it upside down in the centre of your glue dots.  Hehehe...No waiting...


So, we've layered up our photo, added a tag with more layers, sliced up our glittery flourishes and strategically placed them on the page and layered two arrows, all with the same few colours.

Just add your flowers and it's finished.


Two more flowers and some glittery splatter would finish the look if you want some extra pow.

On to our hand made Christmas cards with recycled cards from years past.  I love this one!  I did keep the puppy for future use.


This is our card we are staring with.  I'm using plain, green card stock for the base of the card, today.


Cut a few strips of coordinating papers, going smaller as you go up.  First, for the base of the packages and then for the lids.  I just eye balled.  I cut off the bottom of the card with it's pretty border as well as the wording.  I'm terrible at this part!  Hehehe...Journaling just isn't for me and sticker placement, oh boy!


Stack up those scrap strips (Say that three times fast.) and you're nearly there.


Add some coordinating ribbon and a bow and your card is made.  Add it to the box with all of the others.

Thank you for giving The Cherry a bit of your time.

We'll be back for Freebie Friday with a boat load of links for digital freebies.  There will be some scrap-a-licious inspiration, too.

See ya then!