Showing posts with label rainbow. Show all posts

Friday, February 17, 2017

Stay Magical Scrapbooking Collection From Made By Keuntje and The Cherry On Top With Unicorns, Glitter and Rainbows, Oh, My!

Welcome to The Cherry On Top.

Eek!  I'm just a little excited about my collaboration with Made By Keuntje!  This collection just embodies who I am.  All of this bright, vivid colours and whimsical unicorns and rainbows.  Eek!  It's packed full of fun and frivolity.  So many flowers, glitters and papers to choose from and that's not all.  We've even got coordinating templates, quick pages, stackers AND planner goodies, too.  Ya see why I'm so excited?!

Keep reading to check out this totally awesome collection, get an eye full of inspiration that'll have you dying to scrap with it and consider downloading my tiny freebie.  Hehehe...


Holy, wow!  I just realised that the little girl here is on the toilet!  Hehehe...  What a fun, fun page Jodi from Throwing Some Scraps Around has done.  She used my template and Dana's fabulous goodies to scrap up this fantastic creation.  I can't decide what part I like best.

Let's take a peep at all of this awesomeness!


 Made By Keuntje

Rainbows, clouds, unicorns, sprinkles, hearts, ribbons...my goodness that is one heck of a pack of terrific embellishments.  Scrap your heart out, Baby!

 Made By Keuntje

Dana has designed several different paper packs for this collection.  It's so hard to choose a favourite.

 Made By Keuntje


 I'm loving the word art, too.  I'm dreadful when it comes to journaling and often the word art is just the piece that page is missing.

 Planner Printables

Here are the planner printables I designed.  A sheet full of borders or tapes, another sheet with a few more borders, some lovely journal or project life style cards, banners, buttons...Just what you need to have a really exciting planner, agenda or just plain stickers to use on anything. 

Tip:  When you print on a semi or gloss paper like sticker paper, the colours come out more true and crisp. Another tip, if your printer has a "high quality" option, use it.

The printables come in png format so you can use them traditionally as well as digitally.  I've left the shapes super easy to cut out if you don't have one of those fancy cutters.  Only 2,99 for three sheets!  That's just a buck a piece.

 Stay Magical Stacked Badges

These are my stackers or badges or whatever you decide to call them.  Don't they just sparkle and make you smile?  So much fun stacked up onto these.  I love them!!!  These would make beautiful stickers or embellishments for your pages either traditionally or digitally scrapped and just ,99 cents for six stacks.

 Stay Magical Templates

Here are my pride and joy templates.  I have notebooks and boards full of inspiration.  When Dana asked if I'd collaborate, I went straight for them.  I started with the unicorn and then sought out some designs that would accommodate rainbows and other youthful fun.  These 4 magical templates are just 1,99 in my shop. They are split in 2!!


Stay Magical Quick Pages

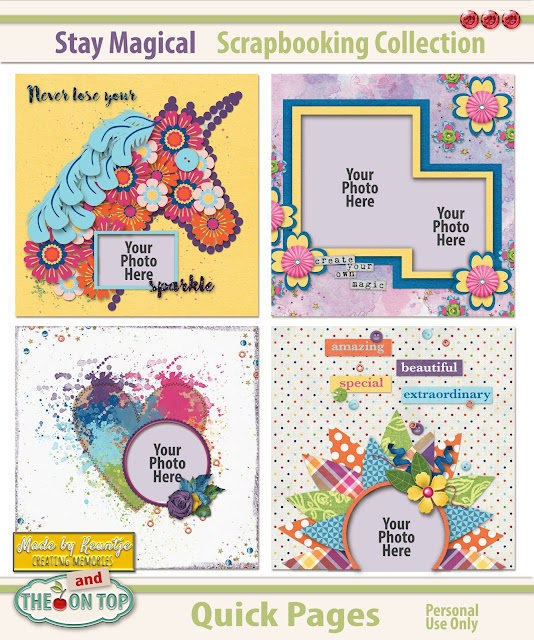
Is that unicorn insane or what?!  Is that not total Cherry style?!  Hehehe...Quick pages are just fantastic when you don't have time to scrapbook or you don't scrapbook at all.  A quick page is a fully scrapped page.  All you have to do is put your favourite photo behind the page, in the spot.  These pages are in png format, so they can be opened in most any software.

Print them out in your desired size (8x8 and 6x6 is my favourite size and your printer should accommodate those sizes and a 12x12 is easy to convert to these other sizes) and slide them right in a sleeve or have them professionally printed in a book via a company like Persnickety or Foto.com.

Quick pages make great wall photos and screen savers, too!

 Stay Magical Quick Pages

I wanted so badly to get a folded shadow on the yellow petals, but I could only figure out how to get them to go up and down and not left and right.  Grrr..Hehehe...If ya plan on lifting this page, traditionally, take your heart punch, then do a soft fold up the middle of your heart/petal to give your flower dimension.
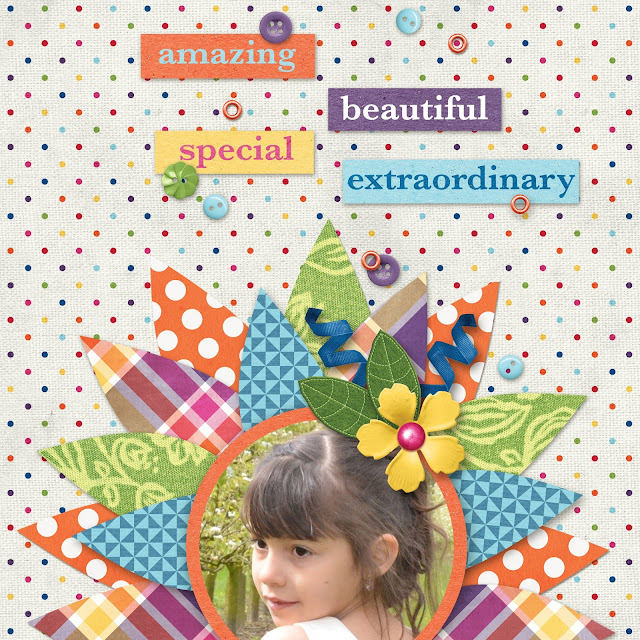
 Stay Magical Quick Pages

I used a card for inspiration for this page and I scrapped my best friend's lovely daughter.  I kept the word bits generalised so you can put nearly any photo in the spot.  Even a landscape picture would fit.


 Stay Magical Quick Pages

There's one of my nieces.  Isn't she just a delight?  I bet you've got the perfect shot to go right in that photo spot!

 Stay Magical Templates

I grabbed a couple of the ladies pages to show off more of the kit and my templates.  Above is Dana's spectacular page that puts the entire collection in the perfect light.


 Stay magical Templates

Here is Marie's page.  Eek!  Just what I envisioned when I designed the template.  Look at those cheeks!  Such a fun page!


 Stay magical Templates

I cannot believe what the ladies have done with this extraordinary template.  We've got a lot more inspiration on our social spots like Facebook and Pinterest.  There is so much more to see! Magalie worked her magic filling in all of those flowers and blinging up the gemmy outline.  How sweet?!

I hope you enjoyed this entry as much as I did!  Here is your fabulous, Friday freebie.  It's for personal use ONLY.  Thanks so much for checking us out, today!

 Word Art Freebie


Here's what you may have missed this week.  I've got new photo reel templates in the shop and I'm offering one for free on the blog so you can see how it works.  I've also got several tutorials on how to use these reels both traditionally and digitally.

 Photo Reel Templates Free photo Reel Template

How about a couple of other fabulous freebies around DigiLand?

 godigitalscrapbooking

Leigh Penrod is hosting the Daily Download at GoDigital Scrapbooking.  Click on the preview, above to see what's up for today.

 Bethaicreations freebie

Take a look at Benthaicreations lovely contribution for March's blog train with MyMemories.  Isn't it just divine?!  Click on the preview, hop over to Ben's blog, get the freebie and hop around to all of the lovely designers.

 FREE kit from Palvinka!

Palvinka is totally doing it up for her challenge.  Download this beautiful, FREE kit, get scrapping and join in on the challenge.  Find out more by clicking on the preview.
 Free Commercial Use

Did ya know that every month, Just Jamie and Mommyish (two of my all time favourite Commercial Use designers) give Commercial Use freebies via their club at The Lilypad?  Click on that preview to find out more.  10 NEW products for just $9,99 in their club.

You are totally set to scrap.  Jump over to our shop, grab this super, duper collection and get scrappy!

Consider hanging with The Cherries in our Facebook group.  We talk scrap, show off work and have a few giggles.

Come on back tomorrow for another freebie, this time hybrid style and with our new kitty inspired collection!

Tah!


SaveSaveSaveSaveSaveSave

Saturday, February 6, 2016

Paper Wallet Project with Template

Welcome to The Cherry On Top.

Saturdays are for hybrids.  We take digital designs, print them out and build up beauties.  Today, we've got this awesome paper wallet that you can give as money and gift card holders.  I've made a couple of different versions so you get the idea of just the kind of things you can create with our template.

Keep reading to see all of our examples, get inspired, check out the tutorials, see the actual finished projects and if you like, grab our template and start designing your very own wallet.  You can even add a tiny album to your wallet.


I used Daddy's Day from Crazy 4 Monograms to design my first wallet. (This store is longer live. :() I thought it'd be perfect for a man's gift.  The top image is the outside front and back.  Just cut around the outside and fold.  You could just cut out the second rectangle with all of the pockets and make slits for goodies to stash.   Adhere it around the sides and bottom edges to the outside cover.  Of course, you could print front to back if your savvy enough, but then you'll have problems with the pockets, but you could just use it as a typical card.

Once again, I'm featuring Minecraft and MagsGraphics awesome kit, Pixel Miner. I've used this for several other projects such as bookmakers and invitations.  Both my boys are Minecraft crazy! This will be perfect to put in a couple of bucks and a gift card for his favourite gaming store.  I know Liam is going to love it.

Maggie also has these fun, dimensional effect journal cards that'll look totally cool stuffed into the pockets.  Click here to get her kit.

I wanted to do something feminine, too.  I was  a bit perplexed over what kit I would use when I remembered this free kit I download a couple of months ago from One Of A Kind Designs.  Isn't it totally Lisa Frank, frig'n awesome?!  And it's FREE!  I've got the link a bit further down.


Click on the image to get this awesome kit for FREE.

 One Of A Kind Designs freebie

Here's a closer look at the template which comes in two parts.  This way everything should come out printed perfectly, but you should check the size for certainty. It will print out at 8" in length if all goes well.  Make sure to check your settings! I couldn't get all of the parts on one page.  Check out this illustration.  It's all very easy.


This second page is the pockets.  Clip in your desired papers, print, cut and adhere the pockets.  Remember, don't glue all around the edges.  Leave the top open.  For the large pocket, consider gluing just the left and bottom, like a real wallet.

We'll be inserting a mini album into one of the wallets.  If you want the inserts for that, you'll need the third page.  Copy the background for as many pages as you want.


Let's get some glue on our fingers and see how this whole thing can be put together.

Once you've clipped in all of your goodies on the computer, you're ready to print and cut.


You can see the wallet to the right and the cards to the left are for the mini album insert.


Choose to either glue, double sided tape or even sew the inside of your wallet to the outside. I cannot believe I didn't think to change the color of the stitching.  Clip in a background just like you would for any other part of the template or just ditch them entirely. Total duh, moment.


How the inside will look.


How the outside will look.


There are so many ways you can do this project.  You could print out just the inside and outside without the layers like illustrated here.


Cut off any edges that aren't perfect.


Either glue, tape or sew the outside to the inside and you'll have just a card.  This is the easiest and fastest way to finish your project.  You can always just fold the money and put it in like you would a normal card.


Cute inserts, eh?  Tip: Look at the slight discolouration in the centre fold.  That's because I used 300 weight paper.  It's doesn't look so prominent when you use a lighter grade. I used three different grades of paper and they all worked great.


I had an audience when I was fashioning my photos.  My boys couldn't wait to get their hands on these wallets.


Keep it really simple by just using the inside and outside as a typical card and it'll just "look" like a wallet or...


Use all of the pieces of the template and layer up a real wallet!  Your's will come out on more than one sheet of paper as instructed.  I saw that this way it was on the small side and improved the template.


Print and cut out all of the desired layers you wish to have for your wallet.


I used super thin double sided tape for this one.  I layered the bill section on top of the inside layer.  I used tape on three sides, leaving the top open for the paper money.


Then taped two sides for the largest pocket that goes on the left side of the wallet.


This is a nice size space for you to put some goodies.


The next step is to layer up your pockets.  I used three.  Start with the largest pocket as instructed.


Go from largest to smallest.  It's that easy.  Don't forget, leave the top open for your inserts.  This is so cool!


Tip: A short cut you can take to this project is simply slicing where each pocket is BEFORE you adhere the inside to the outside of your wallet.  This works really great and will save you time from all of that layering.


My simple paper cutter worked just great.  You could also use an exacto.  I didn't cut all of the way across.  Think of an actual wallet during your construction.


This image shows you just what it should look like.  You could also make the same kind of slits across the smaller pockets so you can insert your gift cards and what nots.  You HAVE to do this BEFORE you adhere the inside to the outside of your wallet.


I'm also showing you how to put in a mini album to make this project even more fun for the recipient.

Scrap up a couple of inserts using a kit of your choice.  The template is provided for you.  This way they all come out the same size.  Keep it simple like you see here, to save some time.  These only took me a couple of minutes to comprise.


I glued them back to back.  Switching out an image, then a picture, then an image and then a picture and the end page is the plain, coordinating yellow piece from my paper scraps.


After gluing your pages together, back to back, score them all in the same place.  As shown here, below.  I strongly advise, folding each score so the pages turn easier once attached.


I'm trying out good double sided tape for this mini as a way of binding it to the wallet.  You could sew or glue gun, too.


Make sure you are gluing the correct side!  I almost made a boo boo.  Hehehe...


Don't forget those folds.


All in place!


So cute!


With extra folds, your album will open up splendidly.


So there you have all kinds of inspiration and THREE ways you can use this template.  As a typical card, layered up or with simple slits.


Click here to get to our shop for the templates.

If you want to see more of projects we invite you to scroll through or hit up our Pinterest Boards where you can catch all of our freebies and projects.

Here are some recent projects related to hybrids like you see here.

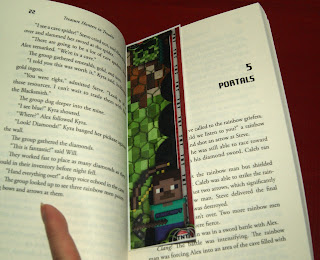
You can grab this fun Minecraft book marker for free.  Click on the image.

 Minecraft bookmarker

We've got a tutorial on how to make this Creeper piñata.  It's mega easy, made in under an hour and you won't even need to buy anything if you have a decent stash.


 Easy piñata

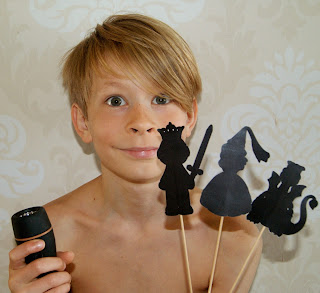
These shadow puppets are also free.  Click on the image to get them.

 free shadow puppets

Click on any of these images to get the tutorial and freebies.


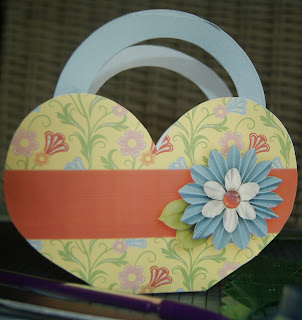
 free heart basket card for dad

Thank you so much for checking out The Cherry!  Join us on Facebook, Follow us right here and or check us out on Pinterest to keep up with all of the paper and digital fun as well as daily freebies.

Tah!