Monday, June 15, 2015

Free Succulent Summer Template


Welcome to another scrappy edition of The Cherry On Top.

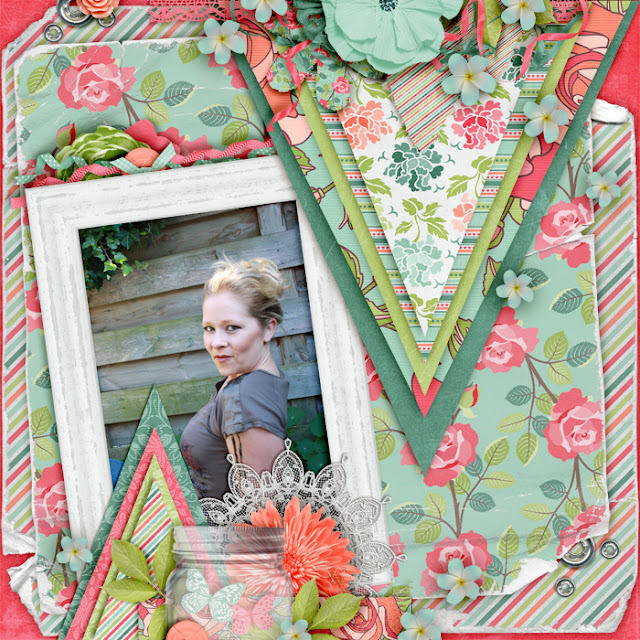
A-Manda Creation is back in the spot light with this absolutely gorgeous new release, Succulent Summer.  This colour palette is brilliant and the elements most thoughtful.  Full of gorgeous flowers, greenery, lace, butterflies and so much more.

I am totally in love with all of these worn papers, too.  Excellent thought in the patterns and alway a fabulously quality kit and collection.  If you want to see more click on the image below and head to Amanda's shop where you can find Succulent Summer and all of her other terrific kits.

 Amanda's Shop

 Amanda's Shop

You can also find here goodies at the Digital Scrapbooking Studio.

This template is no longer available.

Our Facebook Fans totally hooked us up with some major loving and sharing and so earned this free template.  I went as literal as possible from the layout to the template.  Enjoy both tiff and psd versions of this template.


If you are into free templates, you've come to the right place!  We've got a lot more for you. Along with other freebies, too.  You should definitely make sure you're hooked up to our Pinterest that's full of free stuff.  Crafty patterns, printables, digital freebies of all kinds and so much more.  Check us out!

Here are some of our most recent freebies.

 freebie

 free template

 free template

 free template

 free template

All of our stuff is free.  Do not claim any of it as your own or resell it.  Sharing, Pinning and liking is a great way to say thanks.

Happy scrappy and thanks for checking out The Cherry!

Friday, June 12, 2015

The Dirty On Detergents

Welcome to another edition of Dirty Laundry.

I had no idea this would run so lengthy, but when you break down the entire process of laundry, it's incredibly long.  Don't remind you, right?! We're going in order.  Starting off with gathering your laundry, sorting, the laundry area, prepping it for the machine, the machines themselves, their settings and now we're on to detergents.

We'll give you the skinniest version we can so you can skim and get it straight.  Detergents are necessary for the cleaning process of our dirty duds.  Actually, soap is the necessary ingredient and soap is more natural, which is much better for our environment.  We are going to hook you up with some soaps for your wash as well as offer a few recipes so you can try making it yourself.  You'll save tons of cash and be a super green example.  Of course we have the conventional stuff covered, too.


When choosing a detergent or soap you should consider several things.  How dirty is the laundry, does it really matter if it's heavy in perfume and what settings should I consider for what product.  You might be like me and just grab whatever is on promotion.  Hehehe...

Take a look at the back of your packing and see what directions are indicated for use.  Also don't just pour in your detergent, but measure it. This will save you a lot more detergent.  Too much detergent can lead to residue, ruin your clothes and irritate the skin.  Speaking of packaging, homemade detergent saves on this, too.  You'll have a lot less garbage or recycling to do.  Another plus point!

I had a poll asking friends and fans about detergents and an overwhelming majority said they really like their clothes to smell strong in perfume.  It is these ingredients that are really bad for us and the environment.  Find out more about the dangers of perfumes and other, unnatural ingredients in detergents here.  Did you know that for some reason, detergent makers are not required to list ALL ingredients in their products?  When tested, most of these ingredients are really bad for us.  From skin irritation to hormonal defects and worse.  Ugh!


Detergents can stain and ruin clothes.  Read about dosing, temperature and fabrics like satin and wool that might not be suitable for detergents, especially unnatural ones.  We found this article to be a bit helpful.

Good House Keeping has a gallery of the best detergents that's just perfect.  Check it out out here.  Tide is the big one most people prefer.  I always thought it was way too, expensive and my father had allergic reactions to it as well.  It's another company that doesn't list all of it's ingredients and has some naughty ones in there.

 GHK

Home made laundry soap saves you a lot of money, in most cases doesn't irritate the skin and it's better for the environment and your clothes and other laundry.  Here's Liz's one year experience with home made laundry detergent.

 home made soap

Check out our Clean, Clean, Clean board over on Pinterest for many more recipes for laundry soap and other really handy tips and tricks for cleaning your laundry and more.

I saw on Pinterest, how someone made home made laundry soap and gave it to their friends for them to try, too.  I thought it was a fantastic idea.  I've not tried home made laundry soap yet, but it's on my list.  I can't find Borax here and it's in every recipe I've seen so far. Not sure what the Belgian alternative is yet.

Here's a list of awesome, safe detergents that you can purchase.  Ecover seems to be a good one and I know I can buy that here in Belgium, too.  I use other Ecover products as well.

 laundry soap

Over on the Wellness Mama, a site I often go to, she also has a super basic recipe for both powder AND liquid detergent with ingredients that are right there at the grocers or perhaps already in your home.  I may go with this one.

Borax is apparently a bit controversial on it's safety.  It can irritate the eyes just like cayenne pepper or vinegar could, so take caution when preparing this detergent.  If you see other information about the dangers of Borax it's most probably correlated to consumption.  Way back in the Industrial Revolution, they put Borax in food.  That's right!  So, I'm sure you already know this, but don't eat your detergent.  Hehehe...

I'll be back with the scoop on softeners next.  Are they really necessary and what alternatives there are.

Happy laundering! 


Wednesday, June 10, 2015

Dad's Day Mini Album

Welcome to a scrappy edition of The Cherry On Top.

We've rustled up another Father's Day project for you using our apron template.  You can make this simple, paper/hybrid craft, too either by tracing around the provided, free template or doing it digital style.  It's a lot faster and there's little mess. You decide what's best for you and we'll show you how.


Grab the jpg right here or head over to our original entry where you can get the tif version if you want to go digital.

I went with both methods for my dad's mini album.  I did all of the inserts digitally and left the outside traditional, by tracing around the template and then cutting out the tools, like you see right here in this image.

Supplies Needed:

template
inserts (if you choose to go digital)
paper/card stock (if you choose to go traditional)
scissors
adhesive (glue dots, glue)
twine, string or ribbon
embellishments


The first thing I did was design my inserts using stuff from my digital stash.  Mostly using Touched By A Butterfly's Grandpa's Workshop.  The tools were really great.  My dad is a total fixer upper kind of guy.

I printed out the 6 inserts with journaling, a couple of embellishments that were tool related and added bolts, screws, nuts, etc around the places to punch out at the top of the apron.  Then, cut out everything I printed as shown, below.


My next step was to ink around the edges of everything I cut out.  It gives your project a  more polished, finished look.  Either wipe or dab.


On to the cover.  I chose very rigid card stock, traced around my template, punched the two holes at the top and inked around all of the edges, here as well.


Then I applied my pocket, leaving the top open so I could insert the tools.  (In our kitchen apron, we inserted our recipe cards here.)  Use it for anything you like.


Then, I cut out all of the tools and stuck them in the pocket.  It has to go thousands of miles through the mail, so I did adhere each one, just slightly with a tiny glue dot.  Glue dots do a lot better when it comes to heat and cold.

You can see really well in this image, that I chose a paper that resembled canvas and it gives the album a textural feel.


I have a traditional hole punch.  So to be sure, I lined up each insert with the cover and punched through. This makes sure that all of the holes from each insert line up properly.  If you've got a super duper hole punch, you could align all of your inserts, cover and punch through all of them. 


I decided to adhere my inserts back to back since I had just the right amount of pages.  It added to the durability and I didn't have blank backs this way.

I took one end of my twine, inserted it through one of the holes at the top of the apron, and knotted the end twice, so that the twin wouldn't come through the hole.  Then took the other end and did the same.  So easy!

I decided to do silly and sweet for my daddy because that is what he is, too.  Hehehe...I used funny pictures of the boys because he's got one heck of a sense of humour.

Here are what the inserts look like.


As this image demonstrates, you can stand up your mini album or hang it up.  My parents love putting stuff on their refrigerator because they see it all of the time.  Some magnet tape on the back would do the trick as long as it's not too heavy.


Use the same template to make this really easy card if you prefer.  Click the image to get to the tutorial.


We've also got a great tutorial and link to this free template to make a fabulously, easy card.  Even the kids can do this one!  Click on the image to find out more.

 Gingerscraps

Just a couple of days until Dad's Day!  Be sure to make it extra special.  If you are looking for gifts or other crafty ideas for dad or the men in your life, check out our Pinterest board, Gifts For Guys.

Happy scrapping!



Monday, June 8, 2015

More Free Frig'n Frikies!

Welcome to another scrappy edition of The Cherry On Top.

We've got another frickie for you and yes, it's free.  That's what we are all about.  Free or as close to free as we can get.

We've got Over The Fence Designs in the spotlight.  They've got a new kit out, Around The World In 80 Days and it's a doozy!  Full of amazing elements perfect for scrapping your travel photos.  I've got plenty of those.

I used the kit to show off our really fun, Germany adventures.  Gorgeous right?!  My hubby with his delicious, cold beer in Bernkastel, Germany.  A picture perfect village, running along the river.

 DSS

So, are you asking what the frick is a frickie?  It's a combination of a frame and a quick page that can be used as either or.  

 free download

Here is an example of using just the frame.  Simply pop your photo in the background and that's it!  You just scrapped a gorgeous page in seconds.

This is me in Paris, this time.

You can shrink up the frickie, add a picture and simply layer up some coordinating background papers, too.  It's so versatile!


 DSS

Here's another frickie I designed and a tutorial on how to use it with a lot of examples to get your creativity going.  Click on the image for the link.


If you're here because you saw the word free, well hello and welcome.  We have tons of freebies on the blog and the Digital Scrapbooking also spoils their fans with freebies, too.  I desgined this layout using the free template for the White Space Challenge at the Studio along with free goodies from the Use It All Challenge there, too.  Click on the image to get to the Studio and join us in all of the fun, free stuff and gorgeous products.

 DSS

All of our goodies are free here.  Please do not claim them as your own or resell them.  They are for Personal Use Only, always.

Happy scrapping!


Free, Fun Father's Day Card

Welcome to another scrappy edition of The Cherry On Top.

We are getting super scrappy for Father's Day.  This is our third project for Dad's special day.  I snagged this awesome template from Key Lime Digi Design over at Ginger Scraps and you get it there, too and for free.  To see our other paper projects click here.

 gingerscraps

This card is so easy to assemble, but we're still hooking you up with a little tutorial.  Older kids will be able to make this no problem at all.  So get them to get the glue on their fingers.  Hehehe...

Here are a couple of screen shots at the digital process, but you don't have to do this digitally.  You can simply print out the template and do it totally traditional style by tracing around the template.  The choice is yours.


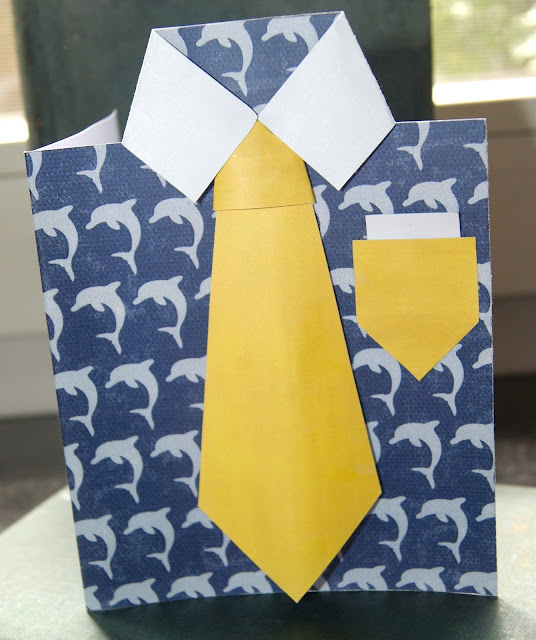
I clipped in a fun, Florida style paper for my cards background.  It's Key Lime Digi Design, so it only felt right to use dolphins, blue and bright yellow.

I created my own little layers and wanted a pocket as well.  I shaped that up and put everything where it should go, to make sure the sizes were all perfect and they were.  


Then I moved my shapes back to the top of the page so I could print and cut.  I should have cropped out my background on my screen saver.  I was checking out some other designs with pockets.


Simply print out your template either all clipped in with your favourite papers or the original version of the template.  These are all of the materials you need.


Cut out all of your shapes.  I also added two small buttons to my page, for on the collar.


Snip in just a touch, about an inch as shown above and below.  (You can see that basic printer paper does not do this project justice.  It's also why I made the other one.)


Wrap around the rectangular piece, at the top of your tie and adhere.  If you are using everyday paper like I did, glue will be just fine.  If you are using higher grade paper with more weight, then consider glue dots or double sided tape.


Snip out those tiny buttons and adhere to the tips of the collar for something a little extra.


I tried using glue dots on this thin paper and it really didn't work well at all. It even marred the top of my tie a tad.  So use glue for thin paper.


The experimental card designed with thin, regular printer paper.

 GS

And...the new and improved version with good, rigid, semi gloss paper, fun bright colours and functional pocket where you could insert a coupon or something in.

 GS

This seriously easy, fun project is ready in minutes flat.  Head over to Ginger Scraps Forum GingerScraps, grab the template and join us in the fun.  Enjoy!


Wednesday, June 3, 2015

Introducing A Frickie And It's Free


Welcome to a scrappy edition of The Cherry On Top.

I've got my gal Eva from eqr Aveziur in the spotlight because she's opened up a fantastic, new ETSY store and she has filled it with some seriously awesome new products, too.  Her newest Commercial Use goodie is all about summer and it resonates summer just perfectly.  I had to have it and I had to share it with you because it's THAT good.

 freebie


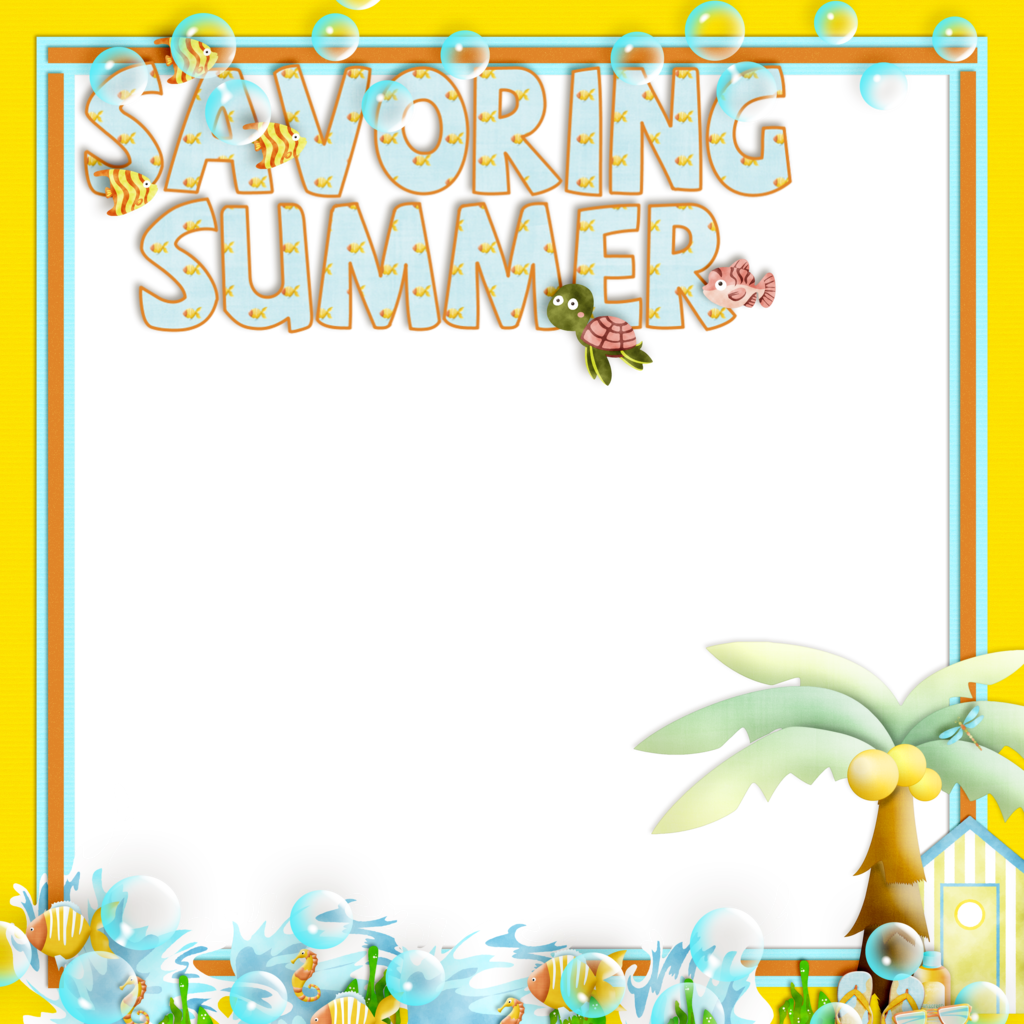
So, what is a frickie?  Well, it's a little bit of a lot of things and as far as I know, I invented it.  Hehehe...I'll at least coin the word frickie.  It's an amalgamation of the words free, frame, stacker and quick page.  It's got to be one of the most versatile digital goodies out there, right?!

This is the fabulous resource I used.  It's the designer resources 4, Beach Clip Art and Paper.  Using colours of the sun, sky and sea to come up with these little goodies of perfection and reminding me of my insane obsession with the beach.


 Aveziur on ETSY


What do you do with a frickie?  So many things!  Let's take a look and see what I've created.

In this first layout, I used the frickie as a frame, by shrinking it up a bit and inserting the picture neatly in the middle.  Tip:  With this particular frickie, it's important that you use a picture with a large background so that you still see the word art clearly.

Then I took a couple of other elements from the pack and added it to the top and bottom.  Use your own or consider purchasing Eva's lovelies.  I put the beautiful fan in each corner, added some bubbles and some coordinating papers for the background.  All from eqr Aveziur.

 Aveziur on ETSY


In the next layout, I used it more as a paper stacker, adding some coordinating papers in the background and plugging in some journaling, photos and matching borders.

 Aveziur on ETSY

This one came out so cool!  I used my cookie cutter tool and clipped up a photo with a lot of ocean and an image concentrated in the centre of the photo and used it to mat my picture.  That's it! 


 Aveziur on ETSY

The easiest thing you can do is just paste a large picture in the background.  Tip:  Use a picture that focuses more towards the bottom and has a lot of space at the top to  compliment the word art or title.

 Aveziur on ETSY

Here's a look at some more of Eva's products.  Here's what I've done with them and each image is hooked up to her new shop so you can get a better look.  The first one is my all time favourite.  I used Eva's, Among Flowers kit and scrapped my little guy.

 Aveziur on ETSY

This is a template for a paper top hat.  The first image is with Eva's Among Flowers and you can make your very own traditional top hat either digitally or traditionally.  I've got the tutorial all linked up for you.  Click here to check it out.


Enjoy your frickie and we invite you to go through the blog and see all of the freebies throughout.  We are all about freebies and we post everyday to Pinterest and Facebook.  Join us there, too.  Thanks for hanging with The Cherry and remember all of our goodies are for Personal Use ONLY.
Share our blog links or leave a comment as a way to say thanks.

TO DOWNLOAD TODAY'S FREEBIE CLICK HERE.

Tah!