Wednesday, February 17, 2016

Owl Love You Forever and Freebies

Welcome to The Cherry On Top.

More digital scrapping delight.  We've got LouCee Creations in the spot light and her new kit, Owl Love You Forever along with some sweet inspiration and some freebies, too.

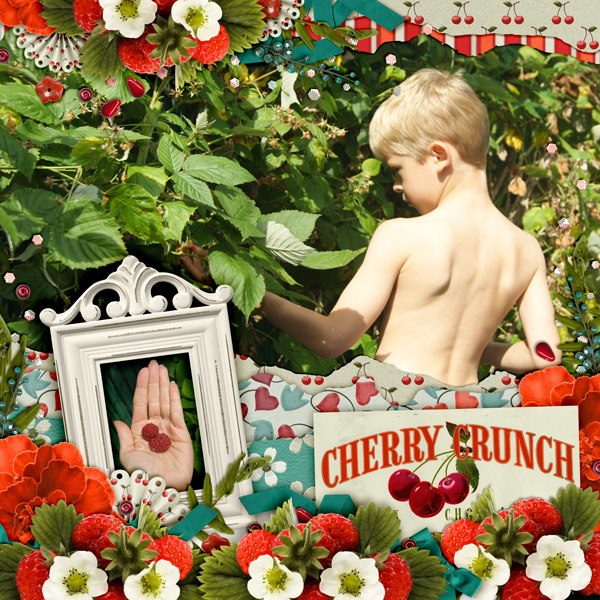
This is my youngest, JJ.  He's got Autism (which we blog ever Monday) and the camera is typically not his friend at all.  He very rarely allows us to snap a shot.  These pictures were so special.  He let me shoot away.  I'm thinking maybe it's because we were on a long family vacation in Germany and we stayed in this fabulous art house.  Every wall was full of local artists showing off their best and it was super inspirational to be there.  We also live in a one story, bungalow and this house had THREE floors.  The kids just loved it.  I'm thinking the doggie liked it, too.

 LouCee Creations

I started off my layout with a template from Chelle's Creations, but really only used the photo spots.  You gotta love the flexibility of templates.  There were so many special elements in this kit, I wanted to show them off.  I kept adding and adding and used that sweet alphabet that comes with the kit until I had a nice presentation of some great pictures of JJ.

Here's a look at the kit, up close.


LouCee also has a freebie available on her blog.

 LouCee Creations blog

We've got this free paper stacker for you.  It's uber versatile.  Stack up some great photos, embellish and you're set!  Right click to download.


You can find this fabulous kit for just $3.50 at the Digital Scrapbooking Studio, for a limited time.

Our freebies are for personal use only.  Do not claim them as your own or resell them, please and thank you.

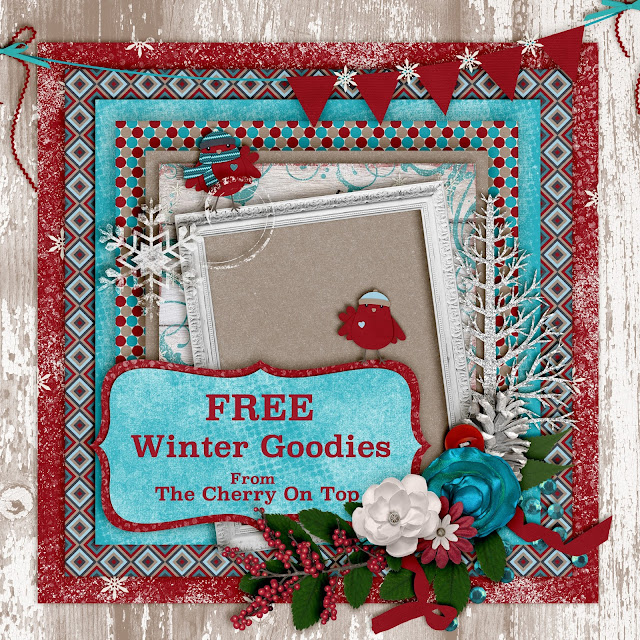
Here's a quick look at a few of our recent freebies.  The blog is full of free stuff.  Either scroll through and take a peep or head over to our Pinterest boards where you can find them all in one place.  If freebies are your thing, then you have to get over to our Facebook Page where we post several freebies, every single day.

Click on the images to get to the download.

 free printable

A free template or quick page, if you like.

 free template

Thanks so much for checking out The Cherry.  Make sure you do it, again!

Tuesday, February 16, 2016

The Kit Cart, The Cherry and Freebies

Welcome to The Cherry On Top.

I haven't figured out how to take back an entry.  Hehehe...This wasn't supposed to air until tomorrow and I can't seem to change that.  Oh, well!  I'll jump in here and fix things up so it's all ready for you wonderful readers.

The Kit Cart Designs is back in a big way and with two new kits that are a cool blast of fun.  They are also on an awesome promotion for the rest of this week.  So grab them while they are this cheap.

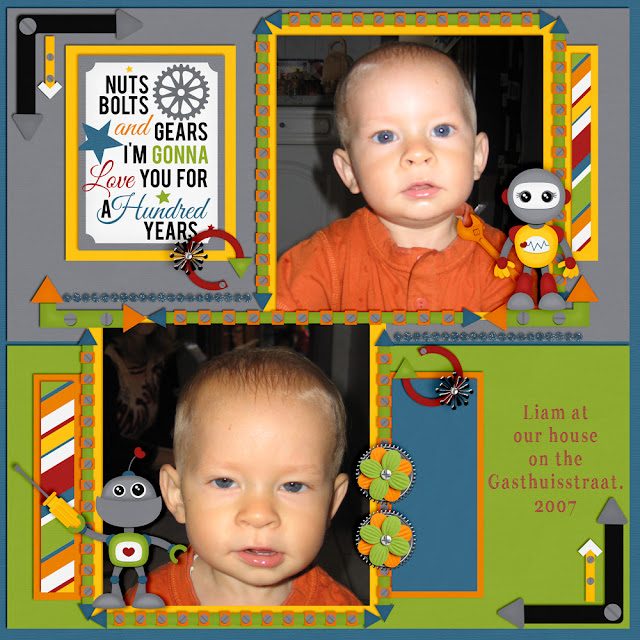
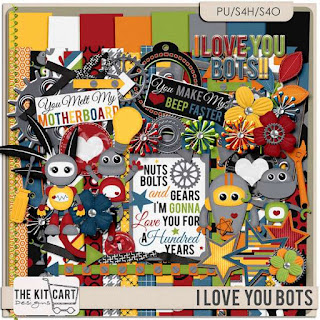
This is Love You Bots.  I just love bright, fun kits full of cute embellishments good for just about anything you might have in mind.

These robots are so cute.  I've used all of them in this one layout.  See the top one?  I often like to have characters or critters peeping our from behind stuff.  Just something a little different.

Keep scrolling to see the Kit Cart Designs other new kit, more inspiration and grab a couple of freebies, too. 

 The Kit Cart Designs

This layout started off so cool.  I used that nifty border from the kit and strung on some other fun elements to fashion this frame and the corner elements.

 The Kit Cart Designs

Jamie, the doll she is, is letting me give you this quick page for free!  We can give freebies in png format right from our blog now.  Thanks Blogger!  This is saving us tons of valuable space on our other download spaces.  Right click and download.

Plug in two photos of your cuties and you've scrapped!  Consider shrinking up the 12x12 to an 8x8, 6x6 or 4x4, print and frame or put it in a scrapbook sleeve. I turn layouts into cards.  See how we do it here.  There's also a link to a free template to make the job even easier.


Look how darling?!

 The Kit Cart Blog

This freebie you can get on The Kit Cart Designs blog.
 The Kit Cart Blog


This kit is screaming, The Cherry!  The Cherry!  I find it just dreamy.  Up In The Air is also where I'm often at.  Hehehe...

I really floated those elements to give it an airy effect.  I guess I went a bit literal with this kit.  Such a cute picture of my little JJ.  Ah, the child who slept!  Hehehe...


The Kit Carts totally awesome kit for a fabulous price, too.
 The kit Cart Blog

Here's another coordinating freebie for.  
 The Kit Cart Blog

You can find both of these kits for just $2.99 at the Digital Scrapbooking  Studio, but only for a limited time.

Please, remember our freebies are for Personal Use Only and are not to be resold or claimed a your own.

Thanks so much for stopping by The Cherry!  

Monday, February 15, 2016

How To Deal With Meltdowns

Welcome to The Cherry On Top.

On Mondays, we share tips and tricks that have worked for our two Autistic boys both in the past and present.  Today, we are looking into the dreaded meltdown.  We'll make sure you know the difference between a tantrum and a meltdown.  (It's also good arsenal to share with others who just think it's all a tantrum.)  We will look at ways to preventing them and diffusing them.

I have to admit, the meltdowns around here have improved tremendously.  Our oldest son doesn't have meltdowns as much as incredibly loud outbursts of anger.  We'll look at those another time.  Our youngest who shows a lot more Autistic symptoms is more prone to meltdowns than his older brother.


Perhaps, as with your child, friend or loved one with Autism, our JJ didn't show any signs at all of Autism in his first two years.  Compared to his brother, he was a gift.  The perfect baby.  He ate slept, smiled a lot and was just a joy.  Then, BOOM!  It hit like a hurricane.

Meltdowns were a daily occurrence.  Sometimes even more than once a day.  School was definitely a place for the mega meltdowns and still remains to be so.  What helped us most is learning what kinds of things triggers a meltdown.

New environments, loud noises, awful or strong smells, school or sensing the environment is going to change...It's all different for everyone on the spectrum.  Often, you can see it building.  That's what a meltdown looks like to me.  The last drop in the bucket kind of feeling where the emotion is so strong, like a boiling tea pot, it HAS to get out.


My oldest explained that it's physically painful to feel this way.

When I was in my 20's I had huge rage outbursts.  I might dare to equate that to a meltdown.  I'm glad as I was in a place where I could step outside of myself, see how stupid and ridiculous I looked during these fits and be wise and strong enough to stop them by myself.

This isn't the case for some people on the spectrum.  They need constant help and guidance to learn how to deal with these kinds of emotions.  Social cues by means of glares and shouting do not help at all, but just the opposite.


Let's look at the difference between a tantrum and a meltdown.  Tantrums are all about getting the attention from those around them.  In a meltdown, they are not looking around to see the reactions of others.  Control is another issue at hand.  In a tantrum the child has control and in a meltdown, no one does.  Tantrums are ended, in most cases abruptly.  The child gets what they want or is reprimanded and it's over.  A meltdown takes much longer to unwind and it can also be hard to get over physically and mentally for a considerable amount of time.


Do not expect the person to be in any way shape or form, sorry for their outburst.  Shame and embarrassment rarely come into play so don't bother trying to make them feel any of those.

For years we didn't go out unless we absolutely had to because the change in environment was so stressful for both of our boys and frankly, for others as well.  This helped with meltdowns.  The best advice I can give is to remove the person from the situation as quickly and stealthy as possible before a full blowout meltdown takes place.  Pay close attention to what triggers this inappropriate and sometimes dangerous behaviour.


Distraction has worked wonderfully for us and removal, too.  Learning the signs is key.  Don't talk too much and act and react as calm as possible.  This shows them an excellent example, if they are even looking.  In a serious meltdown they more than likely are not able to pay attention to what you are saying or doing so say as little as possible.

If a meltdown is imminent, be sure to make the area safe or move the person to a place where they cannot be hurt or hurt others.  As long as nothing was getting broken and no one getting hurt, I'd just let him scream jump, twist, flap whatever he needed to do until he was physically spent and stopped.  Then I would hold him in my arms or at least get closer to him, physically and let him know that that kind of behaviour isn't tolerated and that we have to do more to prevent it from happening.


At one point we had a thermometer image where our kids could mark where they felt they were emotionally.  This was great for all of us.  The brother knew, the parents and person himself knew how upset they were getting.


You can print and laminate this one.
I would bet that many meltdowns happen because the person in charge is just not paying attention to the signs.  Sometimes a person is in the middle of dinner or a report for work and has no idea what's going on at the other end of the house.  We always had our children under our noses in the early years.  It was essential to stop destructive and dangerous behaviour.

To wrap it up:

Learn the difference between a tantrum and a meltdown.

Try to prevent meltdowns before they occur.

Learn the triggers and make the changes necessary.

Keep everyone safe if a meltdown occurs.

Stay calm.  Don't shout. 

Use simple sentences.

Discuss the meltdown when calm and composure is regained.

Meltdowns are dangerous and it's also a sign that there is something going on that is creating a great amount of stress.  Something has to be done about reoccurring meltdowns.  Get help if necessary.

Thanks for taking the time to stop by The Cherry.  We hope we've helped and we wish you the very best.


Sunday, February 14, 2016

Advantages of Digital Collections


Welcome to The Cherry On Top.

We've got some totally awesome inspiration for you.  We're showing off several layouts and giving you some great ideas on how to use digital collections to your advantage.  There are so many plus points when purchasing a designer's collection and we're going over those as well as giving nifty gifties, too.

We spoke on collections and how to combine them with other kits and collections in our Friday blog. Today, we are going to get an up close look at an extraordinary collection from SnickerDoodle Designs.  I just know you are going to love it!

 the Studio

Let's take a thorough look at the above layout.  It's all from scratch.  Meaning I scrapped up every single  elements individually and did not use a template.  Absolutely beautiful flowers, silky ribbons, a touch of bling and pearls adding glamour and luxury.  Then the whimsical bubbles.  I can't resist using bubbles.  They add dimension as well as a touch of frivolity. 

One of my favourite packs in this collection are these quote overlays.  I've never seem them before and I absolutely love them.  See how I used them in the above layout?  I added the coordinating glitter effects (also in the collection) then laid it over my large photo.  Oooh...I'm in love with this look.  It gives my layout an unobtrusive frame and a bit of gleaming glam, too.

 the Studio

Here's a look at the kit.  Isn't it just so special?  The elements are beyond fabulous and you can use it for any type of project you might have in mind.  It's also currently on a fabulous promotion!

 the Studio

Let's take a look at another pack in this teriffic collection and why collections are the best way to scrap.

I think this layout is amazing and...it may have taken 5 minutes to scrap!  If time is not on your side when it comes to digital scrapbooking, then you definitely need to purchase collections!  This layout is just a border from the collection pack, inverted and horizontally switched up to give the effect you see here.

Scrapped up in minutes is very appealing!

 the studio

Here are the borders.  Are they not fabulous?  Use them along the sides, top or bottom or even in the middle.  I often use them right across the middle and place the photos behind them.  If you don't like that they look cut off, place a long ribbon across the bottom or layer up some strips of paper to get you to the bottom or top of your layout.

 the studio

Here's an example of a huge border with the photos tucked behind it.
This is Over The Fence, Travelin' Man Collection.
 Travel'n Man

Here's another example using borders as the main part of your layout to save you tons of time.  I used some torn papers to get a finished look across my page.

Karen from SnickerDoodle also hosts the border challenge at the Studio. She's also a bit of an expert on borders.  Have you seen the Border Buddies?  They are definitely an asset to have in your digital stash.


Berry Happy from PattyB Scraps
 PattyB

Here is an example of a border, not used on the sides or edges of the page.  I just used this bow/ribbon to cover up the bottom edge that would normally not look right placed there.  You could used long strips of paper as well or anything like you see at the top of my page with those kinds of borders.


Here's an example of those Border Buddies.  She's got a lot more in the shop.  Click on the image to see them.  You won't know which one to choose.

 the Studio


Another pack you will often find in a designer's collection is a pack of clusters.  For this layout below, I used a ready made cluster and a layered paper.  This was another layout made in minutes.  I added a couple more matching elements from the clusters for cohesion.  Repetition is always good for a balanced look.  I added a frame the collection, the circle you see and then whipped up the word art.  It's just an alpha from my software and Karen's glitter effect from the collection on them.  Popped in the flower that is also in both clusters and those great leaves.  Boom!  Finished in a flash.


 the Studio

This is what the entire collection looks like.

 the Studio

This is a close up of the clusters.  The one in the middle, left is the one I used for the above layout.  Take a good look at them and see how they make scrapbooking so fast and easy.

 the studio

The first layered paper stack you see here is the one I used.  The others will also offer a quick layout when coupled up with the clusters and goodies from the kit.  If getting a symmetric, cohesive look is difficult for you to achieve, then collections are ideal for you.  Collections are great for when your mojo is on low, too.

 the Studio

Click on the image to get to Karen's blog and grab our freebie.
 Snickerdoodle

Eek!  Get this awesome free overlay at Snickerdoodle Designs blog!

 Snickerdoodle Designs blog


The Cherry On Top designed a couple of freebies for Snickerdoodle.  Find them on her blog, which I would also totally recommend you follow.  Karen writes totally awesome, thoughtful blogs full of tutorials, tips and freebies.  If you love her designs like I do, check out the Facebook Page and Pinterest.

Thanks so much for hanging out with The Cherries!



Saturday, February 13, 2016

Romantic Designs and Free Valentine's Day Printable

Welcome to The Cherry On Top.

We are sticking with the romance and what collection shows love like, I Love You More from Alexis Design Studio.  So soft and warm and full of love.

I scrapped up some family using a gorgeous template from Heartstrings Scrap Art.  Her shop at the Digital Scrapbooking Studio is really fabulous and the prices are great, too.

 SBG

Just in case you're needing a card for the upcoming celebration or for anyone, really, we designed a versatile card for you.  Simply right click and download, print, cut and fold and you're ready!


Thanks to Alexis Design Studio for providing us with the goodies!  Here's a look at this stunning collection.  Stamps, glitter, hearts, cupids and a soothing colour palette.  Just fabulous!

 SBG

If these designs are all you, then check out these designers other links.


https://www.digitalscrapbookingstudio.com/personal-use/?features_hash=13-55  There are some amazing sales at Heartstrings Scrap Art store at the Studio.

Heartstrings Scrap Art also hosts the White Space Challenge at the Studio where you can snag a free template nearly every month.  Find out more here:
https://www.digitalscrapbookingstudio.com

Here is the Facebook Page where you can find another freebie and become a fan.  https://www.facebook.com/heartstringsscrapart/?fref=ts

Alexis Design Studio also has a Facebook Page and you can follow them as well as grab the freebie there, too.  https://www.facebook.com/Alexis-Design-Studio-303527872993180/?fref=ts

Thanks so much for hanging out with The Cherry!

Follow us on Pinterest and Facebook and grab freebies every single day!


Friday, February 12, 2016

Freebie Friday With The Cherry On Top

 Welcome to The Cherry On Top.

We've made it to Friday and of course, we've got freebies for you.  It's also my birthday!  So, the freebie should be a bit special and it is.

Layout love is on tap along with some lovely previews of new kits out in DigiLand.  We also have some unique tips for you and gifts in typical Cherry fashion.

I don't know how it is where you are, but we are having rain, rain, rain.  It has not been cold in Belgium here for years.  A few days of freeing, but nothing major.  Nothing like the snow you see in this picture.  I don't really mind not having snow, being a Florida girl.

We're looking a couple of collections out this winter and we want to touch on how you can coordinate  various collections together to make really awesome stuff.  One of the easiest ways to mix and match is by colour.  Match up the same shades of red, blues, whites...Think about theme.  Look through your snow kits and pick the pieces out you like best.  Maybe even start a folder of all of your favourite flowers and greenery.  For some reason, designers often come up short with the appropriate greenery in a kit.  Don't settle!  Look through other kits and use the ones that fit best.

This is an example of Paty Greif's newest kit, It's Snowing Outside.  Look carefully at this lovely colour palette.  Of course, it's always a nice fit when the photos you are using repeat some of the colours from the kit or collection.


 PBP Snowing Outside

This is a glimpse at the collection.  Her drawings are always so wonderful and unique.

 PickleBerryPop

Now, let's take a look at this free overlay I designed a couple of weeks ago.  Notice the colours?  Not a bad match at all.  I put a variety of goodies from different designers into this.  Though most of them come from The Kit Cart Designs, Winter's Frost collection which is totally cracking!  Those gorgeous ribbons and that flower with stunning embellishment, adds so much glamour and  pow to my page.


The fence is my own design.  I used a template from GS Creations and some wood paper/background to fill it in.  This gives the overlay a natural, warm feel against the chilly snow and my bundled up baby.  Hehehe...The icy tree is also my design.  Another template from GS Creations with just an added effect from my software program.  The birds are also ours.  They fit just great even though they don't come from the collection. 


 Winter's Frost


Both images are downloadable by right clicking.  They are also for Personal Use Only.


This free template also coordinates with the freebies well.  Click on the image to get to the blog for the download.

 free template

It's my birthday, today and I have a special gift for you!
Enjoy this FREE Mini Kit using our Winter Goodies.

Remember, I don't know diddly about quality control and it's for Personal Use Only.

 Free Winter Kit from The Cherry On Top

Leave me some birthday loving and enjoy your free mini.

Thanks so much for stopping by The Cherry!

Tuesday, February 9, 2016

Valentine's Cards and Free Templates


Welcome to The Cherry On Top.

We've got some hybrid inspiration for you, today in the form of a Valentine's Day card.  We also have links for a free card template and some fun free letter templates to play with.

We made these mini albums not long ago, using our free February goodies from a previous blog.  This mini can be made in minutes and with very little supplies.  Make either one of these mini albums and consider using it as an insert for a card.


I designed two layouts using Amanda Creation's new release, Stuck On You.  I scaled them back to a 6x6 format and inserted the layout into our free, basic card template.  I printed out some sweet Seuss quotes that suited my boys then added this simple pocket with some coordinating scrap paper.  Here, I put in the boy's mini albums.


I know JJ loves this picture.  I designed these letters and the heart as a template.  It's really fun and versatile.


You can move the shapes around into any format you like.  I switched it up for my other's son's card.


Once the layouts were created, these cards took a few seconds to layout and print.  Just cut the card out and fold it in half and your already finished.


 Amanda Creation at the Studio


This is the letter template.  Use it as you like.  If you want the card template, click here.

 free love letter template

Did you miss our last hybrid?  We designed these paper card wallets and the templates are also free.  Click on the image to get the tutorial and the template.


 wallet card hybrid freebie

This is our latest free template or quick page if you like.  It's been a real hit!  Click on the image to get to the blog for the link.

 free template

If you are all about the freebies then make sure you Follow us here, on Facebook and Pinterest, where we share all kinds of freebies daily.

Thank you for joining us and happy scrapping!