Wednesday, April 13, 2016

Mini Folding Scrapbook Album

Welcome to The Cherry On Top.

We are back with our traditional version of this nifty, folding mini album.  Last week we showed you the digital, hybrid version.  Click here to see that tutorial as well as grab the free template that you can use digitally or traditionally.

Keep reading to see our tutorial on how to craft up this lovely mini album that you can have finished by lunch.  We've also included some images on how to design with some or our favourite goodies from Graphic 45.


Grab the download from last week and print it out.


You can choose to print it out on the paper you want to use for your project or you can print, cut and trace it.


You may want to lightly mark where the folds go if you are tracing the template.


I often lightly fold my template so I can see where the folds are when scrapping it up.  

Tip:  If you want nice, straight lines, use a ruler or something similar.


Your basic album is all set for embellishing and photos.  Let's look at some techniques you can use to make an awesome project.

Tip:  Using a collection is an excellent way to keep your projects looking balanced and coordinated.  It's also a time saver.


Here is Graphic 45's Steam Punk Spells embellishments.

Gently remove a couple of different shape circles.  I inked around the edges and cut or filed off those nobs of paper from where it was attached.  Stack them up, adhere and you've got a lovely layered flower for your mini.


Here's a tag from Play Time's Past.  The blue was very similar and I love that shot of bright on all of this black.  Ink around the edges, add a coordinating gingham ribbon, cut out the square checker boards, lay those over some tiny strips of scrap from the collection and add tiny buttons for further dimension.


We used the same layering technique as the flowers, for these circles.  I also off centered the top square so that the circles would stand out a bit more and more of the black background would be covered. Very important!  This part of the template needs to be done upside down.  Make certain that each portion of the template is heading in the right direction.  It's a mistake I make often.


Here's a look at the inside of the mini so far.  The lovely, thick, black card stock as background for the squares I cut out from Play Time's Past paper.


This is a look at the outside of the mini.  Notice the bottom portion is upside down.


I printed out my photos at just over 2 1/2 "by 2" inches and rounded the corners. You can always print out squared photos and use a corner punch.


Place your photos where you like on the squares.  You can use the outside, inside, make pockets, adhere them onto tags...


Another closer glimpse at our embellishments.  Two ribbons behind the domino tag, more small checker boards and another layered up, coordinating circle.


The outside part is all finished!


Here is how be built up the flower for the cover.

Tip:  We used the larger check board from Play Times Past for our flower on the cover.  I used a flower that was just the right size, as a template.


Tip:  Don't forget to check out the other side of these sheets of embellishments. I used the back side for this blue flower.


Tip:  Be sure to gently remove your embeltiments.  For the really small ones, I use a pen or pencil and gently push through.


The flower is all layered, inked and ready to go.  I used a glue dot that easily comes off to open and close the mini. Consider elastic, ribbon...to close your album.


Tip:  Do not over embellish or stack too high or your album will not close properly.

Here is our digital and hybrid mini's.


LOOK AT US!  We FINALLY figured out how to make a video AND are still trying to figure out how to get it on the blog. 

Thanks for joining us for today's traditional scrap.  We provided you with a free template, some great tips and techniques as well as a tutorial so you can scrap fast, savvy and smart.

We've got a Graphic 45 board on Pinterest as well as a board where you can find all of our free stuff and trust me, there are a lot of things there.

We'll be back next week another traditional scrap project.

Happy crafting!

Friday, April 8, 2016

April's Coordinating Digital Freebies From The Cherry On Top

Welcome to The Cherry On Top.

Freebies are our specialty and we've got some more coordinating freebies from our April goodies.  If you haven't grabbed those, you can find them here.  Keep reading to find our most recent freebies and see what we've done with them.

Every month we feature planner inserts and offer several matching goodies in the form of stickers, frame clusters, frickies, quick pages and even lovely printable hybrid projects.

Take a look at some of those products that are ready for April.


This quick page will be ready for download next week, but I wanted to show it off so you come back. Hehehe...

Below, is a frame cluster.  You may want to grab it because it will make an awesome addition to our stacked papers for April that you can find on our Facebook page. (For the moment we are having technical difficulties with the APPS on our FB Page.)

All these photos are from my family's most recent vacation.  Every year our family, my mo and pa-la and sister, bro-la and their two kids, all head off on a long weekend.   

My oldest still loves to cuddle despite the fact he's nearly as big as his cousins.


I used the stacked papers and our cluster frame to make this layout in minutes.  We love making scrapping easy for you.  We know not everyone dedicates the time to scrapping like we do and that's why we offer time saving freebies.  It's also nice working on projects that you know you can finish quickly.


 Here's another layout of the boys Easter morning with their new toys.  It's the same stacked papers with a different cluster.  If you use our stickers from last week, you can add them to your projects.


Grab the free cluster frame, right here by right clicking and saving the download.


Do the same for this quick page.  Right click and save to your downloads.


Since our APPS are not working on FB, you can get the stackers right here.  Just right click and download.


How easy is that?  At The Cherry On Top, we make scrapbooking that can be done in a snap.

Remember, all of our freebies are for Personal Use Only.  You may not resell them or claim them as your own.

Here's a look at last week's freebies:


 free download


We'll see you next time for our other coordinating quick page and clusters.  If you don't want to miss those, make sure your Following us here, on Pinterest and or on Facebook.

Wednesday, April 6, 2016

Little Spot On The Prairie Free Template

Welcome to The Cherry On Top.

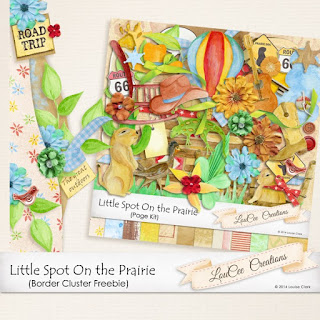
I was totally inspired by a layout I spotted on Pinterest and couldn't wait to try it out.  I paired that layout up with a brand new kit from LouCee Creations, Little Spot On The Prairie.  I love this crafty feel of the water colour and the irony of a desert type of theme.

I had these lovely photos of my oldest when he went to a CowBoy themed party.  I cut the centre of the o's out and inserted my pictures, giving LouCee's kit, centre stage.

 LouCee Creations

Here's another layout from my scrapper sister, Erika.


I thought the layout was pretty unique, so I turned it into a free template for you.  I realise that you may have a girl where this kind of page might work.  Keep scrolling to see how I changed it to be gender friendly.  That's the beauty of templates, their flexibility. Make sure you spell little correctly, too!  Hehehe...


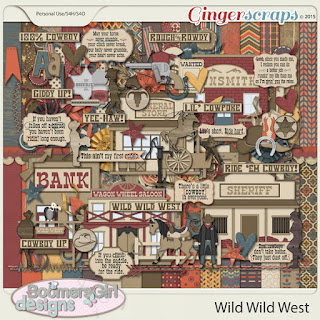
How's that for a change up?  I scrapped up my niece and her horse and used a really fabulous kit from  BoomersGirl Designs, Wild Wild West.  It's the kind of kit that you'll use over and over.  It is chocked full of awesome elements.


I am experimenting a bit with this template and outlines.  If you download this template and have problems using it, I would appreciate your feedback.  Even though our stuff is free, I want it to be awesome.  Here's a little guide on how to ditch the outline in PSE.  

Go to your layers menu, click on the fx letters to the right of the name of your element you want to change.  This menu will pop up.  Click on the box with the stroke to get rid of it and hit OK.  You can also right click whilst hovering over your element and click on clear layer style, but you'll lose your shadows, too.


 Wild Wild West

Here's not only a peek at LouCee's kit, but a pretty free border, too.  You must be fast because it's only available through the week!

 Louie's Freebie

This free cluster you can find on LouCee's Facebook Page.

 LouCee on FB

To get today's template, click here.

If freebies are yo' thang, then The Cherry is the place to be!  Follow us here, on Facebook and Pinterest where we share free stuff every day.

Thanks so much for checking out The Cherry!


Tuesday, April 5, 2016

Folding Match Book Mini Album Tutorial And Free Template

Welcome to The Cherry On Top.

We just love quick, easy and inexpensive paper projects.  In today's world there are a lot of people not dedicating time doing the things they love.  So, it is essential that when you finally do reward yourself, that you can start and finish a project in just a couple of hours or less.

We also understand that economics can come into play.  We address frugal techniques with great results.  Our crafting table isn't full of today's greatest gadgets or newest paper collections.  If you have all of that stuff great and if you don't, no worries.  You can still scrap up super awesome projects with just the most basic of supplies.

Scissors, adhesive, pencil...Seriously, you don't need much more to create beautiful projects.

I saw a super mini on Pinterest.  Though I couldn't find any kind of template or tutorial, I just looked at the images of the opened mini and designed our template from that.

Keep scrolling to get a look at our newest hybrid, check out the tutorial and download the template to use digitally or traditionally.  Don'cha just love options?

Here's what the album looks like when it's closed.  The purple one is the hybrid version and the black one is the traditional version. We'll have the traditional version's tutorial on a later blog.


Here's a look at the template.  Make sure you read through the tutorial to prevent some mistakes. This is in a tif format.  If you can't use this kind of format, let us know in the comments.
 free template

I didn't provide dotted lines where you should fold, but it's very easy.  Cut out all around the edges, like you see in the image below, then fold on the inner lines and fold the tabs in.  Look to our photos to see how it's done.

Open the template in your program of choice.  Get your gallery together of photos and embellishments and papers if you are using them.

The template makes placing your pictures just perfect.  In PSE14, go to the layers menu, click on the box you want to use, drag in your photo and create a clipping mask with the right click or in earlier versions, Command G.  You can then expand or shrink your picture for the perfect fit.

You can see I've also included some word art and when you look at the finished, printed version, you can see where I added elements and one background for behind the Spring Break lettering.  I outlined the lettering so that it pops against those lovely flowers.


If you want to print back to back, all you have to do is flip the template horizontally.  I tried doing it via printer, but I couldn't get it just right.  I just printed out both sheets, cut and adhered back to back.


So one side has all pictures with a couple of elements and the other side I used only backgrounds.  WARNING!  If you are going to do the other side like ours, you have to put the writing upside down. Hehehe...Hence My little purple patch of paper for the cover in the photo.  Of course, you could also add digital elements or photos to the tabs.  I did that in my traditional tutorial.


Here's what the mini looks like after printed, cut, adhered back to back and folded.


The book is all closed up. I added some coordinating paper to cover my mistake, some scalloped edging, a couple of glitter dots, doubled up some buttons and tied a coordinating, silk bow to finish it off.

If you don't want to cut off the black lines you can always ink around to even everything out, in any colour you like.


I used A-Manda Creation's Hippy Hoppity Easter kit.  Find it by clicking on the image.

 Amanda's Store/Hippity Hoppity


That's one fast and easy project for you to try out.

We've got a tiny video for this project if you want to check it out and maybe give us a thumbs up for trying.  Hehehe...It will get better, I promise.


  https://www.youtube.com/watch?v=f1AlPY_fIVk

Keep in mind, our templates are for personal use only.  If you'd like to use them professionally, we can help with that.  Just send us an e-mail for Commercial Usage.

Reward yourself by scrapping up some fun pictures.  Keep it for yourself or give it as a nifty gifty.

Thanks so much for joining us at The Cherry!

Want to see more projects like this?  Check out THIS board and see more of our free crafts.


Sunday, April 3, 2016

Maximising A Mini Kit

Welcome to The Cherry On Top.

Today, we are working with mini kits with maximum impact.  We'll show you how to match them up with the right template and how to get those few papers and elements to give big results.

The Digital Scrapbooking Studio is having a fantastic April's Fool deal where you could buy a mystery kit for $1.  You don't know what kit you are going to get, but believe me, the prize at the end will definitely make you smile:) The kits will all be for sale after the week long promotion.

I got to work with a few of the mini kits and was thrilled with the outcome.  It's a lot like a Use It All Challenge, where you get a free mini kit and have to use all of the pieces to design your layout or project.

Let's take a look at what we've done with a few of these really fun mini kits.

First, is LouCee Creation's, A Little Shabby.  These colours are so soft and pretty.  They totally spoke to me.  Then again, I just love shabby chic.  Take a peep at all of those fabulous elements in this mini.  Gorgeous flowers, a nice variety of greenery, beads, the charm shoe is a favourite and I found those two tiny hearts a sweet touch.

This mini had me focusing on the elements.  They were awesome and so brilliantly thought out to be used to a maximum.  I didn't have a layout pop into my brain, as I sometimes do.  So, I went for a very simple template that used tiny elements and focused on a large background.

The template is a hodge podge of PHOTOcowgirl and the mask in the background is from LissyKay Designs.  I duplicated Lissy's template, which you'll see a little further down, ditched all of the elements except the mask then moved it into PHOTOcowgirl's template.  I also faded the mask just a tad, so that the smaller photos might stand out more.


PHOTO cowgirl's template is also pictured a bit further.  I never follow a template exactly which is the magic of templates.  I kept the elements small, like in the template, but enlarged them all on the template, just a little.  I also have this thing with white space.  Hehehe...So, I added that extra corner cluster.  That cluster seemed to soften my mask, too.

The background paper was absolutely perfect for this layout with it's bordered edges.  What a match!

Isn't this mini just divine?!


Here's PHOTOcowgirl's template, Barren Beauty.

 Photocowgirl


This is LissyKay's template and it's FREE!  Click on the image to get the download. +
 List Kay freebies

A-Manda Creation's mini, April Fools is a lot different than LouCee's.  Full of bada bing, brightness! A-Manda makes the best papers in DigiLand so I chose a template that would show them off.  This is also a free template.  Keep reading to find out more.


Amanda's mini also only had a couple of elements and I compensated a bit by using a template with a lot of papers to draw you in and some uber fun photos of my oldest, when he was not so old.  It was total luck that photos and the papers coordinated!  Hehehe...For real!

Here's a sweet tip to get around limited elements:  See those green curly ribbons?  In the mini they are blue, but I didn't want the blue ribbons on top of my already blue circle.  In PSE, click on the element you want to use so it shows up in your workspace.  Then grab the colour paper you want from your gallery and clip it in.  This way it will match perfectly!

I also added a few effects to the colourful swirls to make them look a touch more dimensional.  The plain green and pink paper were a little too distracting in this layout, so I added Amanda's splatter.  Once again, the original splatter was green, but I used my tip above and changed it to the red from the mini kit.

Here's the template I used from Joyful Expressions. You can see, I didn't change too much.  Very slight changes for once.  I let the paper take over. Click on the image to get the download.

 Joyful expressions

This is A-Manda Creation's Mini, April Fools.


So now you're all set on how to match up templates with kits or mini kits, you've got a couple of sweet, free templates (if they are still live) and you know of The Studio's amazing $1 minis.  Grab a couple of minis, these great free templates and get scrapping.  You deserve it!

We've got a lot of fee templates right here on our blog.  Scroll through and download what you like.

Happy scrapping


Saturday, April 2, 2016

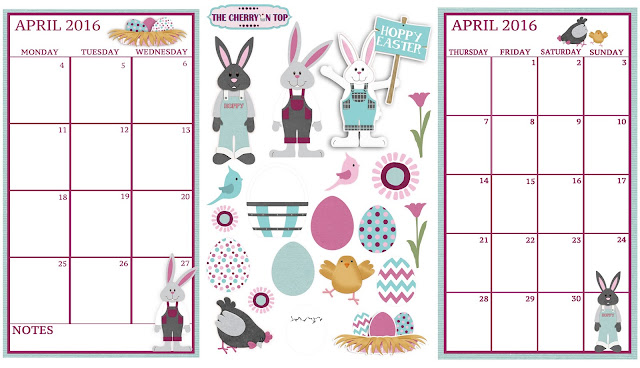
April's Free Planner Pages and Stickers

Welcome to The Cherry On Top's hybrid Saturday.

We are back with more planner goodies.  We've got both pages for you to plan and schedule your busy month as well as a page of fun stickers to use in your planner or anywhere you'd like.

I used mostly Commercial Use templates from GS Creations purchased at SugarHillCo.  There are also some free Commercial Use goodies in the mix from MissTiina also found at SugarHillCo and on her blog.


Simply right click and download.  The stickers are in png format so you can use them digitally as well because they have no background.

Did you miss the other month's goodies?  Find them here:


Our freebies are always for Personal Use Only.  If you 'd like Commercial Use permission send us an e-mail and we'll work it out.

If you download our freebies, leave us a comment, +, Pin or share as a way to say thanks.

Get printing and get scrappy! 

Friday, April 1, 2016

Freebie Friday With Key Lime Digi Design

Welcome to The Cherry On Top's, Freebie Friday.

We've got a super blog full of amazing freebies, including mini kits and a template.  Of course we've got layout inspiration as well as some tips on how to use Key Lime Digi Design's newest collection, All Things Beautiful.

One of the elements you'll find in the new kit is this green stamp frame.  I duplicated it to make this background.  You could plug in different papers or photos into the squares.  The papers in this collection are just beautiful.

I've scrapped up my lovely nieces from our recent weekend get away with the family.  Add a fabulous frame and cluster up your favourite elements and you're set.


This is a peek at the free template.  It was inspired by Sandy's cluster and some of her elements from the kit. Keep scrolling to get the links to the free download.


If time is of the essence, you'll love Sandy's clusters.  They make scrapping unbelievably speedy.  Take a peep at this layout I whipped up in 9 minutes.  Select a gorgeous background, frame up some papers of your choosing, back them with scatter, add mesh, put your cluster over the top, add some lettering if you like and your scrapped!


Take a look at all of this gorgeousness.


 I told you the papers were fabulous.


If you sign up for Key Lime's newsletter, you'll receive this add on for free. Click on the image to sign up.

 newsletter sign up

Don't forget to check out this amazing sale for ONE day only.

 key lime shop

To get today's free template, click here.

We've got many free templates at The Cherry.  Feel free to scroll through and download until your heart is content.

Here are a couple of others.  Click on the images to get the links for the downloads.

 free template

 free template

 free template

If freebies are your thing make sure you follow us here, on FB and on Pinterest.

Thanks so much for choosing The Cherry.