Friday, May 15, 2015

Part 3 of The Laundry Series, Stain Removing and Pre Wash

Welcome to another edition of the Dirty Laundry Series.

We're going in order of the entire wash process.  From gathering the dirty duds, getting them to the space where you launder and now how to prep your clothes for the wash.  Did you even know there are several things you should do before putting your clothes in the wash?

Of course, sorting the laundry is very important. Let's get into detail about prepping your clothes for the machine, while sorting as well as stain treatment, soaking and delicates.

 more laundry ideas


There are many different ways to sort wash.  I must admit, I use the most basic method.  I mix and match, use hot, cold...I just want to do as much wash at one time as possible to get it over with faster.

I always start with the darks because we have twice as many darks as lights and whites.  As you put the darks directly into your machine or another bin (I go right for the machine.) empty pockets, zip up zippers and unbutton buttons.  Make sure your red clothes go in with the darks as well.  Some folks also sub sort by weight.  I do not do this for the washing process, but for the drying, I do.


For environmental as well as economical purposes, I wash nearly all of my laundry in a cold cycle.  It saves a whole heck of a lot of energy and money.  Washing in cold preserves colour,  prevents bleeding and of course, helps shrinkage.  Keeping up a cold cycle allows you to mix the colours a bit more, too.  We don't have that many white items, so I just chuck them right in with my lightest coloured wash.

 AES
Click on this image to read more tips on how to save energy.


All machines, clothes and detergents are created differently so you may have to experience and see just how far over the boundaries you can go with your clothing in regards to stuffing your machine, weight and temperature.

Over stuffing your machine will not lend the cleanest wash.  It will create more wrinkles and smell less fresh.

Every other month, I might wash a white load with bleach and hot water.  Bleach and the hot cycle is terrible for the environment and I use it as little as possible.  Our wash just isn't all that bad and the regular process on cold, seems to do well enough.  

Wool, silk, satin, leather...any fragile garment should be scrutinisingly considered to even enter your washing machine.  Wash by hand. If you really love your clothes or a particular garment, take it to the cleaners.

I've hooked up this image below, for alternatives to dry cleaning.  We don't do dry cleaning.  It's ridiculously expensive, environmentally harmful and our life styles don't require this type of clothes.

 Don't Dry Clean


At the very least, sort darks and lights and wash on a cold cycle.

I rarely stain treat, but if you do here are some tips.

For underarm stains, check out this link.  If ring around the collar is a problem, click here.

OxiClean seems to be the big brand to treat strains. Harsh products are not good for fabrics, our skin or the environment.  So, I'm also hooking you up with a couple of home made stain treatments.  Check out this one from the Wellness Mama.  You may even already have these ingredients in your home.  Here's another one.

 wellnessmama


I also found this assortment of ways to fix some clothing and shoe problems.  There are a lot of good tips here.  I use a lot of these methods.

 clothes hacks

So, now we are actually ready to wash.  We'll look at the different kinds of wash machines that are out there and cover a couple more basics of washing in the next Dirty Laundry edition.

I'll leave ya with this free printable of a clothing care guide.  Click on the image to get to the blog to download and read more about the care symbols.

 care guide

Feel free to share your favourite stain treatments.

Thanks for joining us!

Wednesday, May 13, 2015

Insanely Fast, Easy and No Cost Minecraft Piñata

Welcome to a DIY edition of The Cherry On Top.

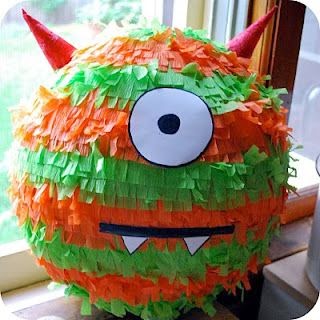
Piñatas are not popular in Europe, so I'm finding. I want to bring it to life, here. One of the best things about a party is the piñata. I have childhood memories of them and they are very fond. My kid saw the concept on a TV show and said he wanted one for his birthday. Since he is a fan of Minecraft, I had to go for the Creeper Piñata.

Hit up the Party Ideas board on Pinterest for more piñata ideas. Here are just a couple more. I've already made a template for this one! Be looking for a future blog.

party ideas

Pinterets

I fist checked out to see if I could purchase one here, in Belgium and found a store in the area that sold them for 25 Euros, unfilled. So at least another 15 Euros or so to fill it and I'm talking about 40 Euros or just under $45 for something that was going to battered and broken and I really don't think the kids care all that much waht is in the piñata besides the candy.  Hmmm...

Hitting up Pinterest first, I found some cool ideas, researched the basic construction, glue recipe and came up with a much easier, faster and cheaper way to make this Creeper (from Minecraft) piñata.  I want to credit The Coupon Closet for the spark. I took their idea and made it a heck of a lot easier.

This piñata took me under two hours to make from start to finish and with a lot of interruptions in-between.


Here is what you will need:

2 paper bags, whatever size you want. 
coloured paper (greens and black for a creeper) for the outside
paper cutter or scissors
light weight candy
light weight toys or other stuffers if you choose
balloons and confetti
1/2 cup flour
3/4 cup water
pastry brush

I keep all of these lovely paper bags from retailers. They come in so handy. I found two nice sized, bigger bags that fit perfectly into one another. They really were not all that rigid as you can tell from the image. They were not coated and there was no plastic in any component. In the beginning I was worried that it wasn't going to hold the stuff inside. I simply folded inward, the handles for the inside bag.


Then I did a forehead slap and thought, I'll put all kinds of light stuff in there to keep the weight of the piñata down. Take a look at all of the light weight goodies I put in there. I took all of the packaging off that I could as well.

I recycled stuff that my boys didn't like or use or things we had doubles of. FYI, those little parachute dudes were a huge hit for the boys of this party. They were between the ages of 7-11. Glow bracelets, whoopee cushions (always a hit), Pez dispenser filled...Think light as possible.

Here's a link to a blog that has a list of non candy ideas for piñatas.

pinata stuffers

I never buy candy. I don't have to because everyone else does. I used candy that we already had in the cabinet. I chose the lightest candy from the bunch and still had a ton left over. There was a sweet variety of spek which are those pink marshmallows you see, chocolate cents, a few lollies and just a couple of other small, light candy to help fill up the bag, balloons and confetti. All seriously light things. You could always put in coupons, gift cards even a couple of dollars or paper money. I thought a 5 Euro bill would be cool or a coupon for a night's stay at our place.


After filling it, I checked to make sure the bag still fit nicely inside each other.  No problem!  Lift up your piñata by the handles and make sure they are going to hold all of your goodies.  You could consider extra reinforcement on them.  I didn't need any.


I hit up my colored paper stash and grabbed green and black as well as my paper cutter and scissors. I folded standard a4 sized paper in fours and cut, but the size really doesn't matter because you have to overlap anyway.  


Then made the glue of flour of water. I used a half a cup of flour and 3/4 cup water. I just blended until I had a decent consistency having no idea at all of just what a decent consistency was. Hehehe...Not too thick. Not too thin. I still had left over.


I grabbed my ever trusty, silicone brush and started the work of applying the paper. The bottom is where I started. It also probably doesn't matter where you start. This dried really fast. I made this piñata on our granite island and nothing stuck, but just keep that in mind as your gluing.


Over lapping is important. Just about a half an inch is ideal. You'll see as you go what is best. Try not to let it get too wet either. Remember, your bags are also from paper.


Work your way around the bag until all of the outside is covered. I continually checked to make sure my piñata was not sticking to the counter top and the spaz I am, kept wiping off the area where I was applying the glue so the clean up was a breeze.


I used two square for the eyes, a longer rectangle for the...the mouth thingy and then two more skinnier rectangles for those side bits. There he was in his green glory. Mama's creeper!

Now, for the big day. Would I be able to blog about this piñata or was it going to be a bust?

The guy jumping there is my oldest and the birthday boy. He was just a little excited. As you can see, we started off with this plastic golf club because I really thought this thing wasn't going to last.


After over a dozen strikes and still no wreckage, we went for a bamboo stick. Hmmm...Still no breakage.


We got an even bigger stick AND took the blind fold off! Funny how one of the boys had on a creeper T-shirt!


Finally!  LOL!  I could not believe how rigid my piñata was! I may have only needed the one bag or maybe because the boys were still kind of small, but keep this in your thoughts, too.


It took them a while to break it and they had an absolute blast with the entire event. Tip: I had bags for them to put their goodies in. Think about doing this at one of your parties and remember, piñatas are not just for kids.


I hope this blog has helped. We've got plenty more party ideas on our Pinterest. This blog also contains ideas for Lego parties. Head up to the top of the blog and look for the search window on the right because we've got a few blogs over Lego. Here's another.

Thanks for your visit and good luck with that piñata!  


Sunday, May 10, 2015

Free Diamonds R 4 Ever Template #3

Welcome to a scrappy edition of The Cherry On Top.

We've got another free template from the Diamonds R 4 Ever series.  There is also inspiration and we're showing off the flexibility of templates as well.  Now is the time to try templates if you haven't already.

We will also set you up with our Free Templates board on Pinterest where you can download dozens of free templates so you can brush up on your skills and show off your beautiful layouts or use them as inspiration.  That's how I got started.  I didn't know how to use them and I just used them as a sketch.  I still do that when I see a template I like that isn't free.  It does take a lot longer, however.

This is how my layout started and since it took so long for me to get all of those diamonds and triangles in there, I figured I'd turn it into a template so that you don't have to fuss.

This layout is made with MagsGraphics, Frog In My Pocket kit.

THIS TEMPLATE IS NO LONGER AVAILABLE.

 magsgraphics

Here's another look at the template with the title switched around.  I used one of the clusters that came with the kit and made the one at the top, myself.

This fabulous kit is from LouCee Creations.  It's called Babushka.  Filled with typically refreshing elements and papers in the good ole LouCee fashion.  Last time I checked it was still on sale for a song!

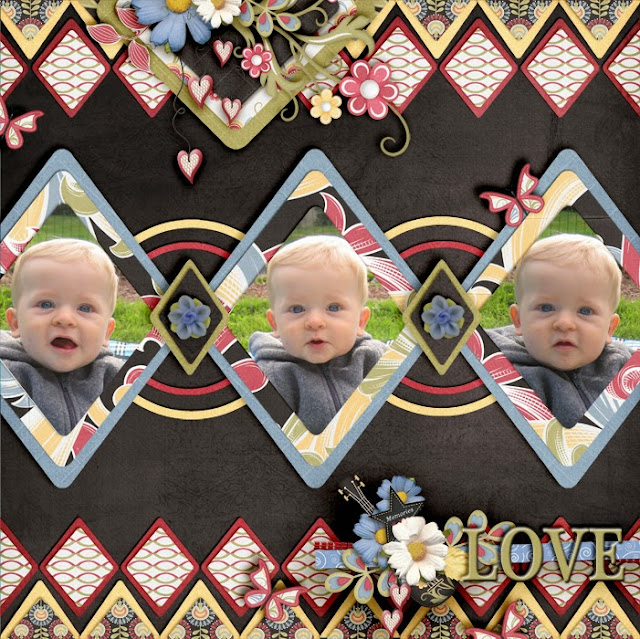
Some super sweet pictures of my youngest when he didn't mind the camera.

 the studio

Here's your free template!  Enjoy and show us what you do either here or on our Facebook Page.  If you're looking for more templates from this series, click here.

 free download diamonds r 4 ever#3

Everything here is free so don't claim it as your own or resell it.  Share our blog links with your friends.  It's the best way to say thanks.

Happy scrapping!

Friday, May 8, 2015

Paper Top Hat Tutorial With Free Template

Welcome to a crafty edition of The Cherry On Top.

 top hat

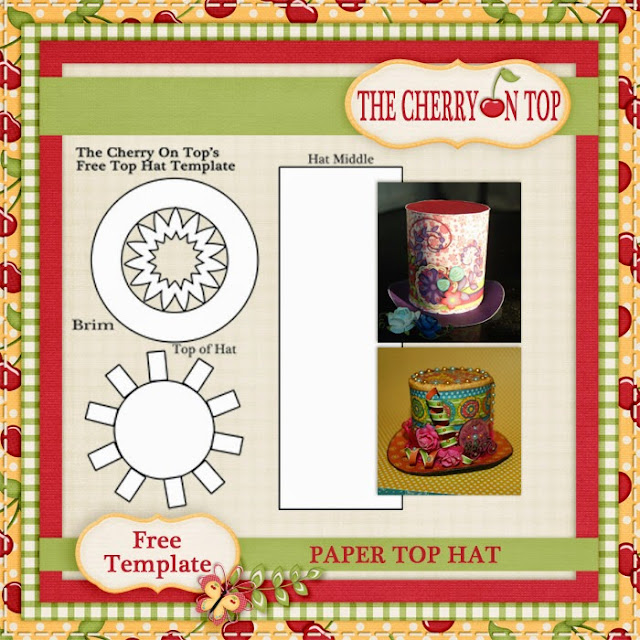
I just love crafting up these cute little top hats.  You can make them in just an hour or two.  Lets take a look at how to design a digital, hybrid top hat and the next time, we'll do a traditional one.  We've got a full tutorial as well as a couple versions of the free template.  This way you can create a digital hybrid top hat or a traditional one, too.

I made this hat with all scraps and a cereal box!  If you want to see more check out the blog entry by clicking on the image.  I had a few requests to make a tutorial so here we are.

Today, we're doing it Digi style!  Download this simple template, insert your favourite background papers and embellish if you choose either digitally or traditionally.  Let us show you how.

This is a screen shot of the template clipped in with some fun papers from Eqr Aveziur's kit, Among Flowers.  The kit is just ga ga gorgeous.


If you've never worked with a template before, it's super simple.  You will need a software program that allows this.  The one here is Photo Shop Elements.  Photo Shop works along with many other programs, too.  Just Google using a template in .... whatever software system you have and find a tutorial that works for your software.


I've cropped these strips of solid colour paper and added them to the cylindrical part of the hat and used some shadows to give it some depth.


Then I turned my project so that I could add the embellishments electronically.  It's all goodies from Among Flowers.  Pretty amazing, eh?

You will need:

software program and or printer
card stock
scissors or cutting device
adhesive 

I printed out both the basic template as well as the template all dressed up on good quality card stock.  Of course you can print them out the template on printed paper, too.

 Cut out your pieces.


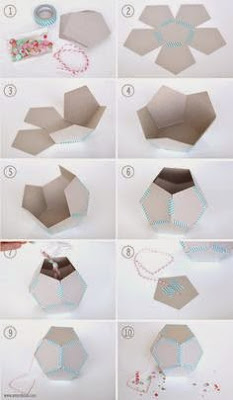
This part is a bit tricky, but I found a really easy way to do it.  First, snip all of the triangle's left side around the entire pattern. 


Then go back and do the left.  It will be done in a snap.  If you have a small scissor it's best.


Here are all of your pieces.   I have to say, it was very difficult getting this template just right.  I tweaked and tweaked and it was always a touch different.  If you're finding the top of the hat too difficult to fit in the middle, then I suggest cutting off the strips by just cutting out the centre of the circle and stick it on the top of the hat.  It's what I have to do too, for a couple of hats.


Choose how high you would like your hat.  Keeping that in mind when you design it digitally and of course, making adjustments to the template.  I taped the inside of my hat when I got it to fit just right over the top of the teeth to the brim of the hat.  If you look carefully at the image below you can see this step.  Then I added a piece of double sided tape right up to the edge and adhered it.


Flip up all of the teeth.  You can either add a drop of glue to each tooth or a tiny glue dot.  I use both methods on different hats and materials.  If your paper is not very rigid, then go with the glue.  Glue allows for more freedom and mistakes.  Just remember to let it dry.


I took my scissors and pressed up each tooth against the inside of the hat.  It's not a disaster if a couple of teeth don't stick.


Use some ink around the edges of the pieces if you like. I cut off all of those tabs on the top the hate because it just wasn't fitting perfectly.


Use glue around the edge of the top of the middle part of the hat or around the edge of the top of the hat and gently add it to the top.  I placed a light spool of ribbon on top until it was dry.  It comes out nice and flat that way.  If you have a little over the edge, no worry.  Take some really good, sharp scissors and carefully cut off the excess, once it's dry.


I like curling up the sides of the hat just a touch.


That's it!  Make yourself a fun, paper top hat in about an hour, digitally.


We'll be back with another version using the templates in a traditional fashion and an entirely different top hat.

Here is your free template.  Good luck and feel free to show us what you make either here or on our Facebook Page.

 free template

Thanks for checking out The Cherry and remember, all of our stuff is free so please don't sell it or claim it as your own.  Share our links to the blog as a way to say thanks.

Feel free to school through our blog and find many more freebies, fun projects and inspiration.

Happy crafting!

Monday, May 4, 2015

The Ideal Laundry Area

Welcome to another instalment of our laundry series at The Cherry On Top.

Laundry can sometimes take over our lives.  It's a never ending process and for many folks, not a fun one.  So we're taking a close look at each step in the laundry process to help make things easier, cheaper, faster, more efficient and hopefully, less dreadful.

In our first instalment, we looked into where you store your dirty laundry and hooked up some helpful images to demonstrate the best ways to keep your dirty laundry.  If you missed it, check it out here.


Since we are going at this in order, the laundry area will be under the microscope.  Where do you do your washing?  Do you have to go to the laundry mat or laundrette?  Have you got a closet type of space or are you lucky enough to have a nice large room just for your laundry needs?

I've had experience with most of these situations and currently, most of my washing chores are done in the garage and there is a pretty sweet amount of space.  I'd love to show you the before and after pictures, but I only have the before ones.  Hehehe... 

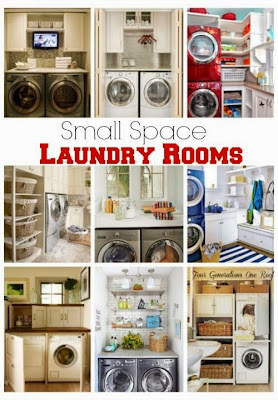
For this instalment, we've got some images of ideal laundry spaces from bright and bold, to efficient, tiny spaces and dreamy rooms, too.  You can find all of these lovelies on our Organisation Board on Pinterest where you can get hooked up to the link to learn more about them.

Let's look at the essentials for a laundry area so you can plan that area.  We will be back with a more detailed entry about these essentials as we move through the laundry process.  

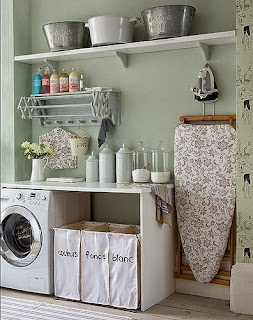
Your machines, bright light, a space to fold, a place to hang dry and a spot for your cleaning products are the basics and should be considered when organising your area.

Here are some common spaces for doing the laundry.

This is when the machines are in the kitchen.  Many people keep the cleaners under the sink, the baskets in the bathroom and hang the ironing board behind a closed door.  Typically there are counter tops to work with.  (Man!  I'd never get out of the kitchen if my washing machine was in there!)  

 organization

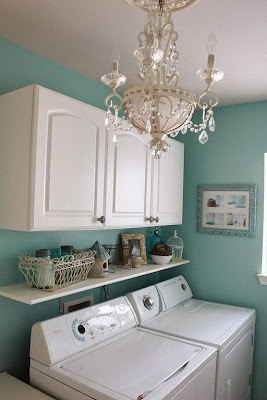
This space is ultra organised and bright. Using the tops of the machines as a folding surface.  A hanging area and a lot of shelves to keep organised.

 organisation

Another clean, bright space with the essentials.  TIP: If you're going to have this nice, little shelf above your machines, put it just above them so items won't fall behind them. Check out the image below this one for the best way to do this.

 organisation

Voila!  Nothing can fall behind your machines now!

 organisation

I love what they did here to conceal the stacked machines.

 organisation

Here's another sweet space with an ideal, pull out drying rack and sweet ironing board and iron storage.

 organisation

Another ideal, bright space.  That rolling rack is awesome.  I have one as well.  The machines are elevated so you don't have to kill yourself when getting at the laundry and look how the doors open.  You can go right from the washer to the dryer without the doors getting in the way.  Tip: Keep the shelving a bit higher if you do something like this so you can utilise that precious space on top of the machine for folding.

 organisation

This space is dreamy for me.  I prefer cabinets to hide all the mess over exposed shelves.  Tip: It's also ideal if you have pests.  The floor is good as well.  If something ever happens to your wash machine, the carpet won't get ruined from the water.  flooring in a laundry space should be considered.  Tiles will be the best choice.

organisation

This image shows some nice ways to organise in a small space.  Tip: Stacking your machines saves a lot of space.  Are you seeing a trend in all of these images?  Bright!  Laundry, laundry, laundry can sometimes bring you down.  So, keeping it bright and clean might make the process tolerable.  I'd suggest a radio or TV, too.
 organisation
Here's a really tiny space with a pull out folding top.  I've also seen this type of slide out shelf in-between the stack.  Now, that's thinking!

organisation

Another example of an organisational option in a small space.

 organisation

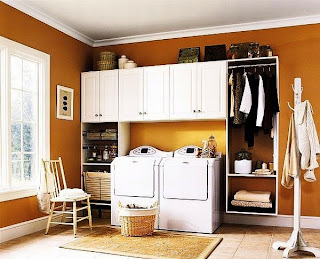
Right by the window for light.  Even a chair for when there are just a couple of minutes left on that last cycle.  Take a seat and read the last few pages of your favourite magazine.  More hanging space and cabinets as well as open shelves.  A good combination.

 organisation

This is a great example of the kind of space that most people face.  What a great idea to hang that bar above the machines and the shelf on top of that.  Super and inexpensive to set up.

 organisation

Counter space is absolutely ideal to have in the laundry area.  You can use the tops or your machine or machines.  Perhaps a board that's hinged to the wall and can be put away when you're finished.  Some folks use their ironing board.  It really helps with organising your folded clothes and makes putting the clothes away that much easier and much faster.  (The most dreaded part of the process for some.)We will talk more about that later.

We will be talking about the machines in our next instalment of the laundry series.  Bang for you buck, best wash and dry, money saving tips and features that will improve the washing process.

Thanks for taking a peep and good luck organising your laundry area.