Welcome to hybrid Saturday with The Cherry On Top.
Wednesday, we had a free template from the Leigh Penrod and Friends train. It's every month that we scrappy designers get together and put a train full of lovely freebies for you. Here's a look at what I did with my template. Keep reading to see other ways to scrap with templates and at the end, I've got a nifty freebie for you so you too can print and hold the completed template page in your hands.
Thank goodness for nieces! I have two boys and sure do love an excuse to go all pink and purple on a page. Check out how you can crop in a photo or a paper or both in my template.
I just love the way this one came out and it was insanely easy thanks to my stacked badges. They are a small part of my collaboration with Made By Keuntje. Stay Magical is an extraordinary kit that should be apart of everyone's stash whether that be digital or traditional. We've put together several pages for printing and scrapbooking traditionally.
If you missed this free template, no worries. It is still available. Click on the preview to get to the blog for the download link.
These are the badges. Aren't they so much fun?! Just ,99 cents for six of them.
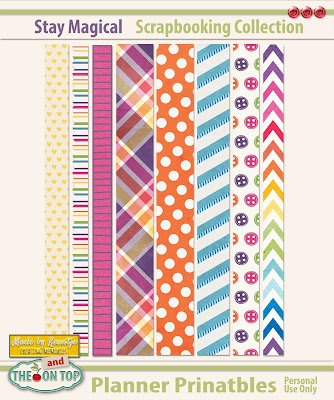
I wanted to give you a closer look at the planner printables and see how they can be used for scrapbooking as well as agendas and planners.
These make the cutest stickers. I've got a hybrid project on the make and I'll be sharing it with you once it's completed.
Just look at all of the fun cards on these 3 sheets. Not bad at all at 2.99 for everything!
OK, let's get hybridising!
Cut out the free frame and use it as a template on your favourite paper. I totally did the frame in my software and printed it out. You can too, because it comes in png format.
Cut out your pretty page, your frame and a strip to adhere to the back so your frame can stand. Keep the width of the strip to at least 2 inches so it stands with ease.
I adhered my page right to the top of my frame. I did NOT cut out the centre, but of course, you could cut the centre out and put your page behind the frame. Of course, the more rigid paper you use, the more rigid your frame will be. I went for a mega rigid frame and flimsy, slightly glossy paper for my page. I figured the frame is giving enough strength to the project.
This image is linked to the free template.
How easy was that?! You can totally scrap this for free, easily and quickly. Now, that is the kind of project The Cherry is all about. The kit was free, the frame is free and the template is free. No complaining and no excuses. Get scrapping!
Now that you've been chewed out, I hope you enjoyed today's blog. Hehehe...Come on back Tuesdays, Friday's and Saturday's for more scrapping with sass! Hehehe...


